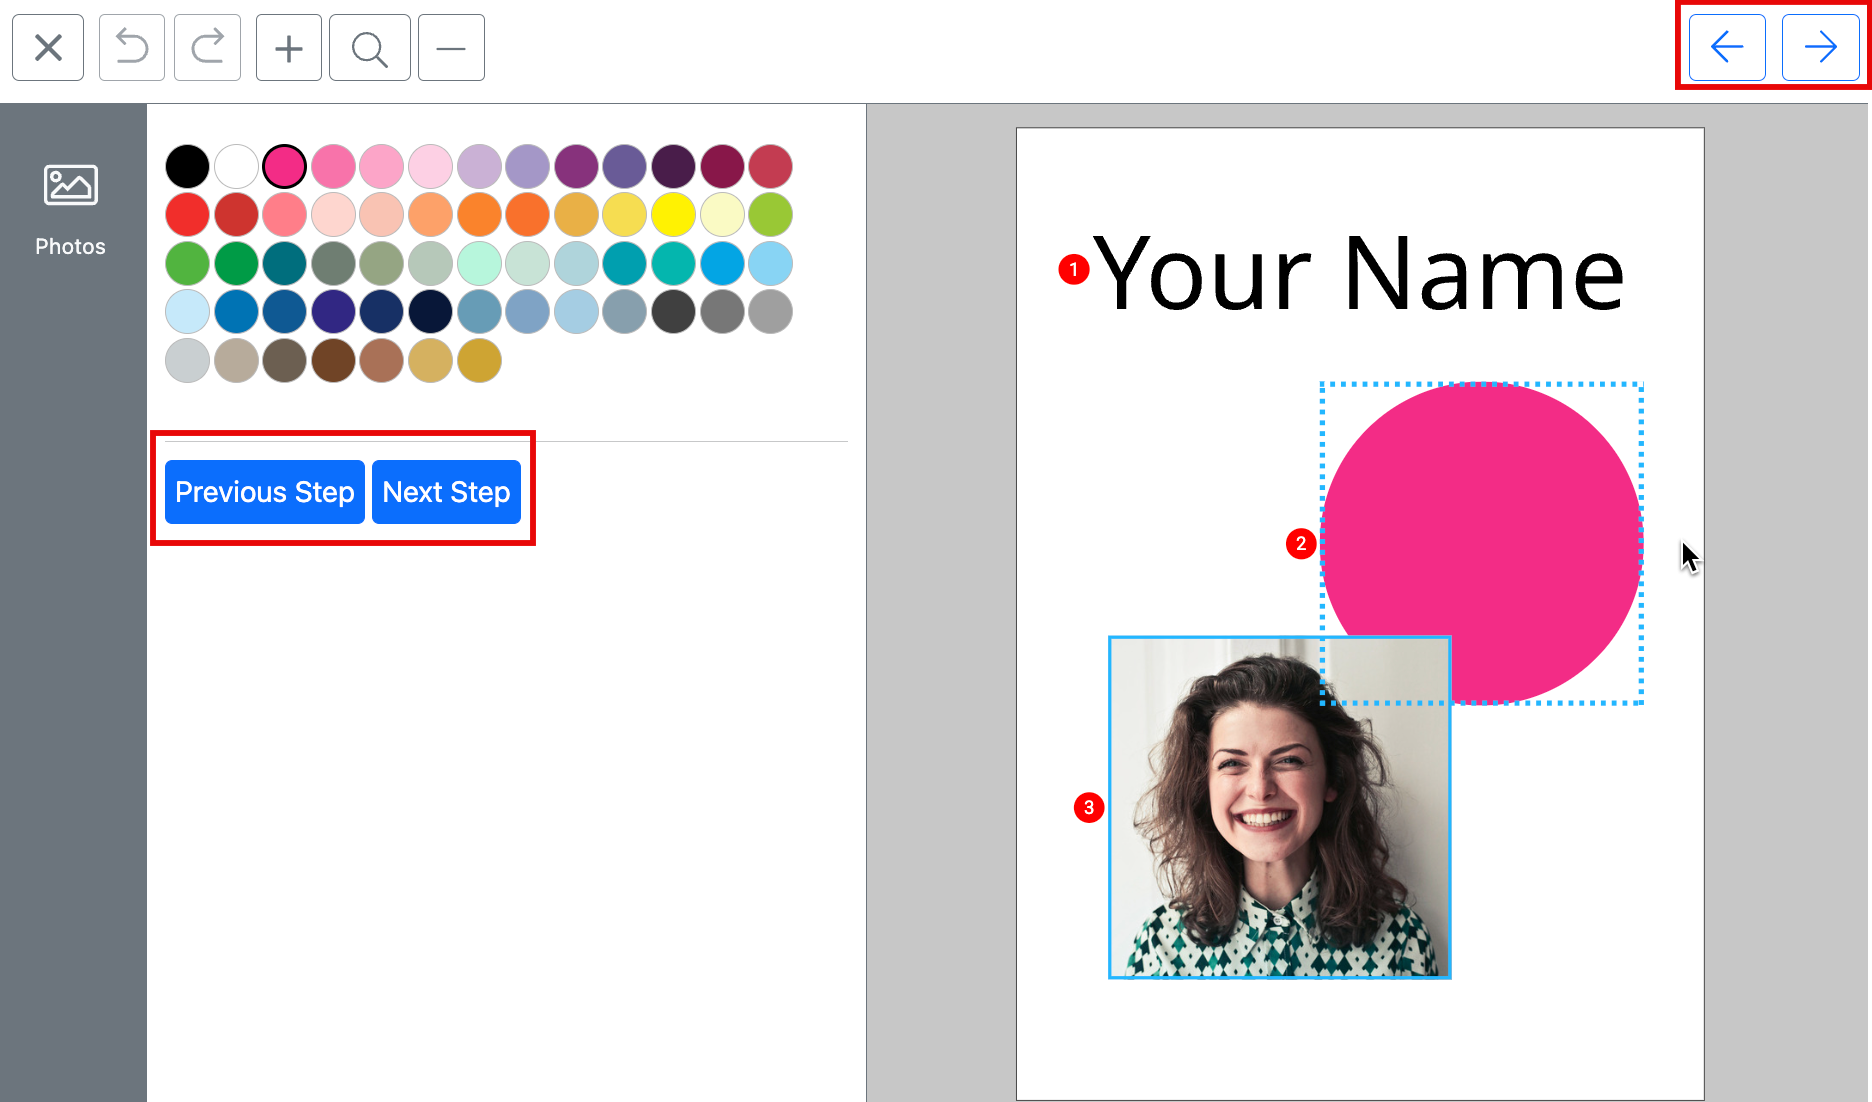
The Buyer Side steps workflow allows for guiding the user step-by-step through the configuration process. Therefore you have to define a Buyer Step Number. Given the ability of the step interface to zoom to the elements configured it is also a great help on mobile devices as the point of interest and configuration is automatically zoomed and centered.
The Steps interface co-exists with normal configuration, so a Buyer can still zoom or change pages, as well as configure elements in their own order.
The selected number is however local to its page. As Printess offers options to resort or rearrange pages, the Buyer Side editor will change it to the final step number at the start of the editing process by sorting all steps first by Document Order, Page Order, and finally by Step Number on the page.
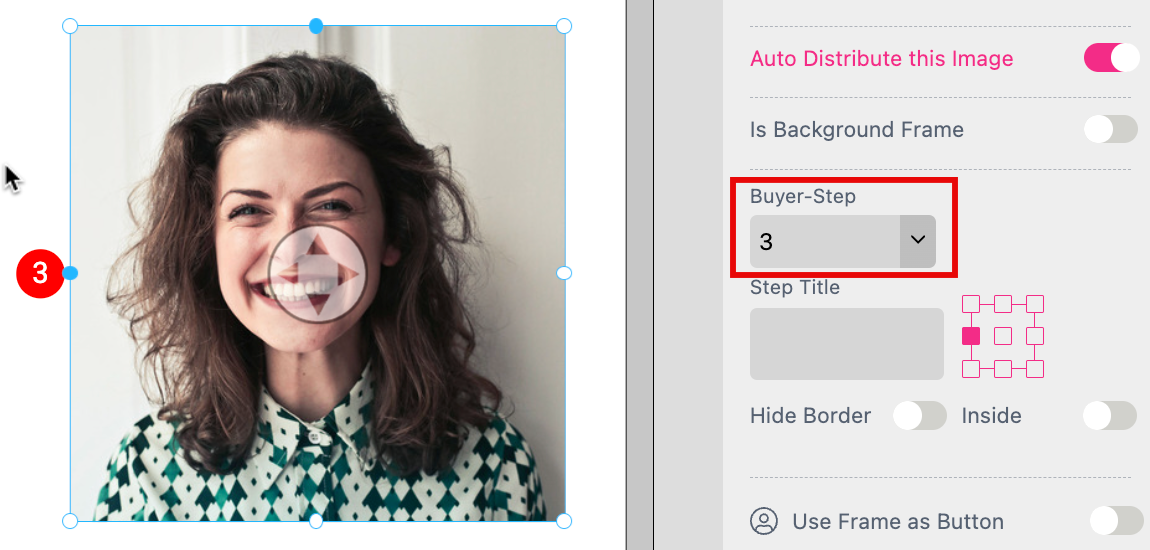
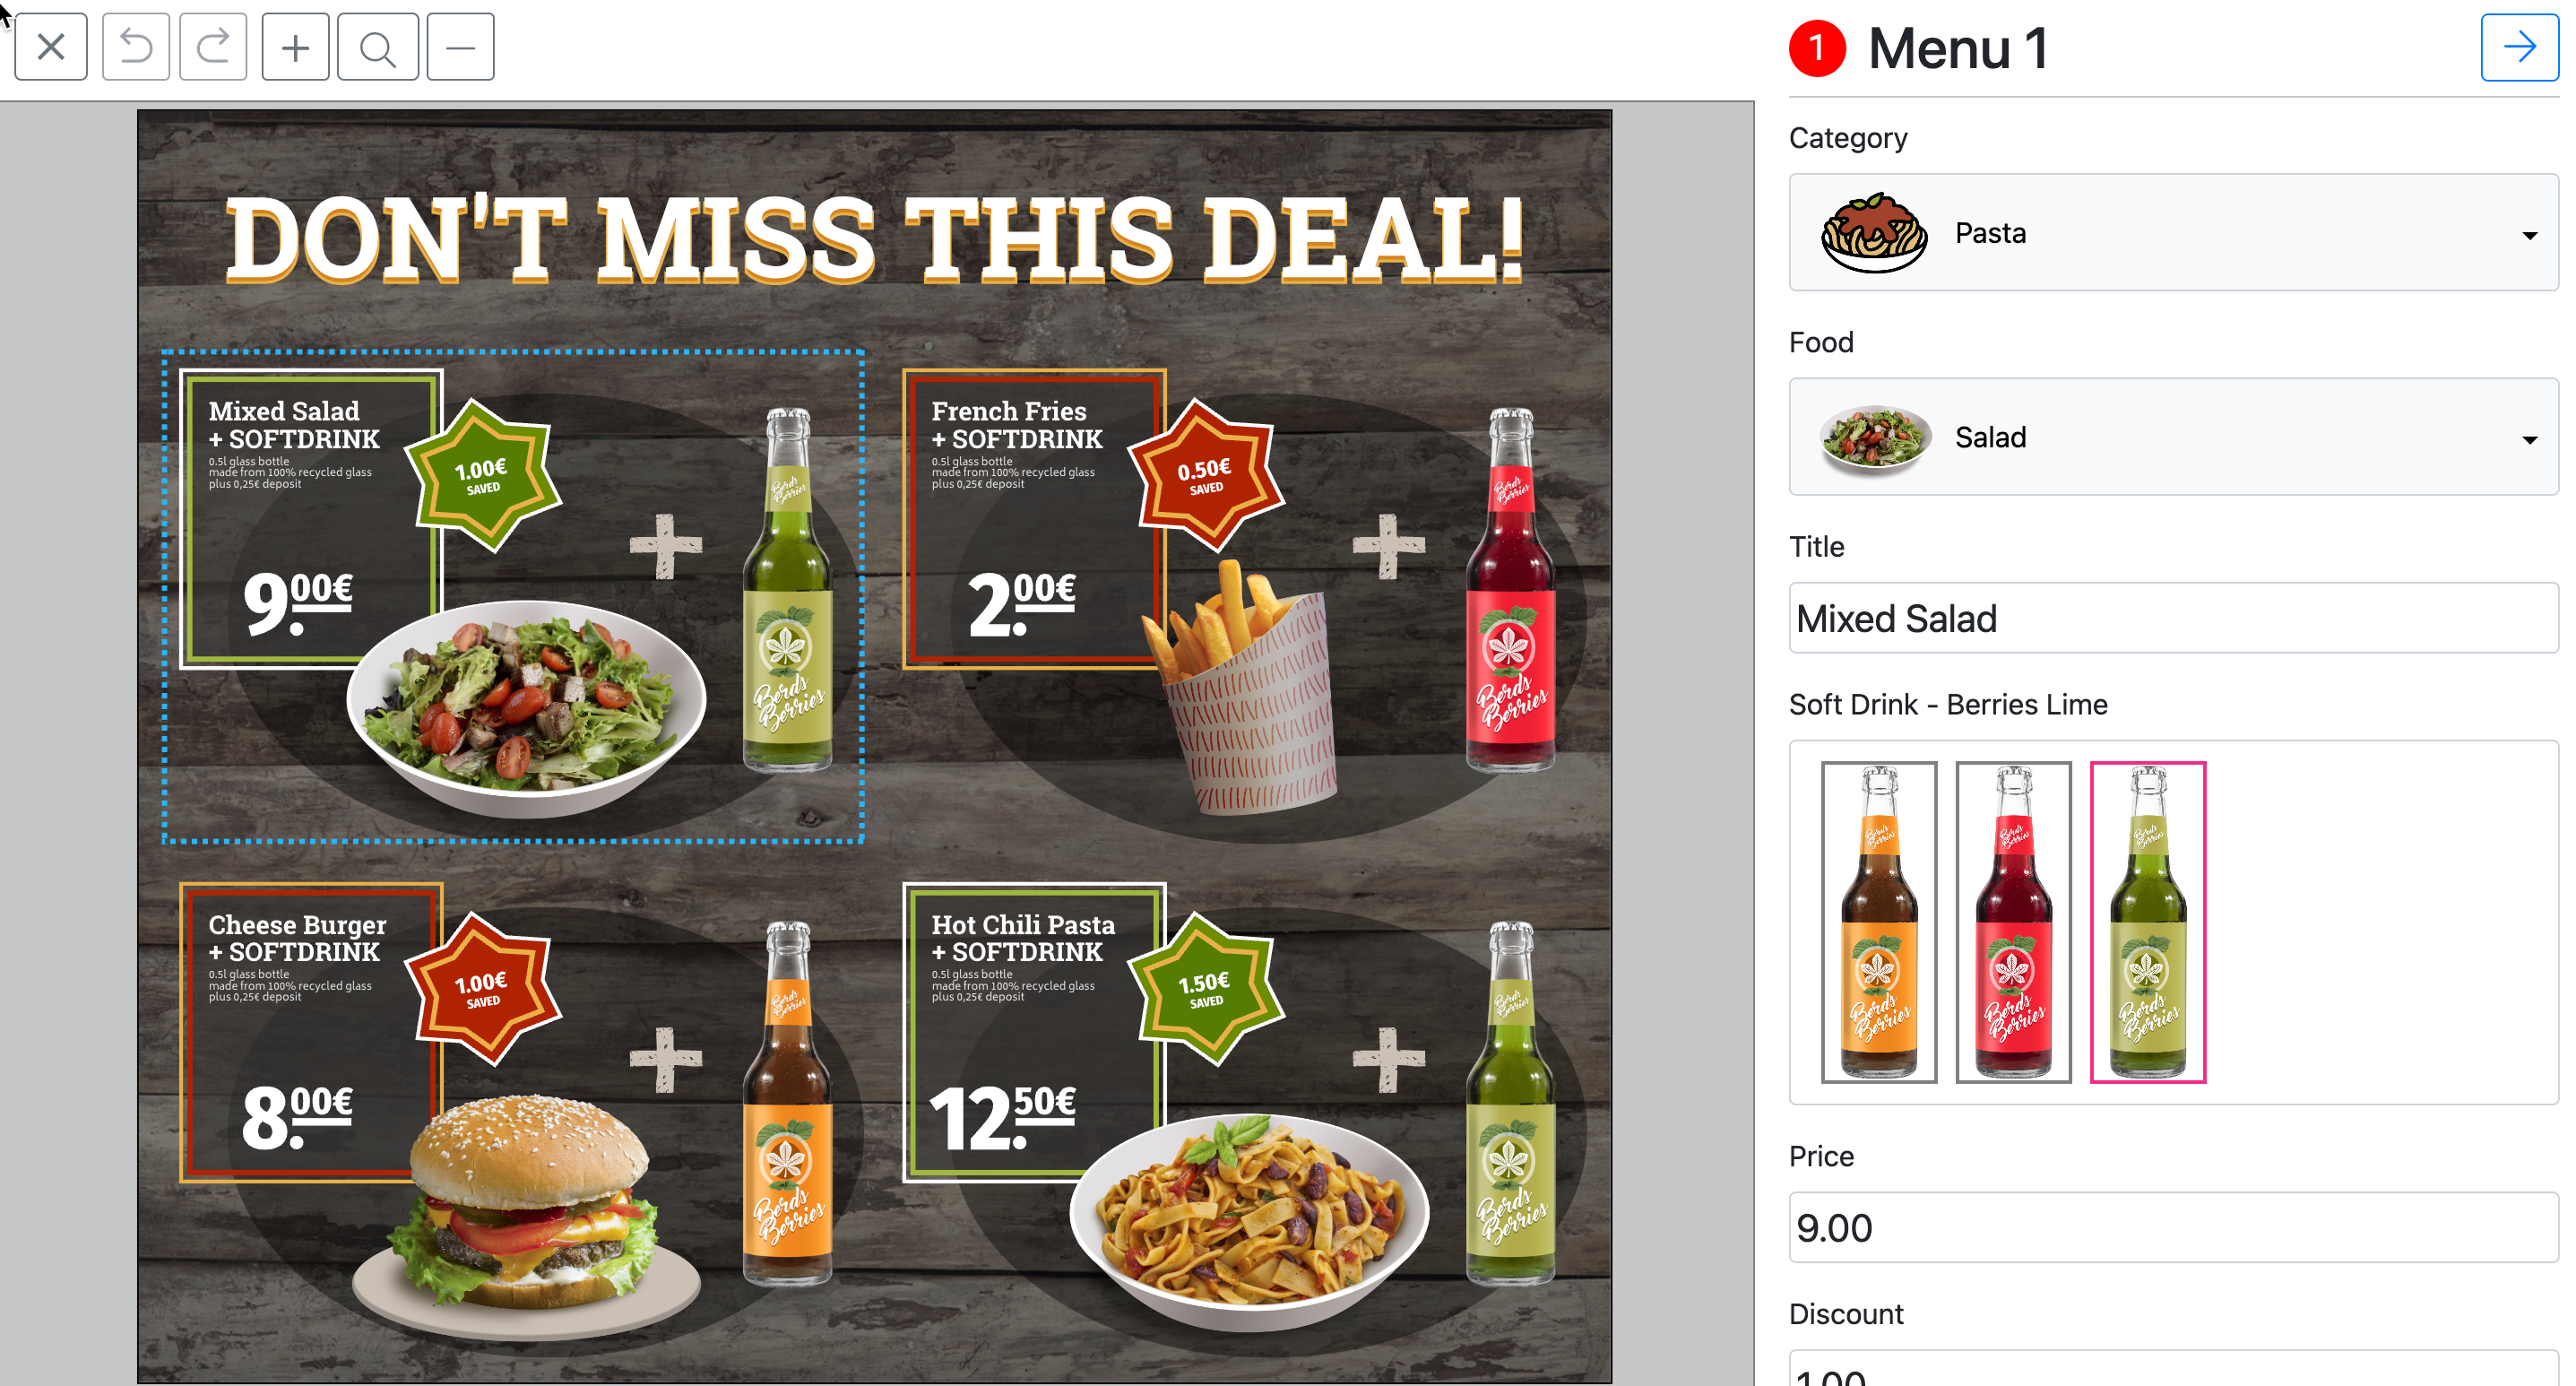
If you want to guide the Buyer through the Properties of the different Frames you can assign Buyer Steps to each single one of them. You find this option at the Buyer Side Tab.
As a result the Buyer can skip through the different steps at the Frame Settings or using the arrows of the Top Bar.
But the selection of each single frame is still supported. To avoid this you have to turn on the option Hide Border. Please read about the Additional Step Settings below.
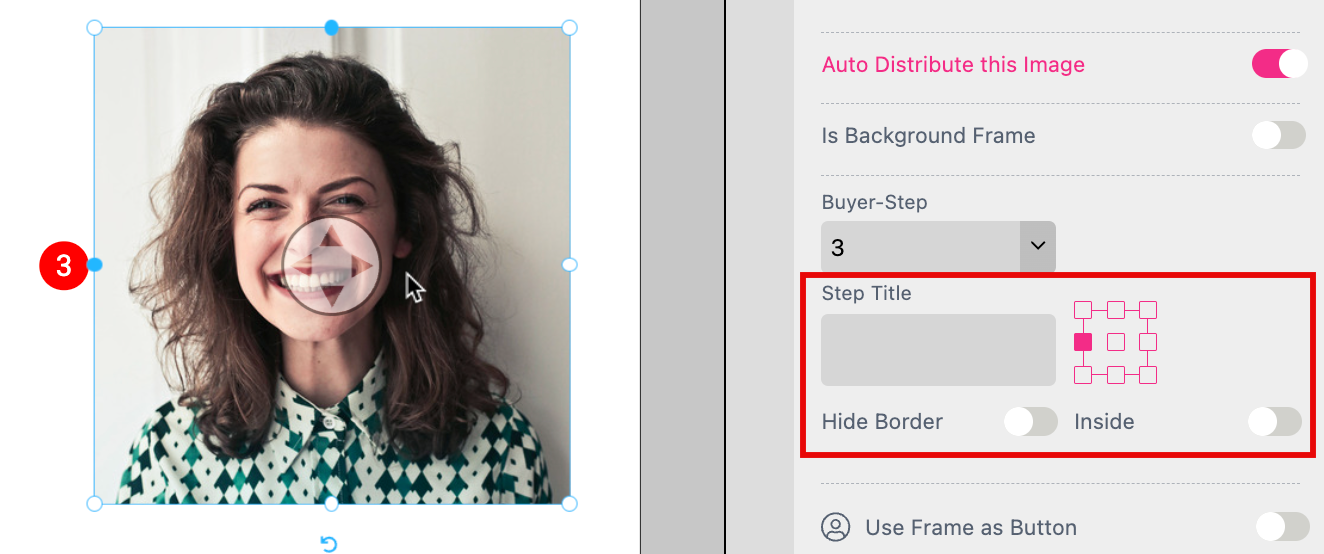
Additional configuration for each step can be taken:
When you use Form Field for the Properties of individual frames, they are all displayed together, even if you have defined Buyer Steps for individual frames. To enable a Step Workflow in this scenario, you must pin the respective Form Field to the corresponding Frame.
All you need to do is selecting the frame to open the context menu of the corresponding Form Field to choose the option “Pin to Frame”.
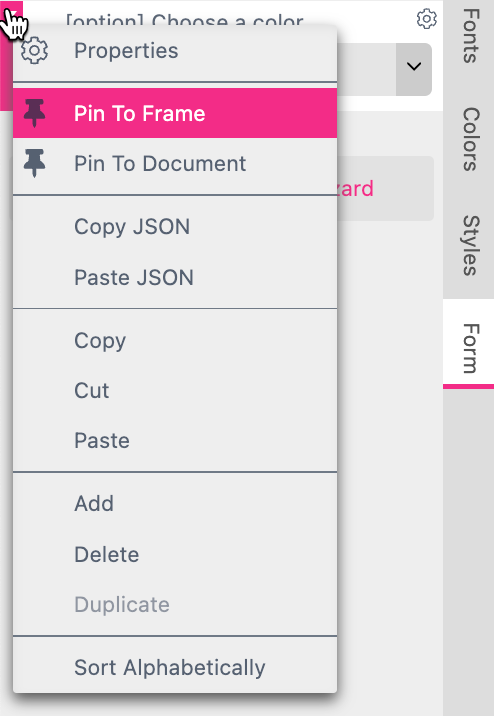
If you set this up for each frame, the Buyer can access the frames only step by step through the Step Workflow.
To learn more about Pin to Frame click here.
Another ability of the Steps Workflow is to jump between several Sub Documents of a Template. This allows you to configure an element that is used afterward several times in the main Document as a Sub Document frame.
Click here to open the Menu Board example document
Printess also allows for configuring Documents as part of the Step Workflow process. To add a Document to the Step Workflow deselect all frames and:
Learn more about the Buyer View Appearance Settings here.
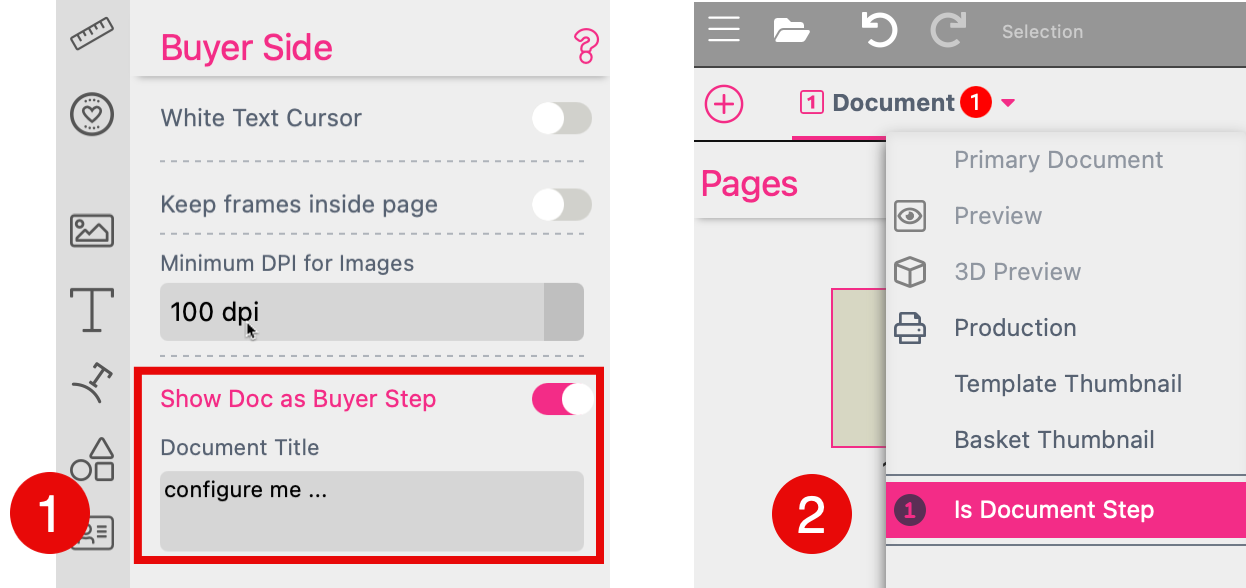
Next to the Document name the defined Step will be shown at the Designer Side
The Document Steps are also useful to show a final photorealistic preview before the Buyer adds the product to a basket. And if you mark your Document as “Preview Type” the step interface will even display ‘Preview’ at the button instead of ‘Next Step’.
You can combine Document Steps and Frame Steps. If Show Document as Buyer Step is defined the first step will then show the complete Document overview even if there is a Frame Step defined with zoom.
Tip: If you influence a certain area in a document with Form Field values you can set them as a workflow step with defined zooming by taking a shape frame and adding a workflow step to it. Then pin all your Form Fields to this frame (Form Fields must be document-type Form Fields to be pinned). The shape frame will then set the zoom area and all pinned Form Fields will be shown for configuration.
As documents do not have an order number, they can get sorted by changing their order in the Document Bar. Documents are configured from left to right.
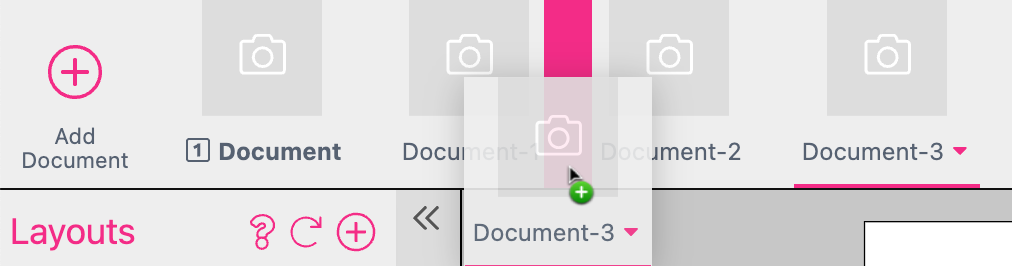
To change the order of a document you can drag it to drop it in a different place.
After the last step in the configuration has been entered the steps interface will automatically show the button ‘Add to Basket’ which finalizes the configuration, creates a save token and thumbnail, and will return to the shop workflow.

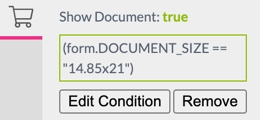
Display Documents Conditionally
If either Icon-Page-Navigation is enabled and a document is set to editable, or the document is shown as Document-Step, the User can set a condition if this particular document will be shown or not.
To create a show condition, click on Edit Condition which will open the Condition Editor:
One can influence the appearance of the step numbers (badges) and the step captions (title) in the Buyer View Appearance dialog. (Find it here!)
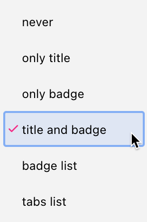
Never: Neither a step number nor a headline will be shown
Only Title: Just the headline of a step will be shown
Only Badge: Just a step number will be shown
Title and Badge: Both headline and step number will be shown
Badge List: A breadcrumb-type list of step numbers will be shown, providing the Buyer with an overview of the steps to configure and where they are in the configuration process.
Tabs List: All steps will be represented by tabs containing the caption of the step.
