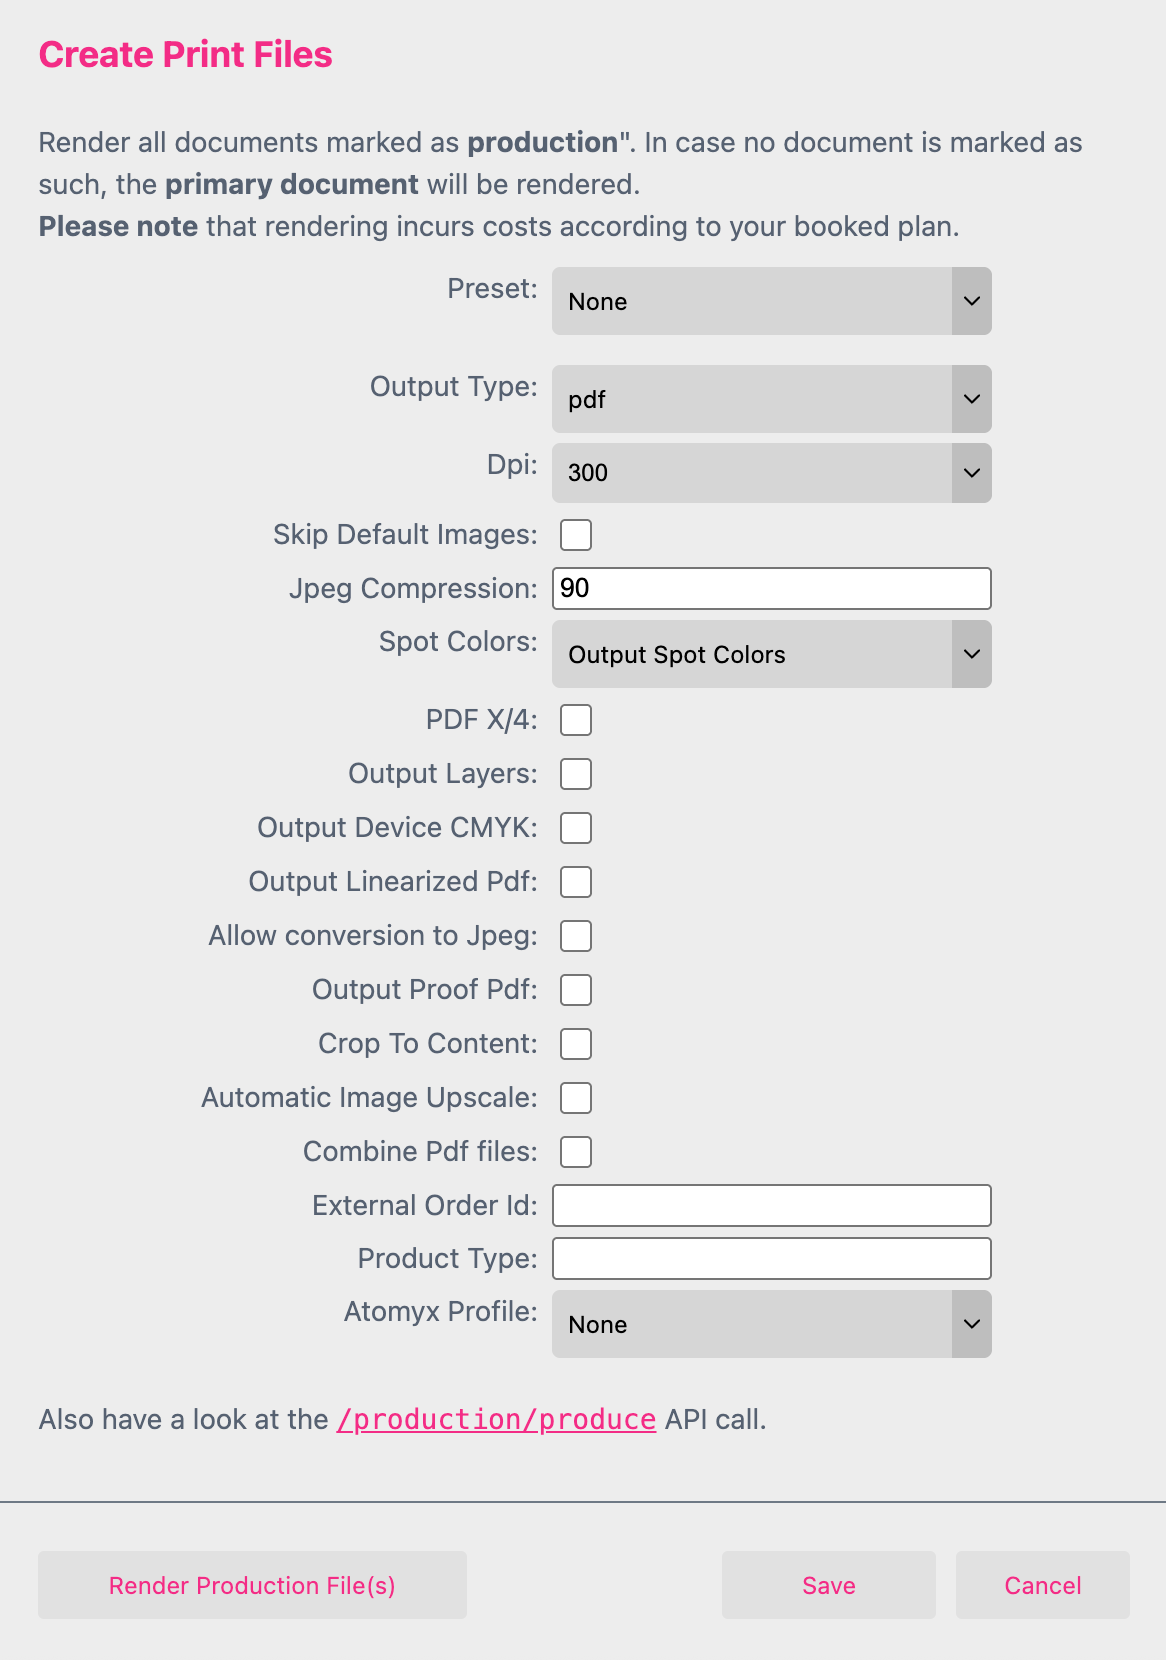
The Create Print Files Dialog is used to define the render settings for when a Buyer selects “Add to Basket”. To open this menu, select Render Output File(s) from the Template Context Menu.

Any following print setting is for testing only! You have to select a Print Setting Model to assign these settings to your production call. Or you can add them directly through the API.
Output Type: Selects the file type to be rendered (pdf,png,jpg,tif).
Dpi: Sets DPI for the rendered document. The default drop-down menu values are 24, 96, and 300 but custom values may also be entered.
Skip Default Images: Selecting this option will not render any default images on the production document.
Jpeg Compression: Define a dpi value to compress the jpegs for the output file.
Spot Colors: Lets you select between outputting spot colors or outputting the set replacement color.
PDF X/4: Forces the output of the PDF in PDF X/4 format.
Output Layers: Outputs a pdf with layers. All layers from your Printess production documents will appear as layers in the output PDF.
Output Device CMYK: Will output all CMYK colors as device colors without profiles. CMYK images will also output in device color mode and included profiles will get discarded.
Output Linearized PDF: Renders a simplified PDF file type that removes Form XObjects. This option is useful if you want to import the PDF into old fashioned PDF readers such as CorelDRAW.
Allow conversion to Jpeg: Will try to convert PNG/HEIC and all image formats possibly to JPEG format. But only if it doesn’t uses any transparency. Effects and other transforms can still influence the final output format - possibly still resulting in PNG. It can degrade image quality but will most likely result in much smaller PDF output files.
Output Proof PDF: Renders the document(s) with a “Proof” watermark overlayed on top.
You can enable the Buyer to get a Proof PDF rendered before adding the item to the Shopping Basket. Therefore you have to activate this feature at the Buyer View Appearance.
Learn more about the option Show Proof Button here
Combine Pdf files: Will output a single PDF for more than just one production files. Even if their formats differ.
External Order ID: The supplied text will be set as External Order ID for the print job (The External Order Id can later get searched for in the Accounts Print Jobs overview)
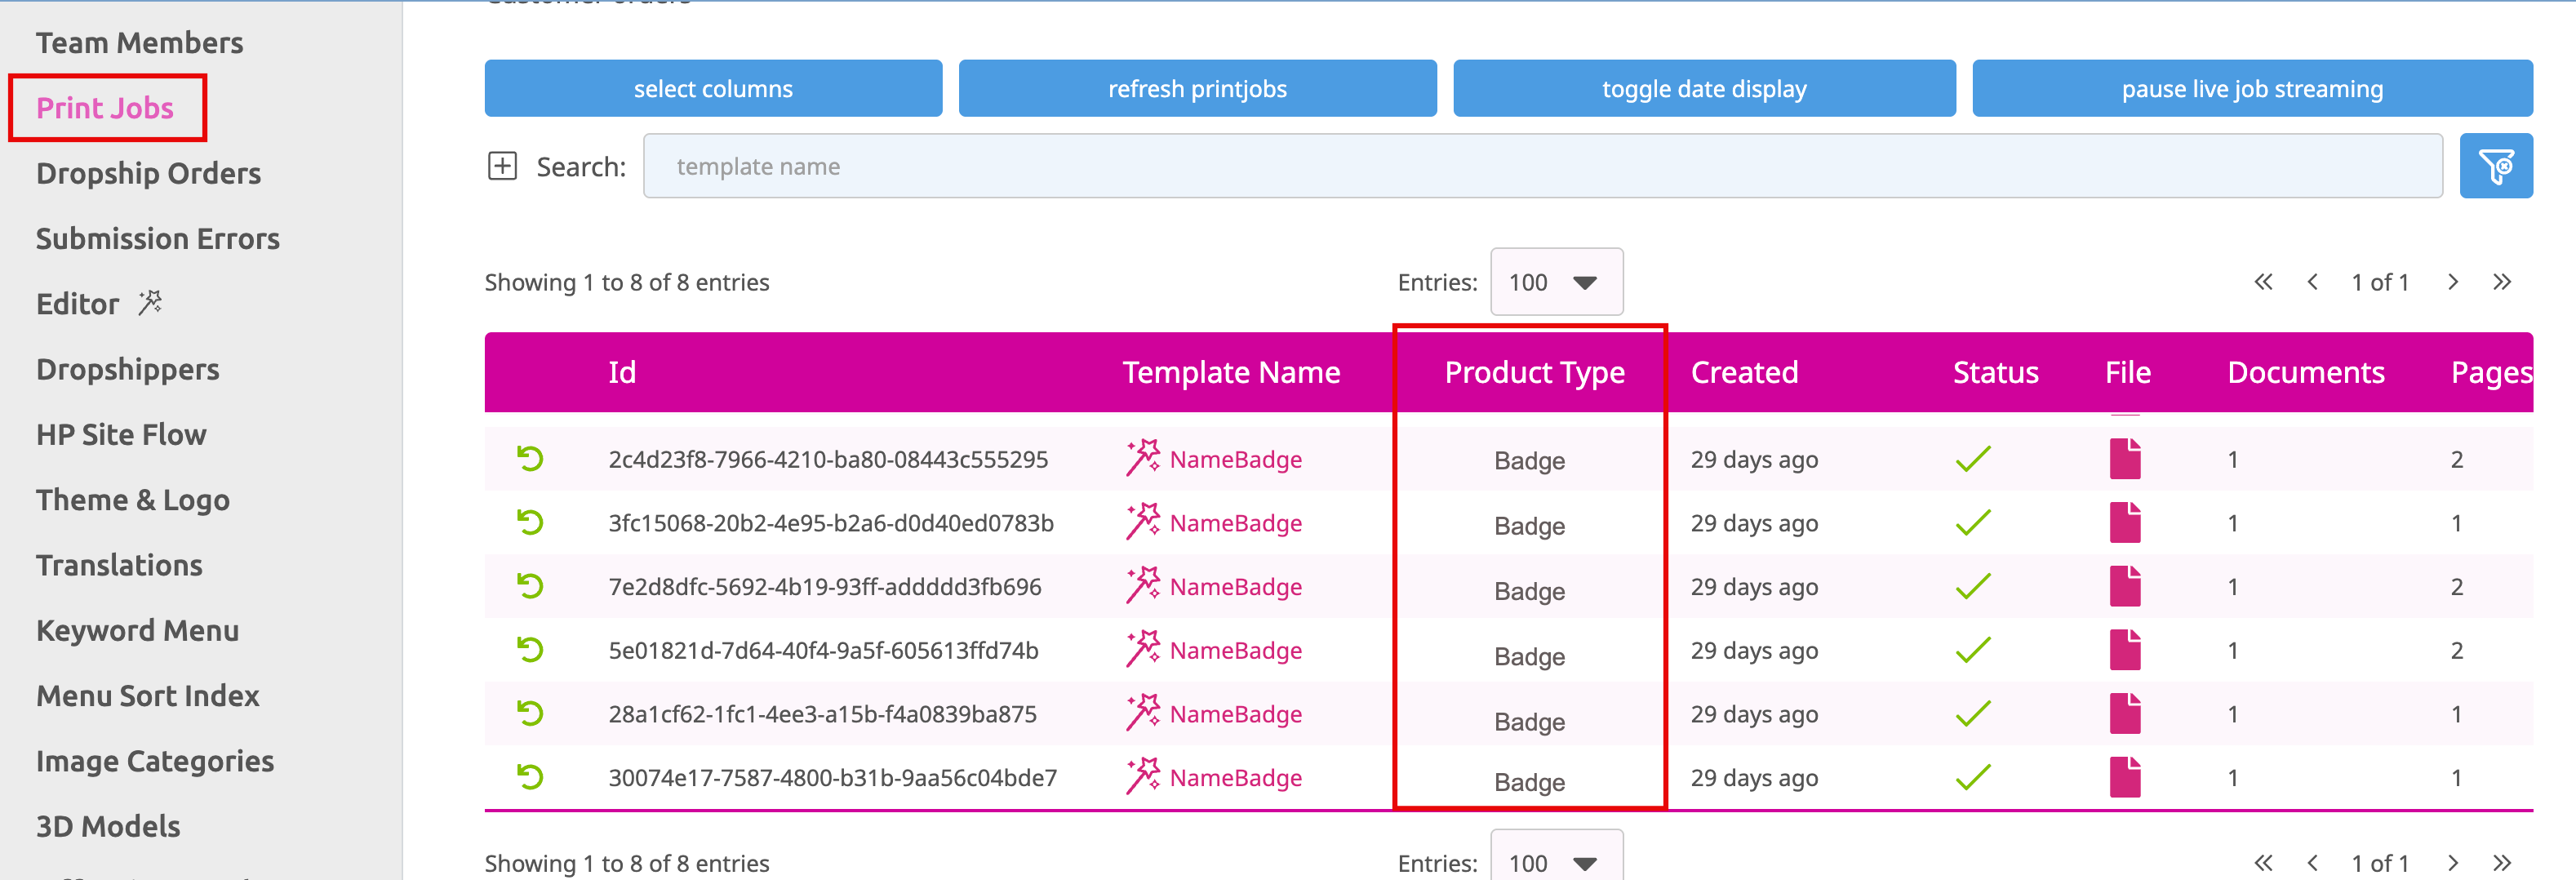
Product Type: Here you can type in any additional information for production like “Badge” for example. This information will appear in the Print Jobs Tab at your Printess Account in the column Product Type if you display this column.

Learn where to assign the Atomyx Key
Render Production File(s): Selecting this will render a production file with the options above.
Save: Saves your production render settings.
Open SaveToken: This option is available on the Buyer Side Print Dialog. To open this menu and access the Open SaveToken feature, select Add to Basket while on the Buyer Side.

Selecting this will open the current “Buyer-State” of the Template on the Designer Side in a new browser tab. To work with this Template, it must be saved under a new name and reopened from the File Dialog, or else the original will be overwritten.
Notice: Don’t continue working in this Editor, it is for checking work and any changes made will be overwritten on save unless the document is saved as a new Template.