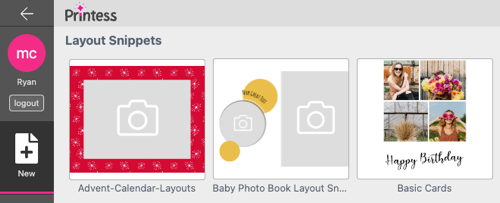
Tip: You can also check out (and feel free to use or modify) our Layout Snippet Example Libraries in the “New” Tab of the File Dialogue.

Please create a new Layout Library first.
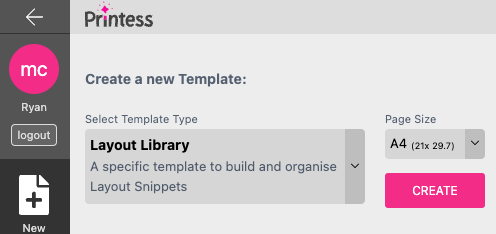
Click on the „Page Size“ Select List and select a Page Size (You can Change the Page Size later on).
Click on „CREATE“. This will create a new Layout Library and automatically open the Designer-Side. The new Layout Library will initially have a Document already marked as „Layout-Snippet“ ![]() . If you want to add another Layout to your Library, simply add a new Document.
. If you want to add another Layout to your Library, simply add a new Document.

You have successfully create a new Layout Library. But before you start to design your own Layout Snippets please define at least one Tag for it (See below Tags for Layouts).
Tip: We do not recommend to have your Layout and Sticker Snippets mixed in the same Template (although in rare circumstances you may prefer this), and it is better to have Layout Libraries separated from your product Templates.
To publish a Layout Snippet and make it accessible from other Templates, you have to assign at least one Tag to it.
With the "Layout-Snippet“-Document you want to publish selected, go to the „Snippet Export“-Tab on the Feature Panel.
Go to the „Tags“ Input Field and click on it. This will open up a list containing all already existing Tags.
Select a Tag from the list or type in a new Tag and press RETURN.
After publishing, you can now access this Layout from other Templates by adding your chosen Tag to a Layout Group. Learn how to Make Layouts accessible on Buyer-Side.
Info: You can assign multiple Tags to a Layout Snippet and one Tag to multiple Layout Snippets. You can think of Tags like categories for Layouts. So it is best practice to assign Tags that are suitable for more than one specific Layout, to make it easier for you to assign them to a Page or Spread.
For the example below, we created a new “love layouts” Tag and named the Layout Snippet “Best Mum”:
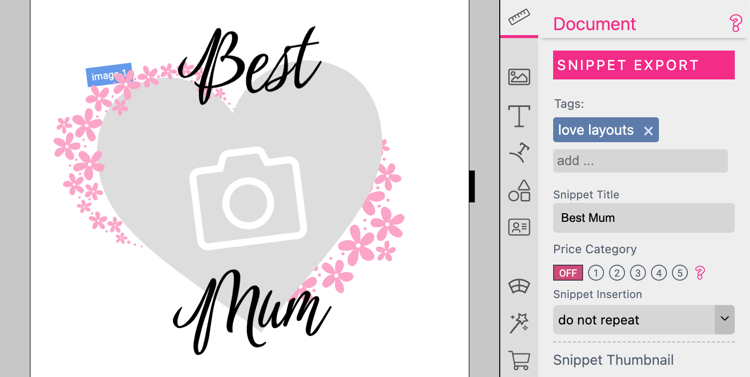
(Optional) You can give Layouts a custom Title and Thumbnail, that will be shown on Designer- and Buyer-Side. By default, the Document Name is the Layout Title and the Thumbnail is created automatically.
Go to the “Snippet Export” Tab on the Feature Panel and go to the “Snippet Title” Input Field.
Click on it and type in your new Layout Title.
Go to the “Snippet Export” Tab on the Feature Panel and go to the “Snippet Thumbnail” Section.
Click on “Add”. This will open up the “Select Image” Dialog.
Select a already existing Image or upload a new one.
Sometimes a Layout Snippet needs control over either the background color (if it needs to be printed e.g. on a canvas) of the target document or the paper color (if the product color needs to change but not get printed e.g. on a colored mug).
So if the background color of the target document should be changed by the Layout Snippet you have to define a Paper Color for the Layout Snippet.
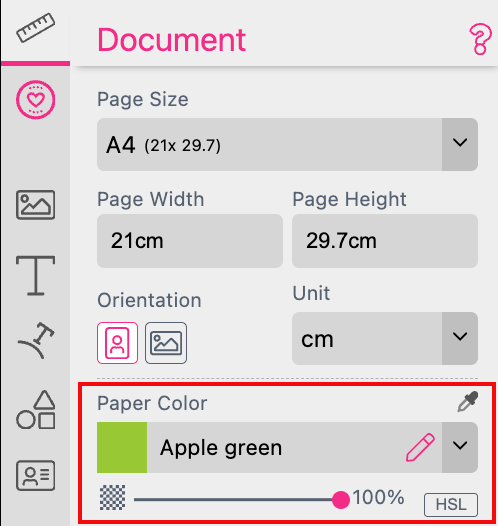
If this Paper Color will be printed or not depends on the Placement Settings of the target document.
Learn more about the use of Paper Colors here
This Tab contains settings with regards to Snippets. Snippets are the way how Printess allows buyers to change document layouts or insert Texts, images in the form of Stickers.
Important: This is the Tab you see if the current document is a Sticker Snippet or a Layout Snippet
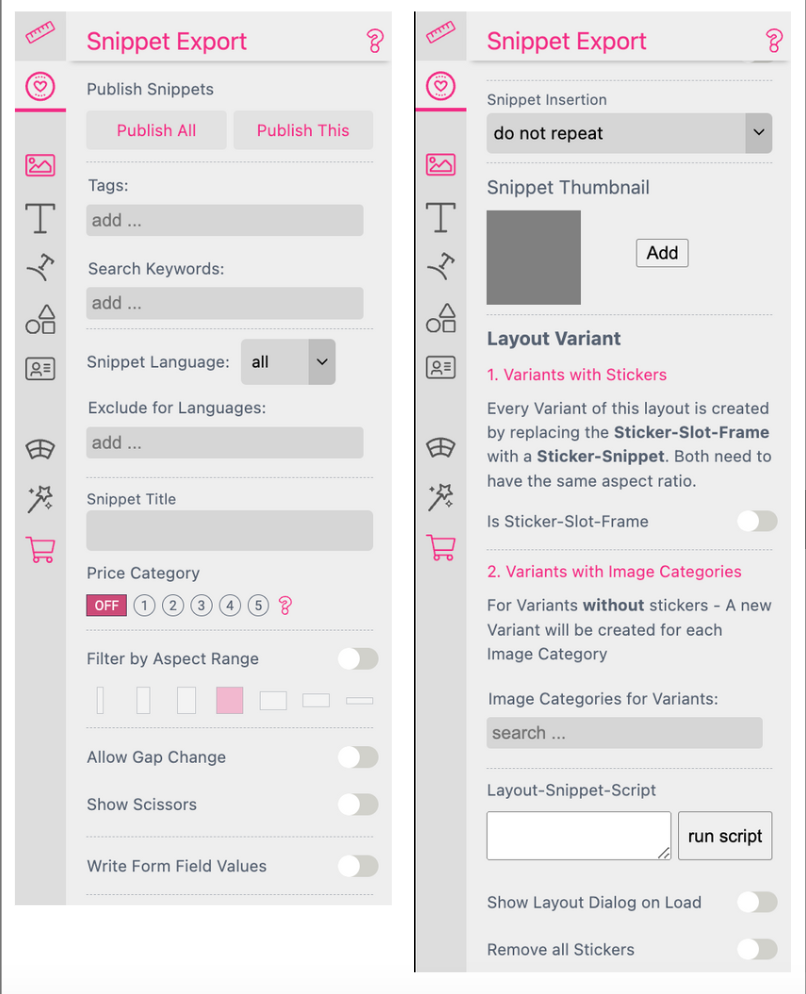
These Buttons allow you to directly publish all Snippets documents in this template or just the currently open one.
Tags are describing a technical category for which the Layout Snippet could be used for. So e.g. “photoproducts”, “beachflags”, “mugs” or “t-shirts” could be Tags. You can set one or more Tag associated with the Layout Snippet here. These Tags will later be used to assign The Layout Snippets to the target Document. You can either define a new Tag by entering it or select an existing Tag from the list.
In difference to the Tags a Keyword is related to the design of the Layout Snippet. It describes what this particular Layout Snippet is designed for. “christmas”, “halloween”, “wedding” or “birthday” are typical Keywords. Because a design with a Christmas tree is only useful for Christmas. You can define more than one Keywords for your Layout Snippet. Just enter it here or choose an existing one. The Keywords could be managed in the Account Portal in the Keyword Menu. So that the Layout Snippets are displayed sorted at the Buyer Side.
You can set a language for a Layout Snippet. After you assigned it to the target Template it will automatically get filtered by the set editor language.
Learn how to set a Layout Snippet language
You can exclude certain languages, so the Layout Snippet will not be available for this languages.
You can restrict a particular Layout Snippet to a dedicated Product Type like t-shirt or mug for example.
Here you can set a title for the Snippet.
If you’d like to sell designs in your shop you can set a price category for this snippet. If the Snippet is than used on buyer side the shop will be notified and can update the product price and pice display. Please learn more about Price display here.
Choose wether or not a Layout Snippet should be available for certain Aspect Ratios of the target Template.
Learn about the Aspect Ratio in detail here.
This setting applies only for Splitter Layouts and prevents the initial Remove Border button from appearing. Plus it control the Gap-Button in the frame toolbar. It is enabled by default. Learn more about Splitter Layouts here.
This setting applies only for Splitter Layouts and controls the scissors-button in the frame-toolbar. If it is disabled the user can not click on the Scissors Buttons in the frame toolbar. It is enabled by default. Learn more about Splitter Layouts here.
Enables you to use the name of an existing Form Field of your target Template to define a value for it. As soon as the Layout Snippet will be placed into the target Template this value will be written into that Form Field. You can add as many Form Field Values as you like for a Layout Snippet.
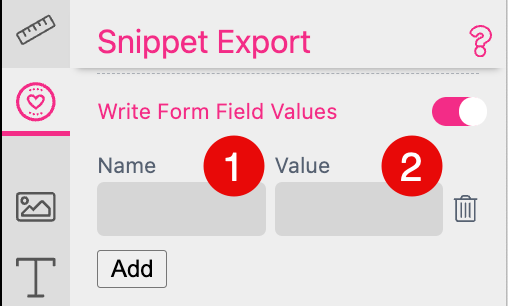
Name: Write the name of the Form Field of the target Template into the text input field.
Value: Write the value into the text input field which should be written into this Form Field.
There are three different option to define such a value:
A: Define a value just for one Layout Snippet of your Layout Snippet Library. In this case this value is defined for any Layout Snippet which is part of this Layout Snippet Library. So as soon as one of this Layout Snippet is placed into the target Template this value will be written into the target Form Field.
B: Define different values for the different Layout Snippets of your Layout Snippet Library. Now the value written into the target Form Field depends on the Layout Snippet placed into the target Template.
C: Keep the value for the Form Field empty. This allows you to have no value written into the Form Field if this particular Layout Snippet will be placed into the target Template. While the other Layout Snippets of the Layout Snippet Library still write their defined value into it.
Choose wether or not a Layout Snippet should repeat of multiple Pages. Learn more about repeating Layouts.
By default Printess uses the the current design as thumbnail on buyer side. If you’d like to set your own thumbnail for this snippet you can upload it here.
Variant Creation Learn more about Variant Creation.
To make Layouts inside your Layouts Library accessible in other Templates and for Buyers to insert, you need to to publish them first.
Info: To publish Layouts inside a Layout Library, you have to save and name your Layout Library at first. Once your Library is named and saved, Printess will automatically save your Library every time you publish Layouts from it.
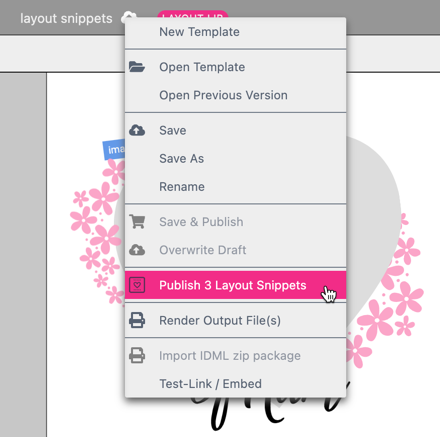
Inside your Layout Library, go to the Top Menu Bar and click on the Library Name. This will open up the Template Context Menu.
Click on „Publish x Layout Snippets“ („x“ = Number of "Layout-Snippet“-Documents in your Layout Library). This will open up the „Publish Snippets“ Dialog.
Inside you Layout Library, go to the „Snippet Export“ Tab on the Feature Panel.
Go to the „Publish Snippets“ Section and click „Publish All“ (will publish all Layouts inside your Library) or „Publish This“ (will only publish the Layouts in the selected Document). This will open up the „Publish Snippets“ Dialog.
The „Publish Snippets“ Dialog shows a list of the Layout Snippet Names along with the assigned Tags.
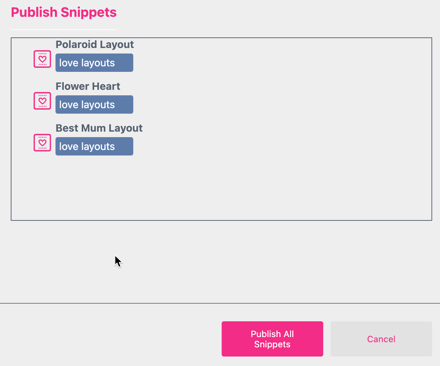
Note: For Layouts without Tags it will show a warning stating „Please add a tag to this snippet in order to make it available.“ That is because Layouts can only be assigned to a Page or a Spread if they have at least one Layout Tag assigned to them.
You got different options to filter Layout Snippets.
For each Layout Snippet you can define Aspect Ratios. The particular Layout Snippet will then only appear at the Buyer Side Selection for Documents with a matching Aspect Ratio.

The options extreme portrait and extreme landscape should be handled with care. Often the layout does not look good.
Depending on the design a Layout Snippet could also work for some portrait formats, square and landscape at the same time. So you really have to try the different Aspect Ratios before you export the Layout Snippets. You can just switch to the Buyer Side for testing. There you find a control which is showing the Aspect Ratios you have defined for your Layout Snippet. Just click on any Aspect Ratio to see how your Layout Snippet would look like.

You can also test it after you have exported your Layout Snippets. When you have assigned them to a target Template you can filter them there at the Designer Side.
Aspect Ratio Breaking Points:
Each Aspect Ratio has a breaking point located midway to the neighbouring Aspect Ratio.
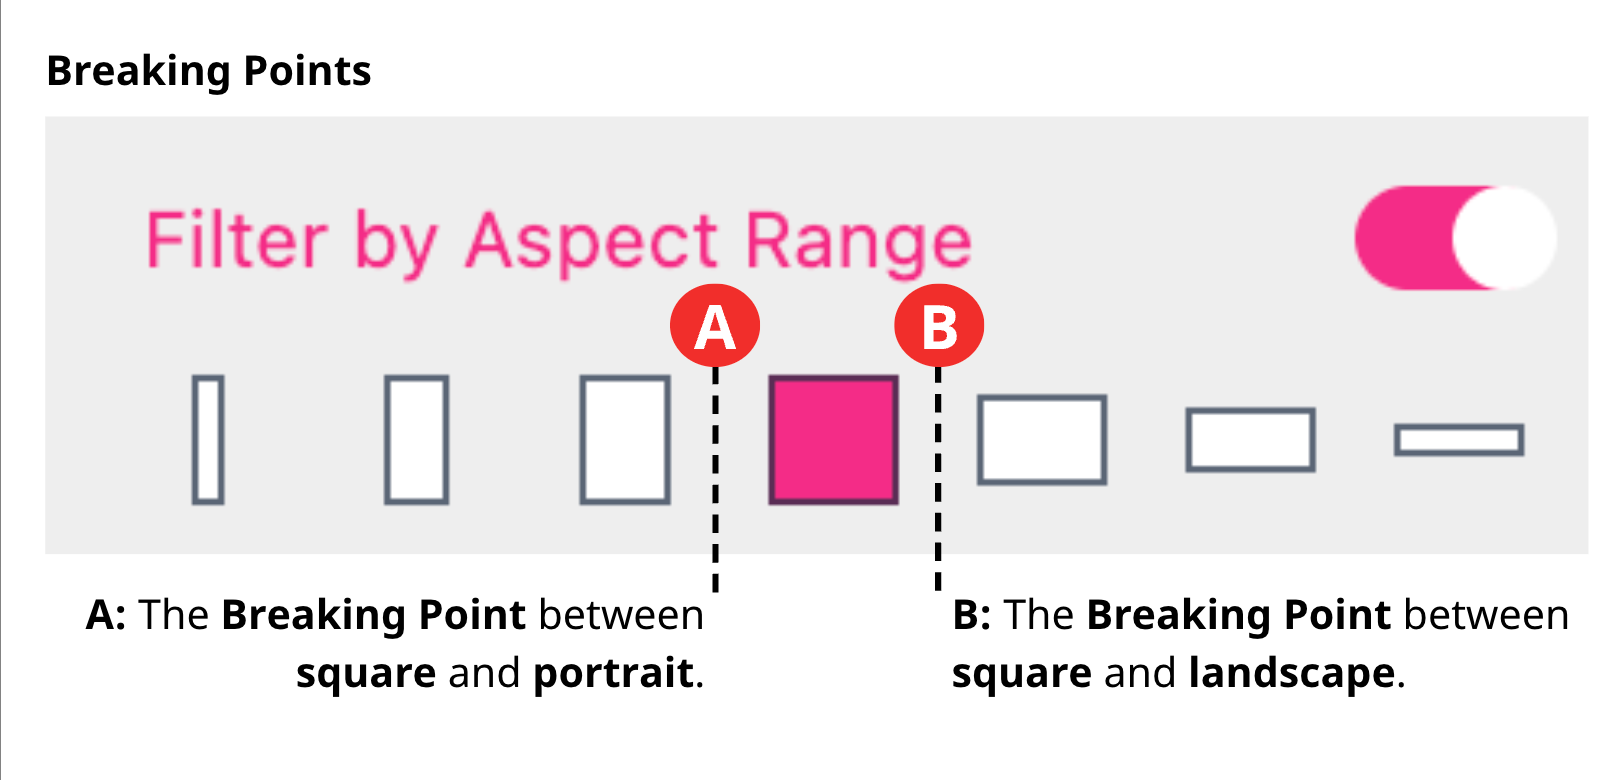
This means that even the “square” Aspect Ratio will still be displayed when the format of the target Document is slightly “portrait” or slightly “landscape”.
You can set a language for each Layout Snippet. The Layout Snippet can later get filtered by the set editor language to allow different Layout Snippets for different languages. If no language is set the Layout Snippet is allegeable for all languages.
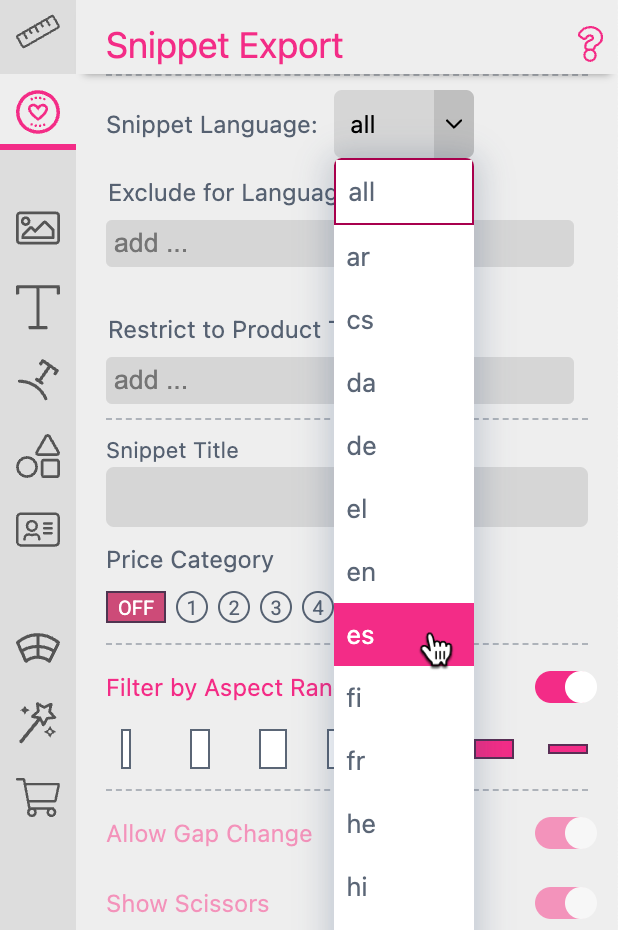
This feature only should be used if the graphic content of it is language relevant. If you only have to change some text of a Layout Snippet you can use a translation table. This is a more efficient way.
Learn more about the Translation Table here
The main idea of Layout Snippets is that they are not designed for a particular product. However, there are special cases where a specific layout only suits a certain product category such as T-shirts or mugs. For these instances, you can define one or more product groups for which this Layout Snippet is suitable. It will then be displayed on the Buyer Side only for the products defined here.
Therefore you have to define the Product Type in the target Template too.
Find the Product Type Template Settings here
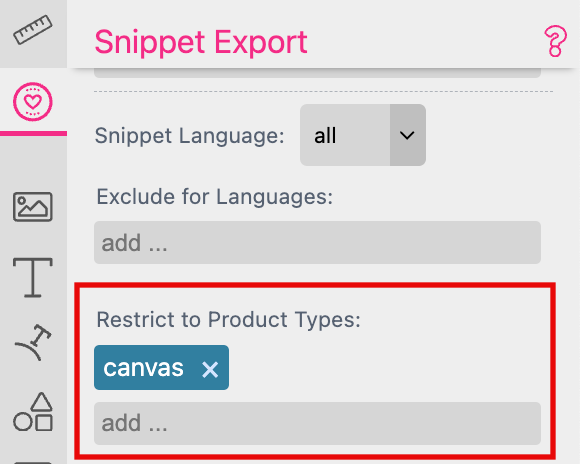
You can define one or more Product Types for a Layout Snippet. Just type in a name or select an existing one from the drop down list. No entry means it matches all Product Types.
This option is more than just a function - it’s a concept. This is why you should follow the specific method described here.
If you have set up Color Schemes for your Layout Library you can define which of these Color Schemes should be available at the Buyer Side for each single Layout Snippet.
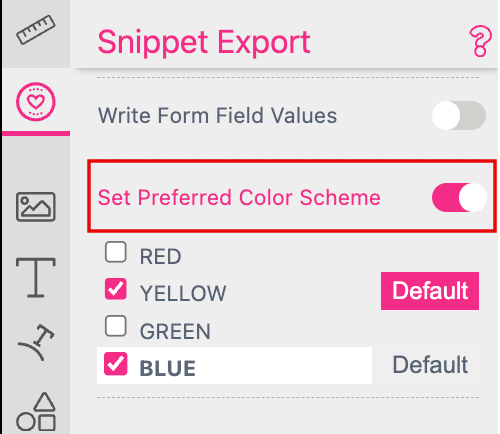
If you have activated this option at the Snippet Export Tab all Color Schemes available will be displayed. Just click the checkboxes of the ones you would like to make available for each single Layout Snippet.
In addition you can define a “Default” one. This defines the initial Color Scheme used to display the Layout Snippet.
Learn how to set up a Color Scheme
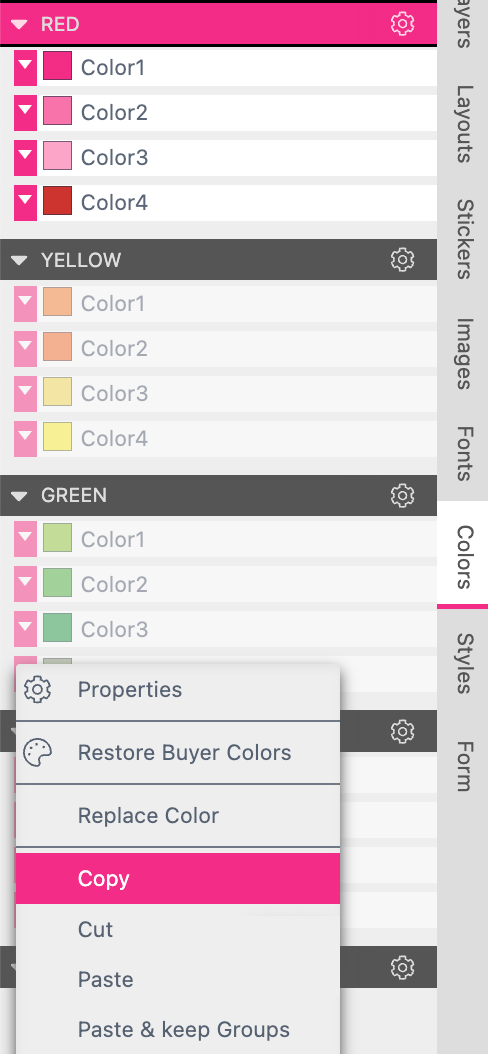
Now the Color Themes has to be copied into the target Template. This ensures that the color names from different Color Themes of different Layout Snippets do not overwrite each other when placed into the same Printess Template.
Just select the color which is on top of the first group. Press the shift key to select the last color of the bottom group. Now all colors of all groups are selected. And the Colors Context Menu opens. Click on “copy”.
Go to your target Template to do a right mouse click on any existing color or color group. The Colors Context Menu opens where you select the option “Paste & keep Groups”.
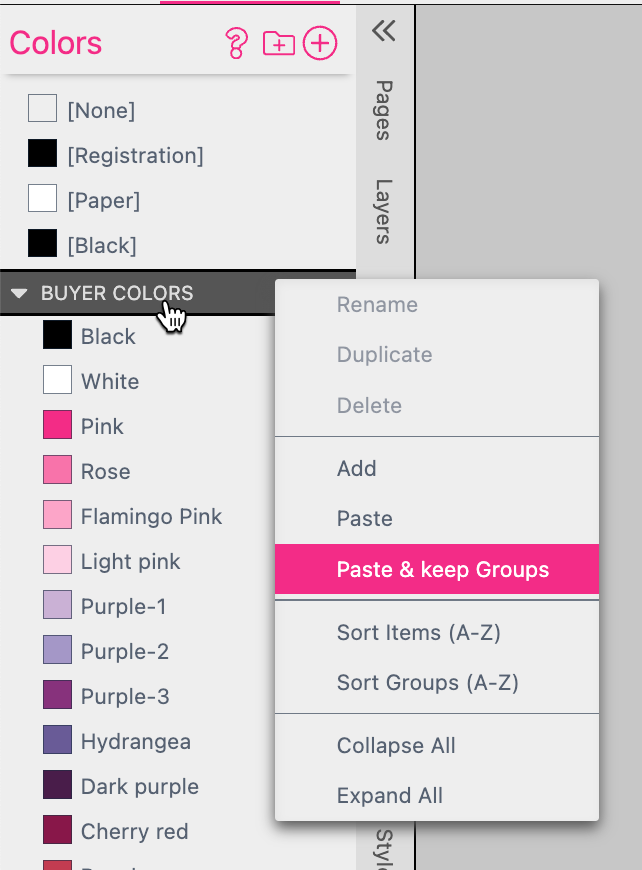
Now all your Color Schemes are copied onto the target Template.
We do recommend to work with a Resource Library.
If you plan to use Layout Snippets with Color Schemes in multiple Templates you should store the Color Themes in a Resource Library. This ensures that you have to copy all the Color Schemes of your different Layout Snippets just once. And it is much easier to maintain all your Color Schemes there. So instead of copying these Color Schemes again and again to all your different target Templates you just create one Resource Library.
Create a new Template to select the type Resource Library.
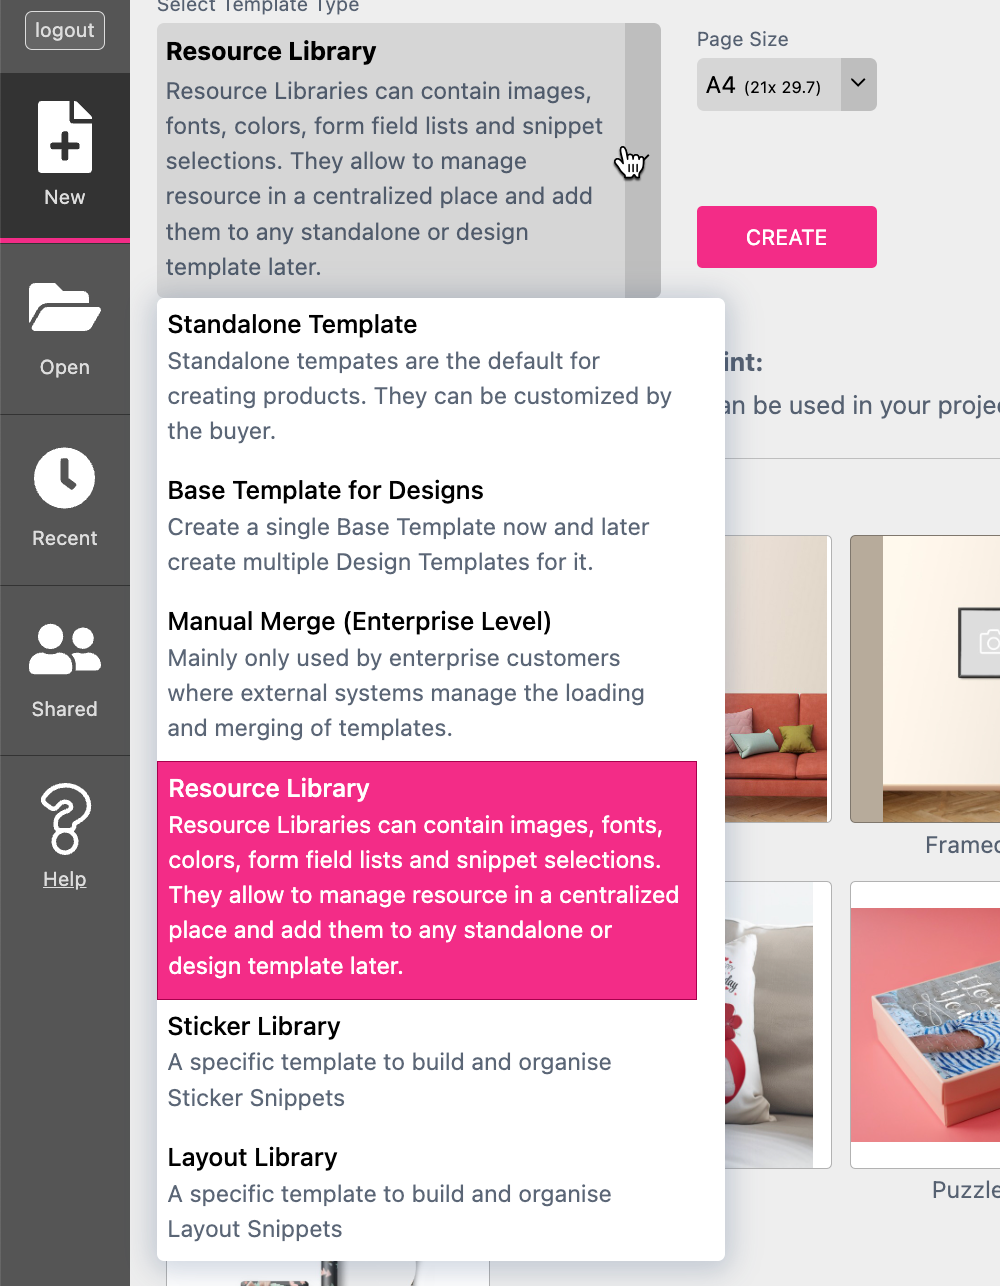
Now paste your Color Scheme Groups into the Resource Library like described above using the option “Paste & keep groups”.
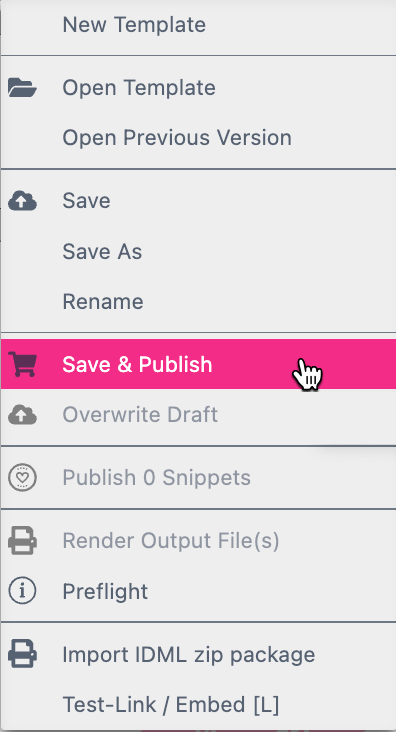
“Save & Publish” the Resource Library through the Template Context Menu option.
Learn more about the Resource Library
Click on the Template Type Badge  of your target Template to open the Template Type Dialog.
Use the option “Add Resource Library” to select the Resource Library which you have created. If you do not find your new Resource Library in the selection, you forgot to publish it.
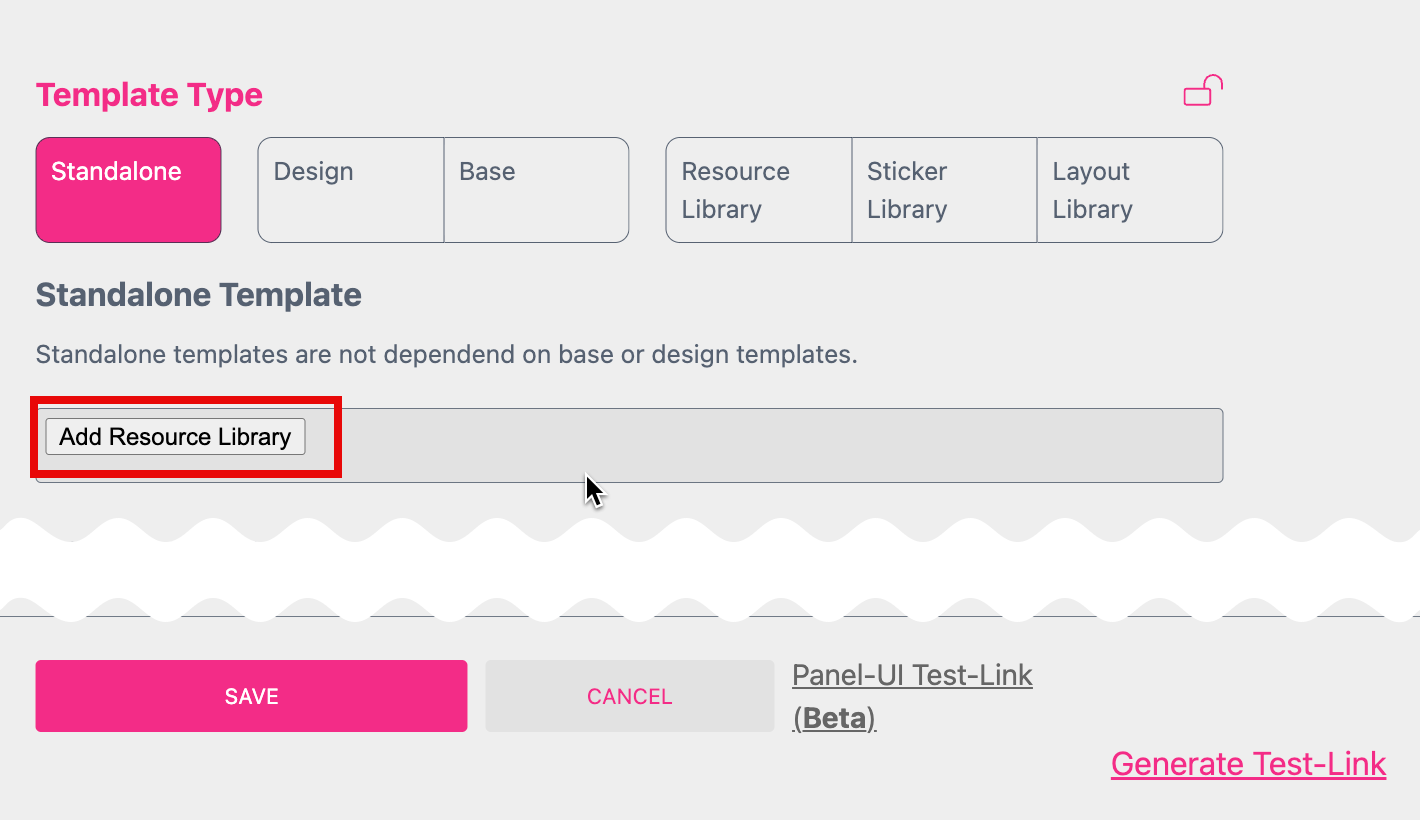
This way you can assign the same Resource Library to any other target Template using these Layout Snippets.
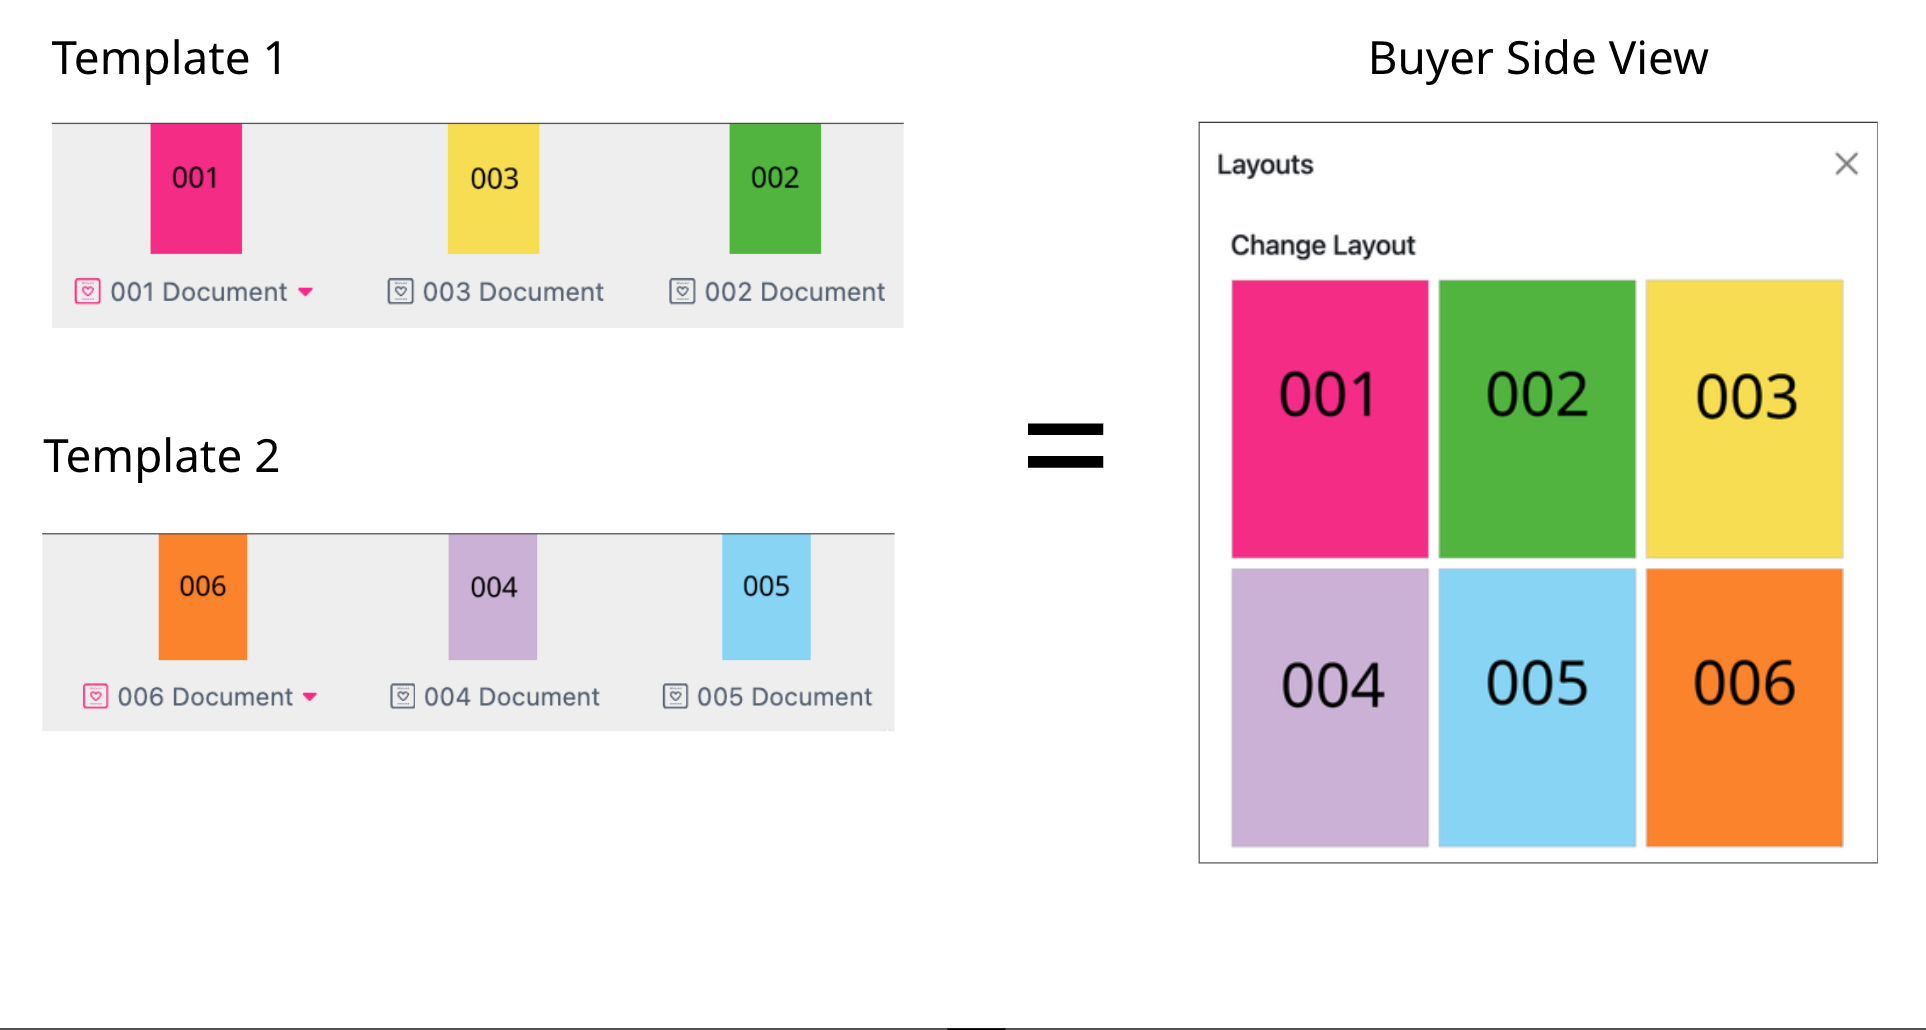
All Layout Snippets will be shown in alphabetically order at the Buyer Side. So you can influence this order by the names of the single Documents within the Template.
This alphabetical order also applies across Templates. So if the displayed “Layout Snippets” come from different Templates, the sorting must be established across these Templates as well. It is best to use a three-digit number naming the Documents for this purpose.
This example is using six different Layout Snippets from two different Templates. Although the individual documents are unsorted within their Templates and coming from two different Templates, they are correctly displayed at the Buyer Side according to their numbering.
You find that option at the Resource Panel in the Snippet Export Tab.
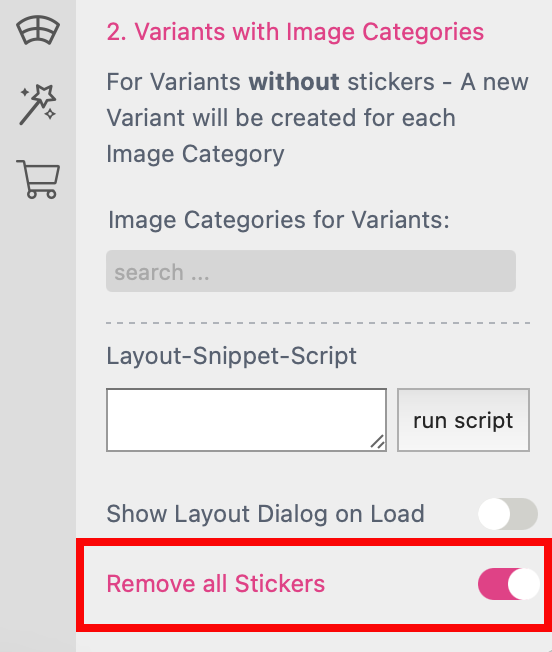
When this option is checked the Layout Snippet will remove all user inserted Stickers on all affected spreads when inserted.
Tip: This feature is not supported by the API backend
If a Layout Snippet should expand to the bleed of the target Template you can use the option Dock to Bleed. This video shows you an example where single page Layout Snippets should be placed on a facing page with bleed.
Learn more about Dock to Bleed here
If you’d like to charge a little extra for certain Artworks buyers are using have a look at the price display feature and use price groups to show a price label next to the Layout Snippet. Layout Snippets can have a price group (1-5) and the price groups can receive a price label given at the start of the editor.
Both Sticker Snippets or Layout Snippets can display a price.
Set Label-Strings for each Price-Category in attach-call: priceCategoryLabels = [“Price 1”, “Price 2”]
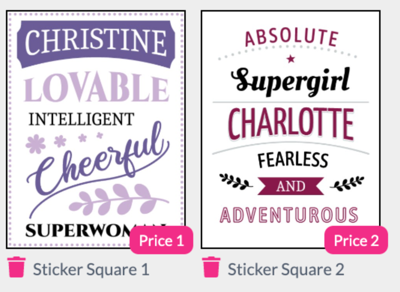
When exporting the Layout Snippet which should show a price label, select a price category for a Layout Snippet.
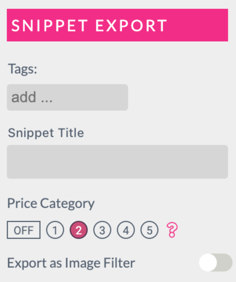
Please read more about displaying price and the use of the PriceChangeCallback() in the Buyer Side - Display Price chapter
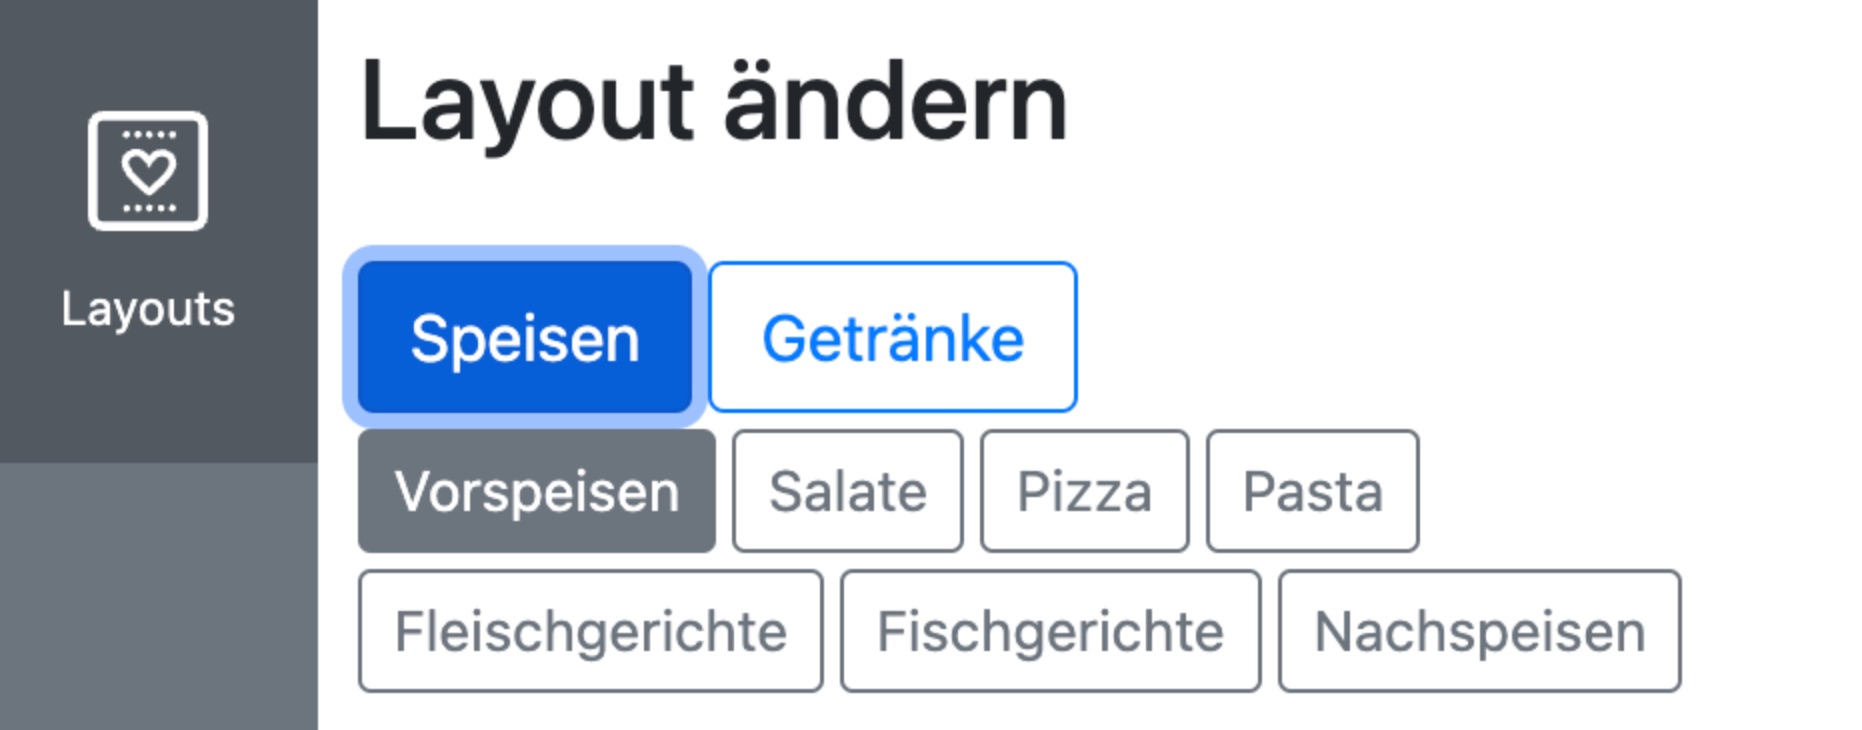
If needed the Keyword Menu can be translated into several languages. Please just add a menu section into your exiting translation table per language.
Please also see how to add languages in the Account Portal here.
Example:
{
  "menu": {
    "food": "Speisen",
    "drinks": "Getränke",
    "seafood": "Fischgerichte",
    "meat": "Fleischgerichte",
    "desert": "Nachspeisen",
    "starters": "Vorspeisen",
    "salad": "Salate",
    "pizza": "Pizza",
    "pasta": "Pasta",
  }
}
