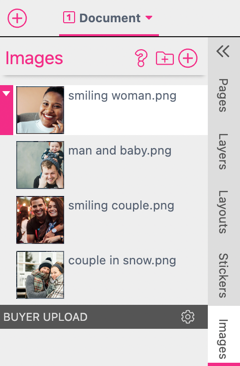

In the Images tab you can upload and insert images into documents.
To add an image, press the Add Image button  . The upload dialog will then open, allowing the user to select one or more images to upload.
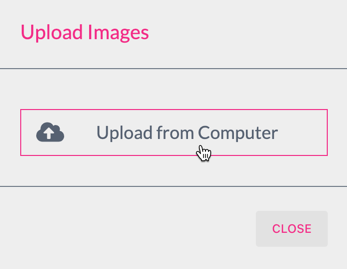
Uploaded images can be simply dragged onto the edited page. You may also select a frame with an Image Feature and exchange the image by selecting another image in the Images tab.
Images can be sorted by drag-dropping them to the desired position.
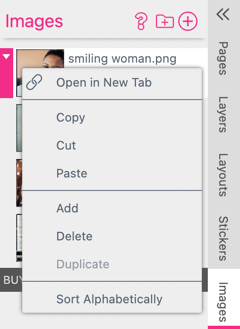
There is also the option to sort images alphabetically in the Image tab Context menu. The Context menu will open up either on right-click or by clicking on the small bar appearing to the left of an image. Here you can also open images in a new tab.
Note: Image Size for upload is limited to max. 160 MPixel and 50MB file size.
Images can be organized into groups. To add an image group press the Add Image Group button  and enter a name.
Move images into the newly created image group by drag-dropping them.
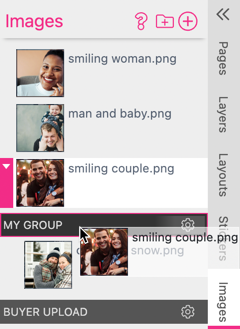
Empty groups are currently removed on save and reload.
The Buyer Upload is present even if no custom groups have been created. This group holds the images which are available to a Buyer.
If one would like to provide a selection of images to choose from, just upload them and move them into the Buyer Upload group or a custom group.
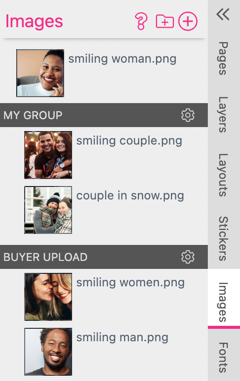
You can also copy and paste images into Printess. For example, if you have taken a screenshot it can be uploaded and inserted on the page by simply pressing ctrl-v on the keyboard.
When deleting images which are in use, Printess will give a warning showing the next frame where the image is in use.

Notice: Warnings will only work for images which are in use within a frame or Style. Images used in scripts, data tables, or Buyer Side folders are not detected and will be deleted.
You can delete multiple images at once by shift-selecting them and then selecting Delete from the Context menu. Printess will only delete any unused images and provide a warning if any of the images are in use and cannot be deleted.

You can also add PDFs to the Image Tab. Press the Add Image button  . The upload dialog will then open, allowing the user to select one or more PDFs to upload.
We recommend to use PDF X/4 standard.

Printess will only load the first page of a PDF. So if you want to upload a multi page PDF you have to split it into single pages first.
Uploaded PDFs can be simply dragged onto the edited page. You can also place it in an Image Frame and exchange the PDF by selecting another PDF in the Images tab.
PDFs can be sorted by drag-dropping them to the desired position.
There is also the option to sort PDFs alphabetically in the Image Tab Context menu. The Context Menu will open up either on right-click or by clicking on the small bar appearing to the left of an PDF. Here you can also open the PDFs in a new tab.
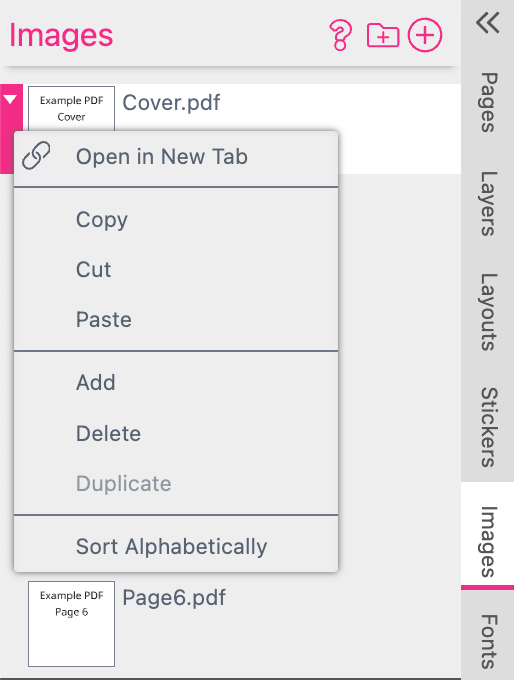
PDFs can be organized into groups. To add a PDF group press the Add Image Group button  and enter a name.
Move PDFs into the newly created image group by drag-dropping them.
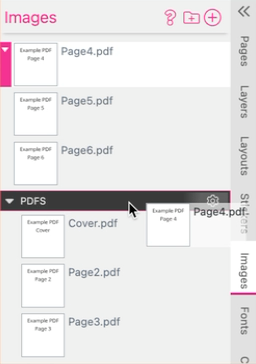
Empty groups are currently removed on save and reload.
PDFs which you put into the Group BUYER UPLOAD could be used at the Buyer Side to be placed in an image frame.
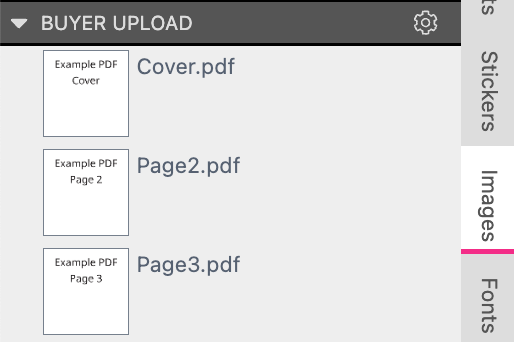
But the Buyer can not upload own PDFs by default. You have to allow the upload first in the Buyer View Appearance Settings at the Tab Images.
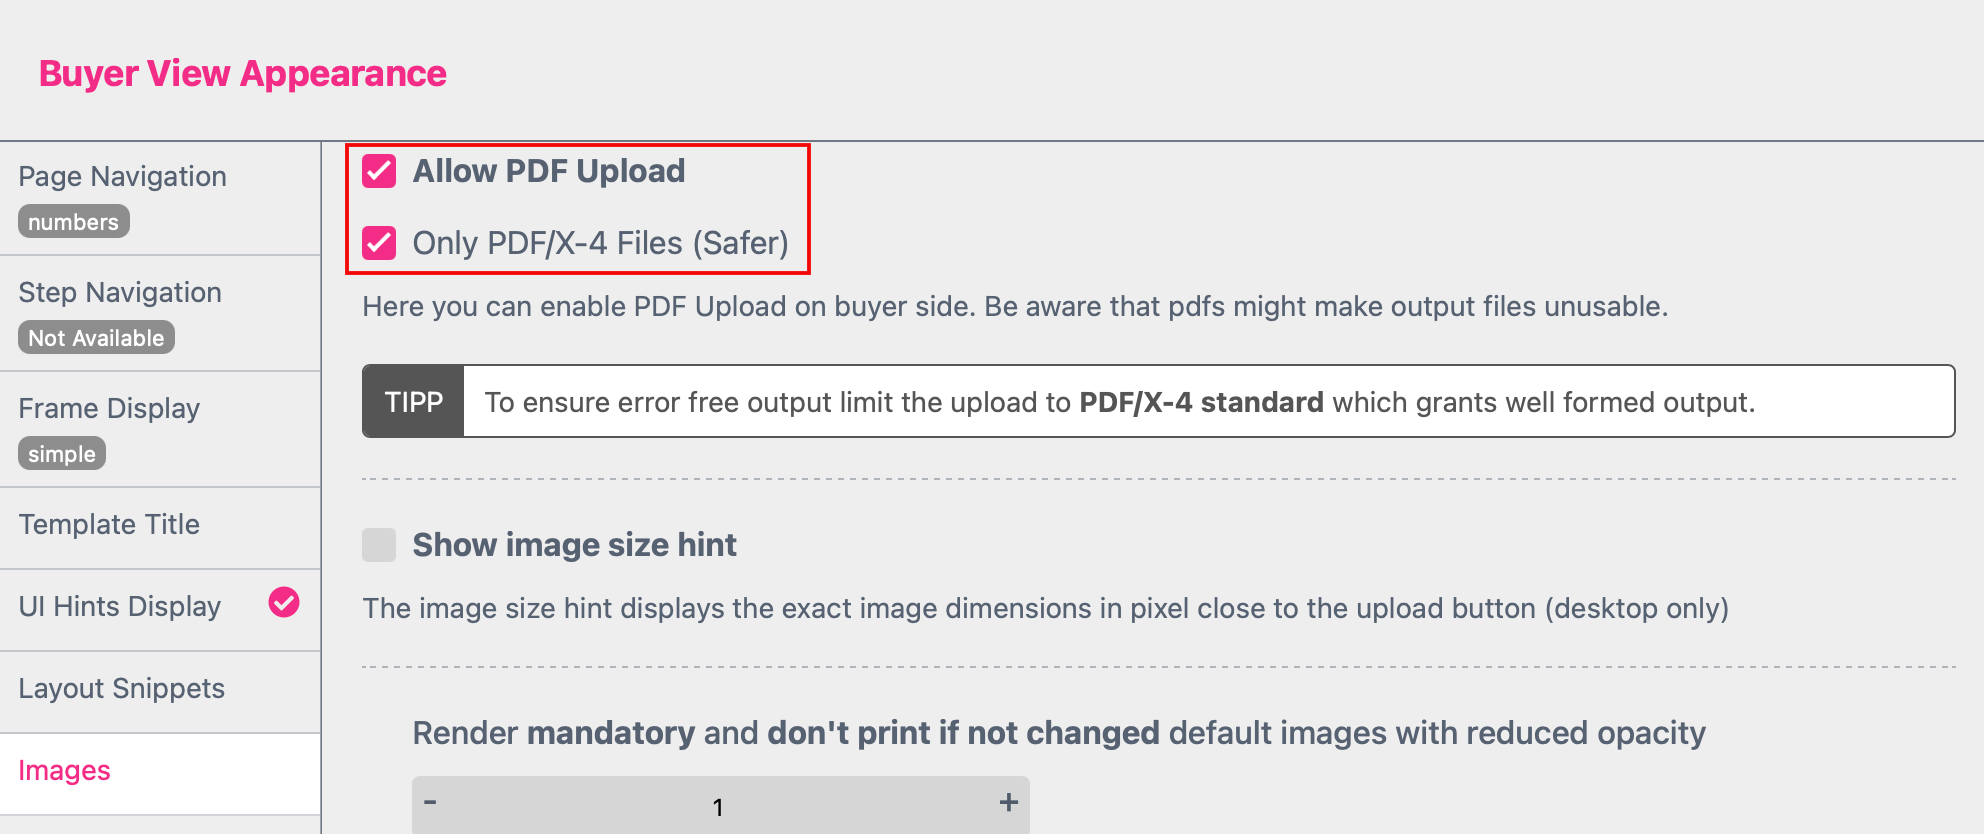
To ensure error free output limit the upload to PDF/X-4 standard which grants well formed output. Therefore activate the checkbox “Only PDF/X-4 Files”.
Learn more about the Buyer View Appearance Settings here.
You can also copy and paste PDFs into Printess. For example, if you copied it from your desktop it can be uploaded and inserted on the page by simply pressing ctrl-v on the keyboard.
When deleting PDFs which are in use, Printess will give a warning showing the next frame where the PDF is in use.

Notice: Warnings will only work for PDFs which are in use within a frame or Style. Images used in scripts, data tables, or Buyer Side folders are not detected and will be deleted.
You can delete multiple PDFs at once by shift-selecting them and then selecting Delete from the Context menu. Printess will only delete any unused PDF and provide a warning if any of the PDFs are in use and cannot be deleted.
