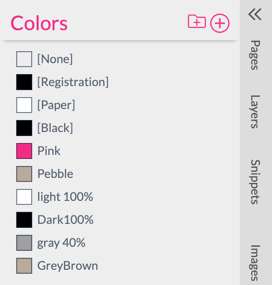

In the Colors tab you can create color swatches, powerful color schemes, and configure Buyer Side colors.
To add a new color swatch, press the Add Color Swatch button  . The color dialog will then open, and you can create a new color!
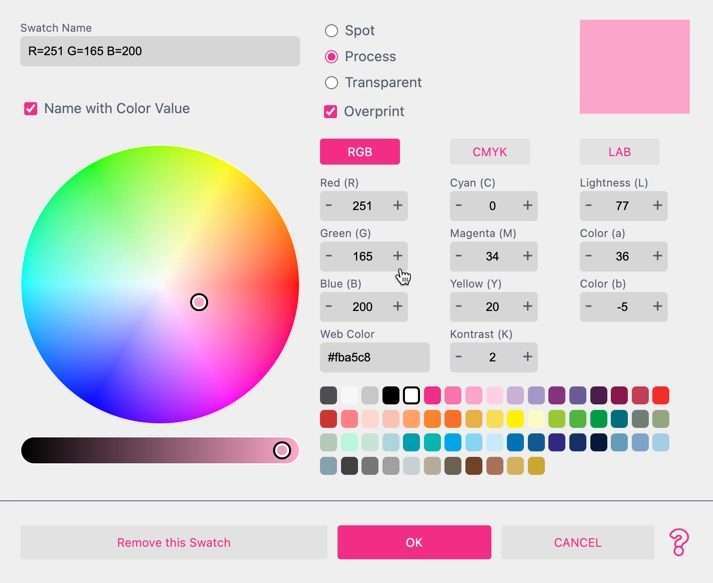
Printess supports a wide range of color models. Process colors RGB, CMYK, and LAB are supported. Additionally, any color may be defined as a Spot color which is useful for special corporate colors, special functional colors for Die-Cut lines, and other technical markups.
By default, a new color swatch is named by its color values. If you want to create a specific color swatch name, deselect Name Color with Value and enter a swatch name in the text box above.
To set if a color swatch is a Process or Spot Color use the radio buttons:
Process - means the color is made from components (either RGB, CMYK, or LAB).
Spot - refers to a method of specifying and printing colors in which each color is printed with its own ink. To define the appearance of the color and define a replacement color in case one outputs the document without Spot colors, the process color is part of the definition.
Transparent this special type of color is transparent without any color values. The Name is also fixed to Transparent
Overprint
Enables overprint for this Spot or Process color.

Unlike the standard “Knockout” method, where overlapping colors were cut out from the lower layers, “Overprint” will print colors over each other. This can cause colors to blend into each other.
Overprint works for Simple Text, Multi Line Text, Text on Path, Shapes and vector graphics.
You can choose a color model and directly enter its color values, or use the HLS color wheel to the left to define a color.
Saturation - better described as “intensity” is lowest in the center and grows to the outside.
Hue - the color tone - changes around the circle
Luminance - the darkness of the color - is controlled with the slider below the circle.
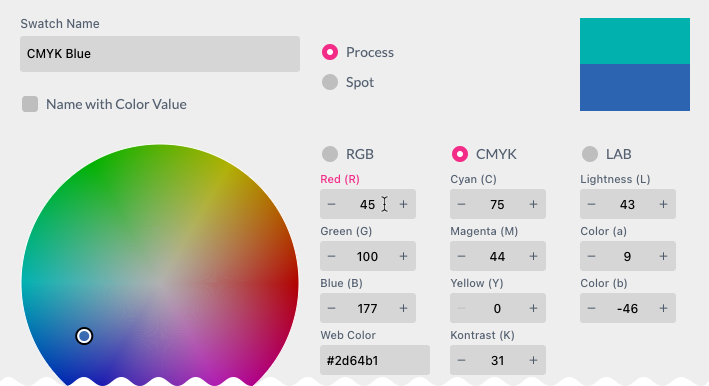
When defining CMYK or LAB colors Printess will automatically calculate the correct sRGB representation via color management, using the Account CMYK default profile (Default: ISOcoated_v2). Selecting a color on the color wheel or changing the RGB values will also trigger the color management and calculate a matching CMYK color.
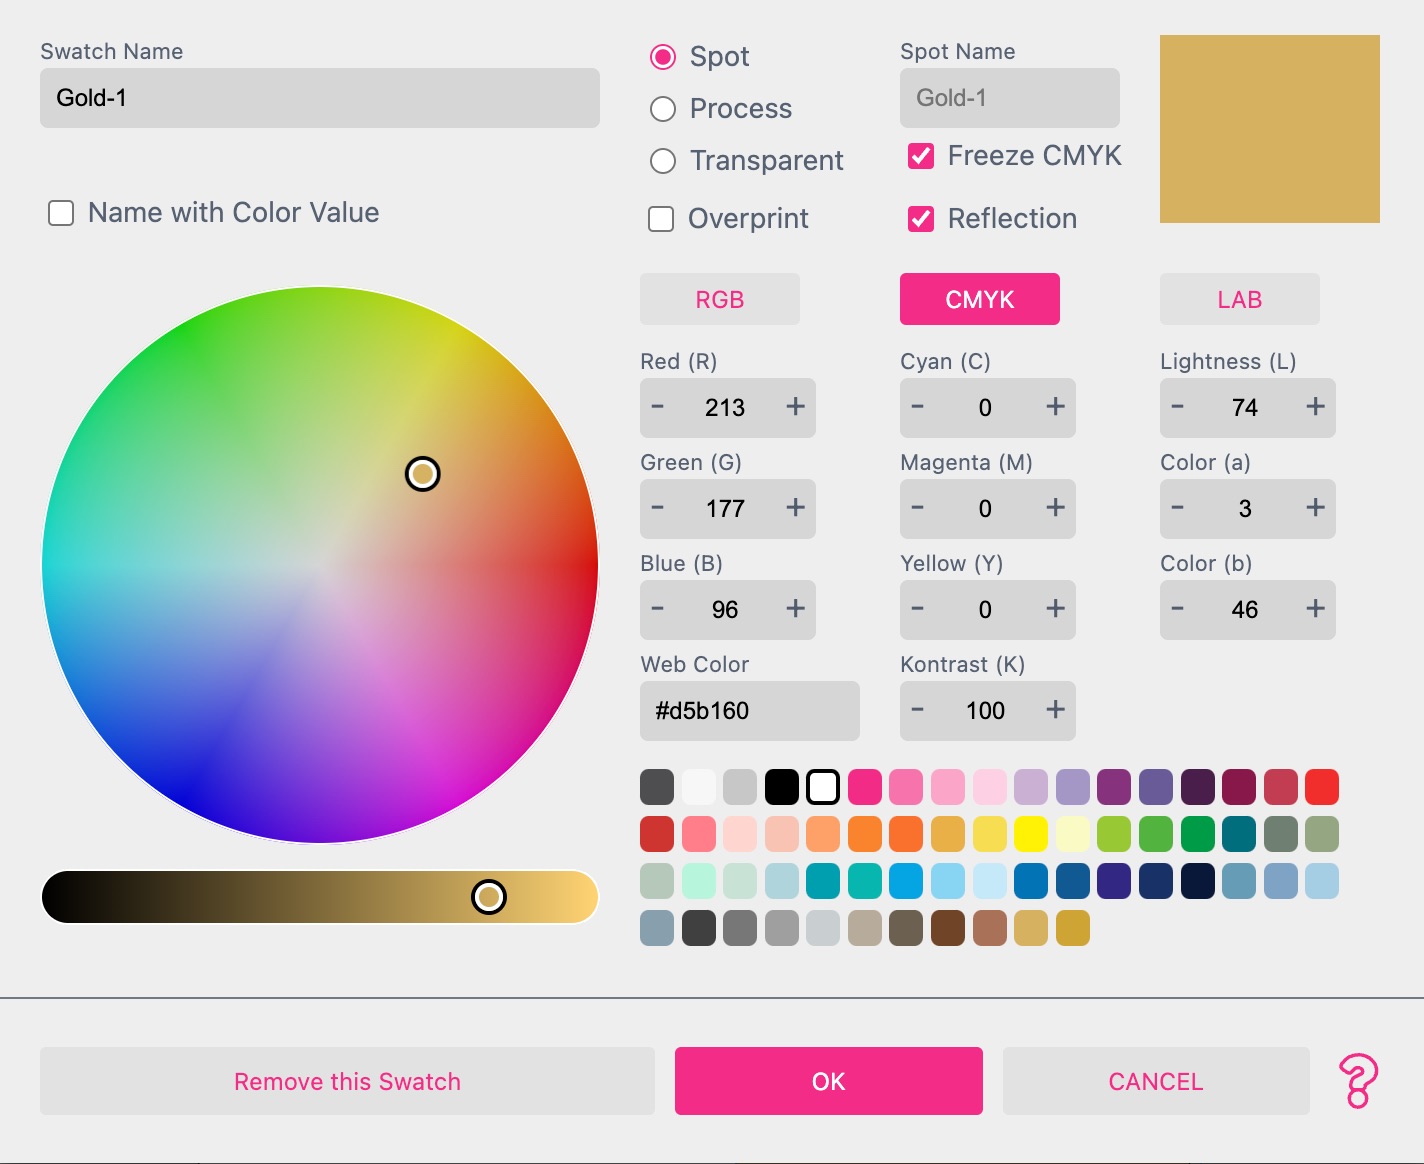
Especially for gold, silver or other foil finishing Printess has some necessary features. In first switching Reflection for any color will show a reflection animation on elements with this color to simulate foil finishing.
This is supported for:
Additionally some workflows require a different CMYK output color then the color (e.g. Scodix requires a spot color with a specific CMYK replacement color. Toner based foil finishing requires a 100% black output color to adhere the foil). You can achieve this by switching to CMYK and enable Freeze CMYK before setting the desired output values.
The example below will show an animated Gold Color on the buyer side, but output a 100% K value in the output PDF.
There are many places in the Printess Designer UI where one can select a color but all of these places will use the Color Selector to do so. As this selector contains a high level of functionality, let us make ourselves familiar with it.
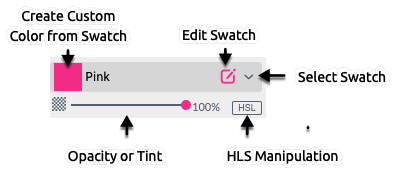
The easiest thing to do is to simply use it to select a color swatch you would like to use. Just click on the small down arrow to the right, and a drop-down will open from which you can select from all available created swatches in the Template.
The slider on the bottom adjusts the opacity, or in the case of a Spot color, controls the tint of the color.
Another option is to edit the selected color swatch directly from the selector. Just select the Pen icon and the color dialog will open. Here you can alter every aspect of the color including the name. Note that this will not create a new color swatch (even if you change the name).
You can also switch to a custom color. A custom color is just a color without a saved swatch. It represents a certain color value that is not selectable in other places. To create a custom color just click on the color patch to the left of the selector and the color dialog will open in Custom Color Mode.
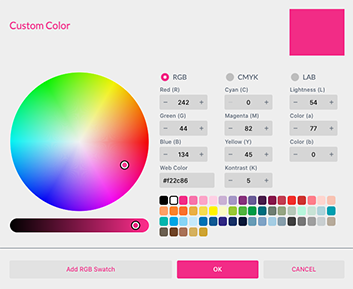
As you can see, the swatch name options are gone as this is just a single color value. If you would like to create a new swatch from here select the Add RGB Swatch button in the dialogue:

This will create and select a color swatch named with the current color value. If you need a different swatch name, simply click the Edit Swatch button.
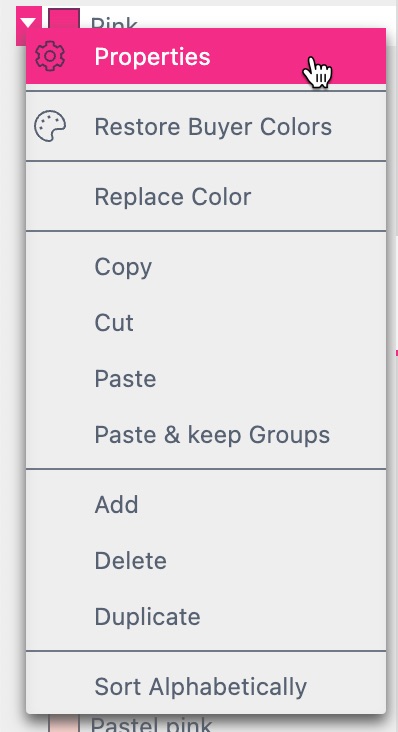
Right-click on a color swatch to open the Colors Context menu. From here you can access several useful functions:
Replace color swatch can now be accessed not only by deleting a color (see below) but also directly. Its improved and now also replaces colors in stories and styles.
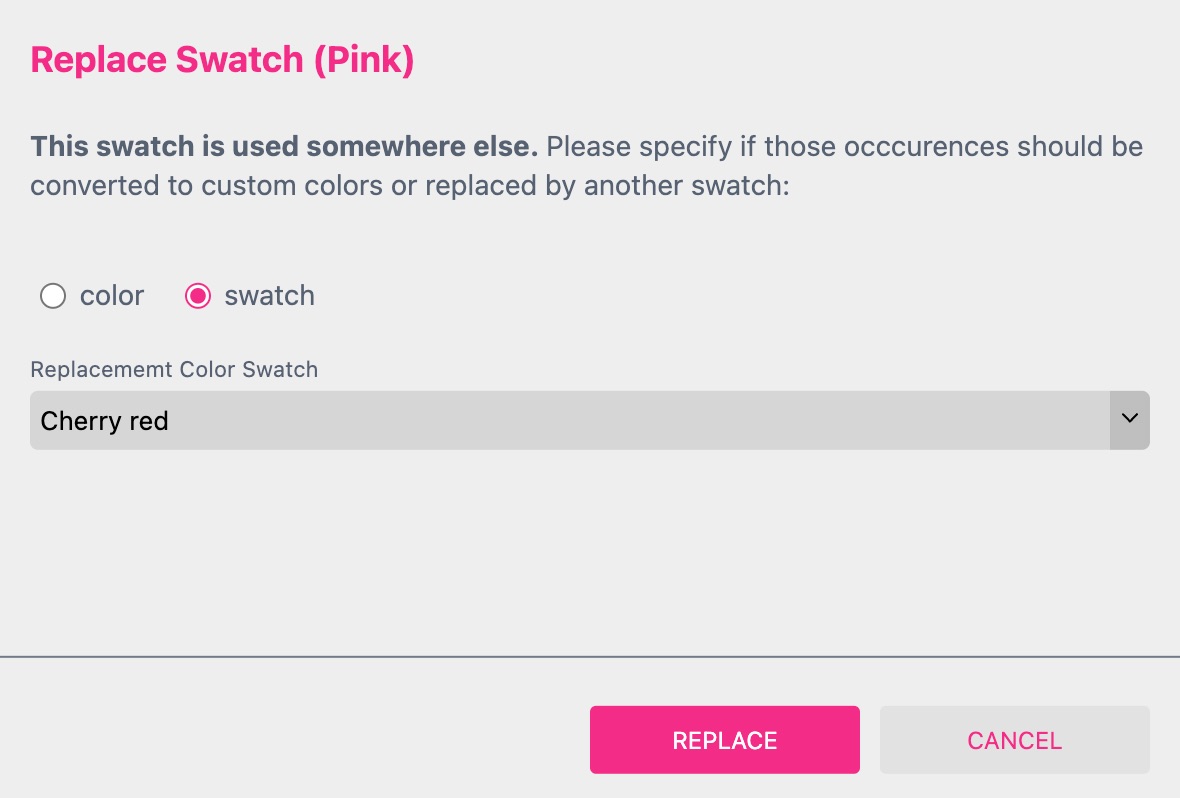
The selected swatch will stay in the list but can be replaced throughout the template by either another swatch or by converting each occurrence by a custom color.
You can delete color swatches by pressing the DEL or Backspace keys or by selecting Delete in the Colors Context menu. If a user tries to delete a color swatch that is used in the document, Printess will ask whether they would like to create a custom color from it or choose a replacement swatch.
Tip: As Printess always checks for color usage, you can reduce available color swatches to only the used ones with ease. Just select all color swatches in the Colors tab with CTRL-A and press DEL or Backspace. Printess will then delete all swatches not being currently used.
You can create groups to organize color swatches by pressing the Add Color Group icon  .
.
Tip: To copy colors including their groups between templates you can select colors across groups and copy them. Then use SHIFT-CTRL-V/SHIFT-COMMAND-V to paste the colors including groups into a new template or select Paste & keep Groups from the color group menu.
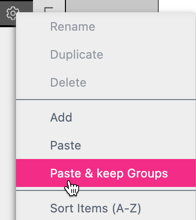
There is an always present group called Buyer Colors. This default group holds the color swatches which will be available to a buyer wherever colors are selectable in the Buyer Side.
Note that Buyer Side colors are not limited to this group. Essentially, every group can be selected to be available to buyers.

Color schemes are a powerful option in Printess that can be used to define several possible appearances for the same design.
For this, a designer can define several colors which appear throughout the document in different variations. Just create several groups which will hold the variations. The names of the groups will be what is selected by the buyer later on.
Now we can create or copy and alter all the colors of the color scheme again under the same name and put them into their respective groups like so:
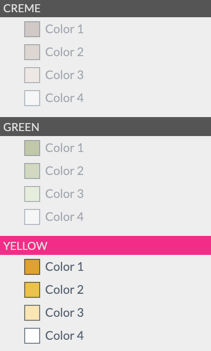
As you can see, all of the colors now exist in several different places but with different color values.
On the Buyer Side, you can select the color scheme and let all the colors in the scheme change according to the selection of individual customers.
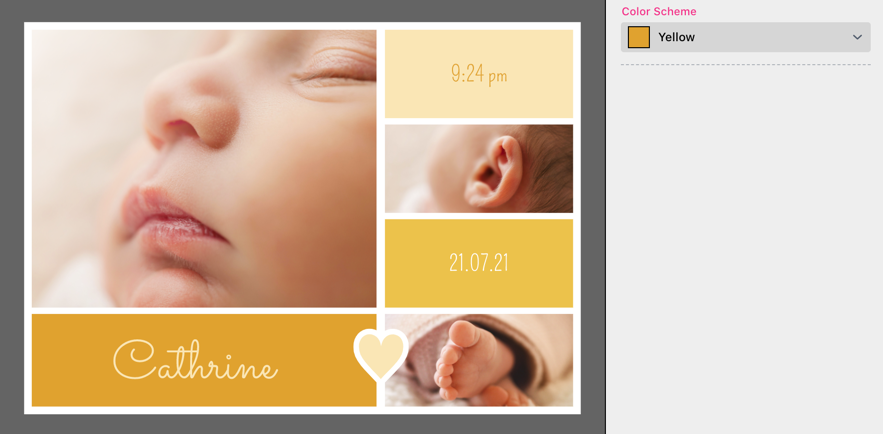
This is how it looks when a buyer selects a color scheme:
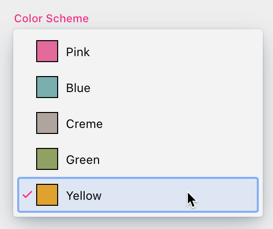
Selected Yellow:
Selected Blue:
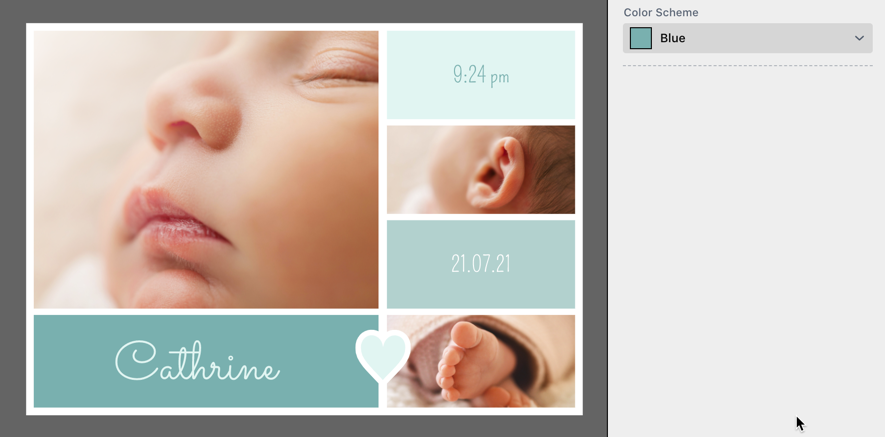
As you can see, all the colors in the color scheme changed with just one Buyer Side setting!
The color scheme selection automatically appears for the buyer the moment you create at least two color groups with at least one equally named color in it.
A very handy function to help create color schemes is the Duplicate function in the Colors Context menu. You can first create the design with a set of color swatches, then just multi-select all of them and select Duplicate from the Colors Context menu. Finally, just move the duplicated swatches to a new group and adjust the colors accordingly.
Notice: HLS colors work only with RGB colors.
Another great functionality for Buyer Side color manipulation is the HLS manipulation option. This option offers color changes on the Buyer Side where a customer only needs to select one color to change a range of connected colors with it.
To make use of HLS colors, start by selecting the same color for different features or elements and then manipulate them with the HLS sliders that appear when the HLS button below the color is selected. You can then change:
Below is an example where we selected blue as the fill-color swatch and the same color for the stroke, but manipulated it with the HLS sliders to be a lighter blue:
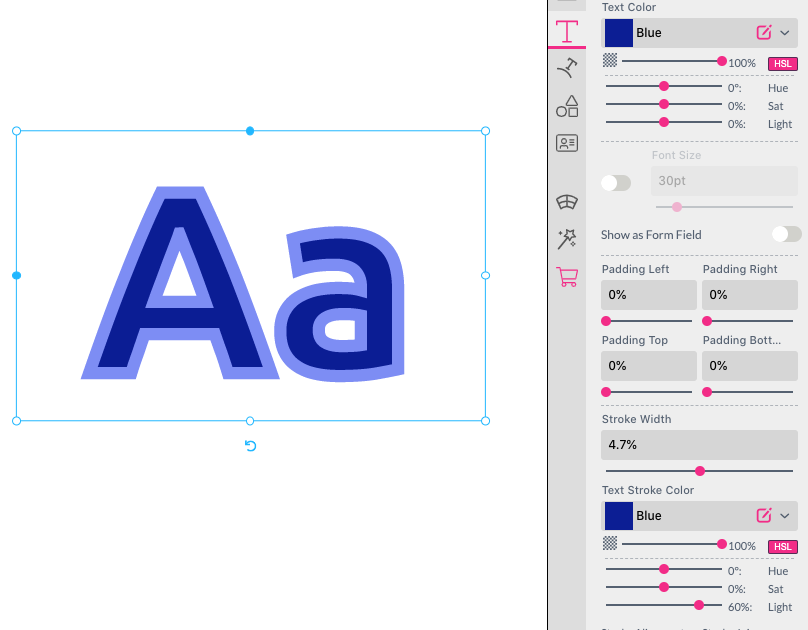
The benefit of this method is that in the Buyer Side one can now select any available Buyer Color (again RGB only!) and thereby change both colors at once. This is especially useful if one would like to create easy-to-colorize Snippets.
Below is the same example as above, but now the buyer changed the color to pink. Note that as it is HLS color manipulation, only one color is allowed to change but changing the main color to pink now automatically changes the light blue to light pink as well!
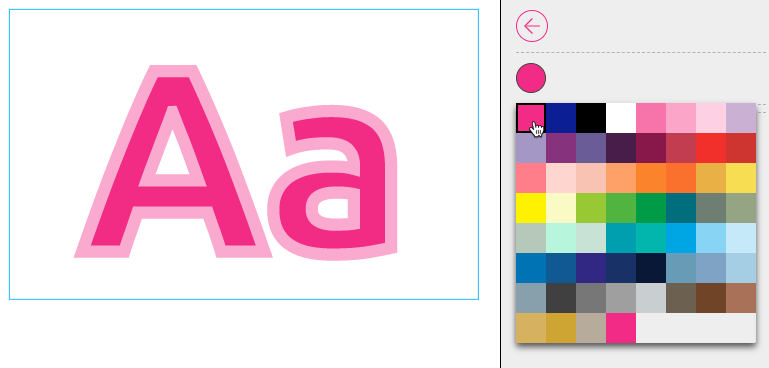
Printess makes it easy to pick any color - even outside the editor window. Simply choose the small probe icon above the color selector and you will get a virtual magnifying glass to select a point on the screen you’d like to select the color from.
This is limited to Chrome and similar Browsers and might require you to allow chrome screen access.

Printess supports the use of color pickers which store their color value as a hex value in the clipboard. Just pick a color and then select a frame containing a shape, Single Line text, or Path on Text and press CTRL + V and the text or shape will use your selected color as a custom color.
Of course, you can copy any color like “#FFAA12” into your clipboard and paste it into the selected frame. Printess will then apply the color to the primary colors of all selected frames.