Your customer visited your online shop, designed a T-shirt, put it in the shopping cart and ordered it together with a postcard in which he thanked his friend for the wonderful holidays. Thanks to one of the great integrations, the shop automatically contacts the Printess backend and starts PDF production. Normally, your job would start now. You download the PDF from the Printess servers and transfer it in some way to your printer who is responsible for the actual production of your product. By using Printess workflows, even this “last” step can be automated. With the help of our HP Siteflow integration, the FTP integration or even via Dropbox, your print documents are automatically forwarded to your printer. Reduce your manual work to a minimum and use our KornitX integration, which even automates the creation of your Printess aparell templates. By using this integration, you aggree that you will be charged for workflow usage.
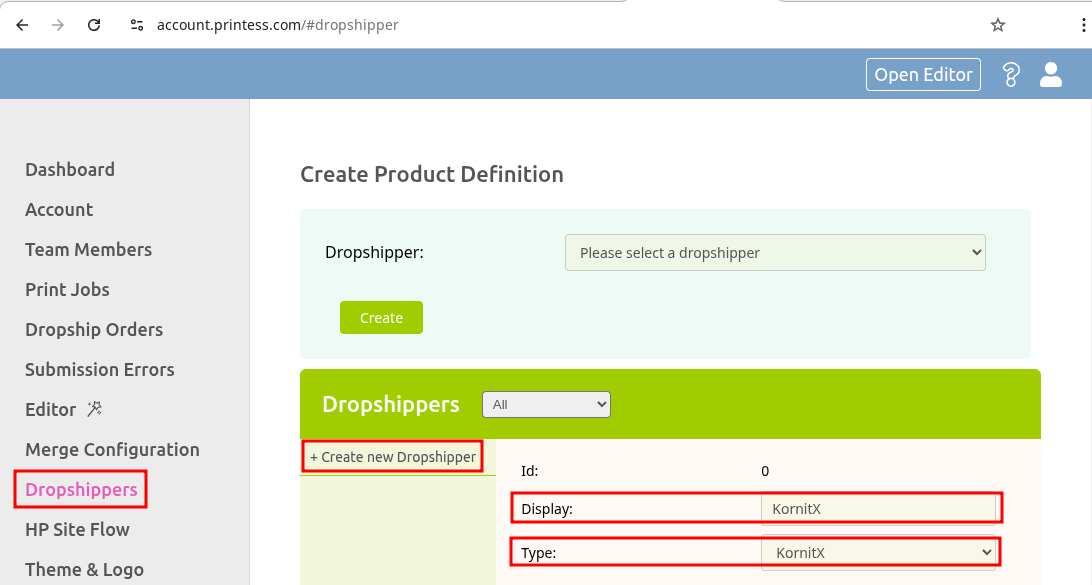
The KornitX configuration constists of 2 easy steps. Configuring the KornitX integration by providing your account credentials and creation & configuration of the Printess print documents. To initialiaze the KornitX integration go to the dropshipper section of the Printess account portal. Click on Create new Dropshipper, provide a meaningful name for the new dropshipper and select “KornitX” under type.

Enter your authentication details (ClientId, ClientSecret and BasicAuthenticationHeader) that have been provided to you by KornitX and click on Create.
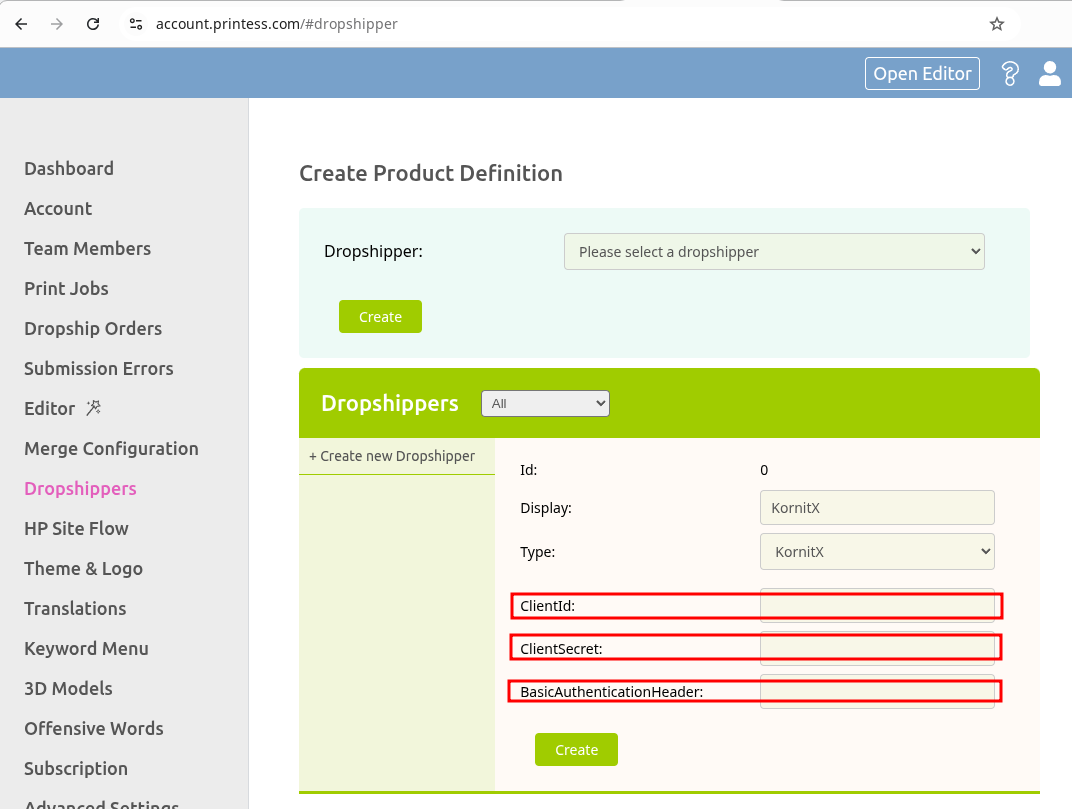
Next, will be the steps of product and template configuration. To do this, reload the dropshipper to ensure that all references have been reloaded.
To bring a dropshipping product into your shop, typically, you must first create the print document and configure the corresponding dropshipping product later. With KornitX the order is reversed because the printess template depends on the KornitX dropshipping product. To create a new KornitX product, Select the KornitX dropshipper that you have just created and select the KornitX product that you would like to bring to your store.
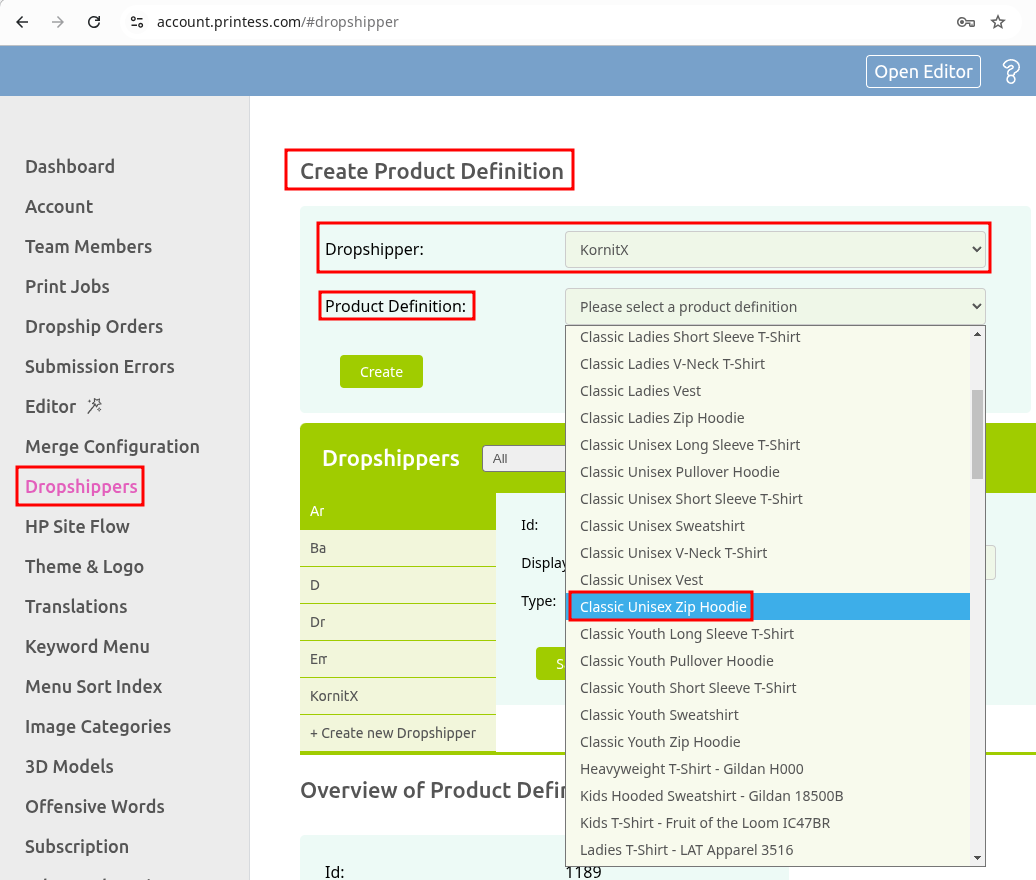
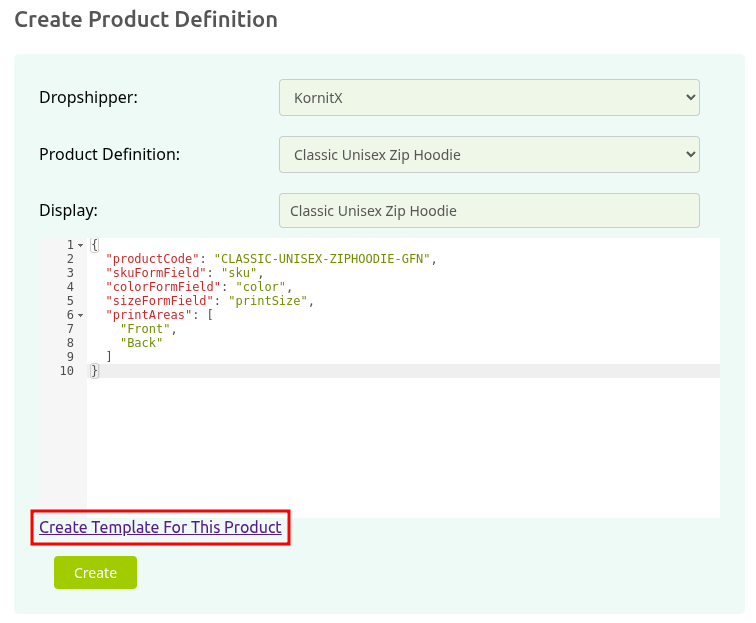
The Printess system will automatically create the configuration for the selected product.
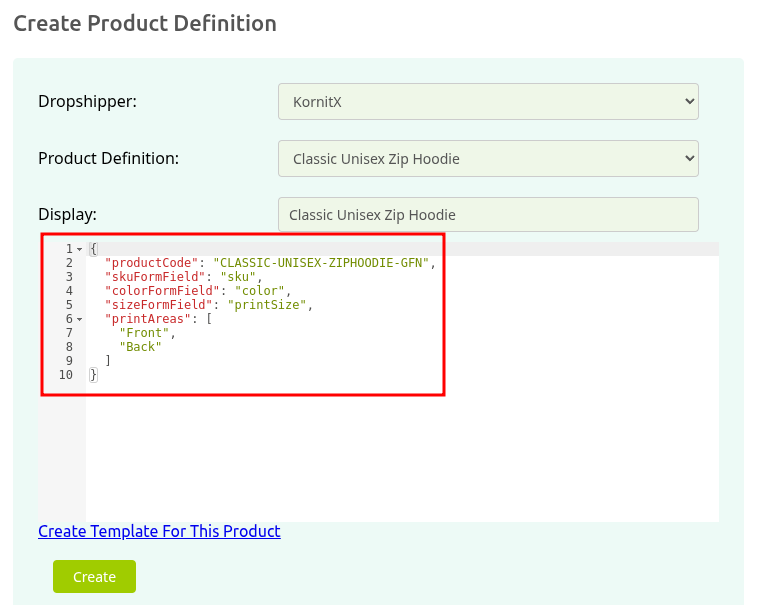
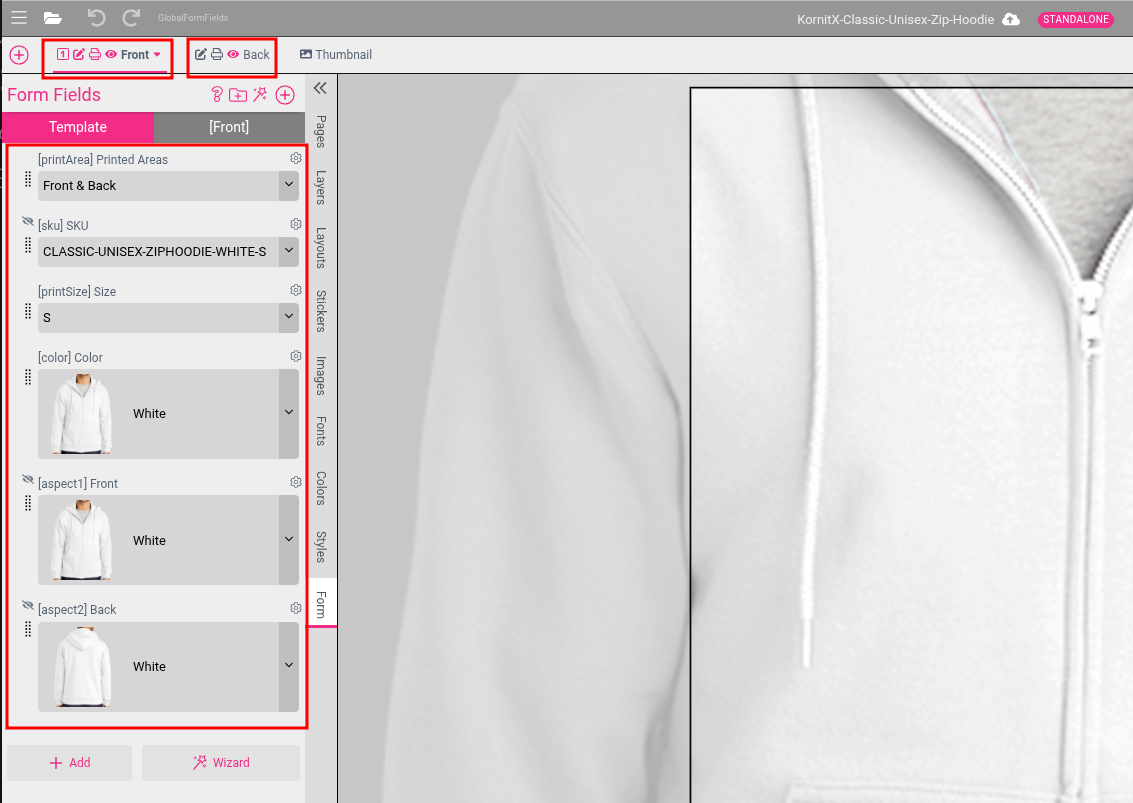
As you can see in the screenshot, the product Classic Unisex Zip Hoodie has 2 print areas (Front and Back) and requires the additional production parameters sku, color and size. These parameters are typically coming from either your shop, or from the Printess template that is using this product for print production. These parameters are forwarded from the Printess template to the KornitX servers using form fields that need to exist inside the Printess template. For the automatically generated configuration, these form fields need to be named sku, color and printSize. There is no need to change anything on this configuration. The Printess system will automatically create the template and all required form fields, print documents and configuration for you.
To create the corresponding Printess template, simply click on the Create Template For This Product link that is displayed on the bottom of the dropship product configuration.
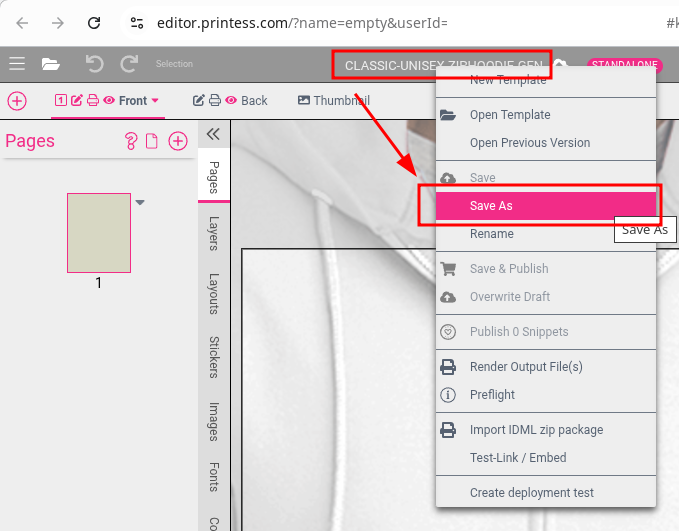
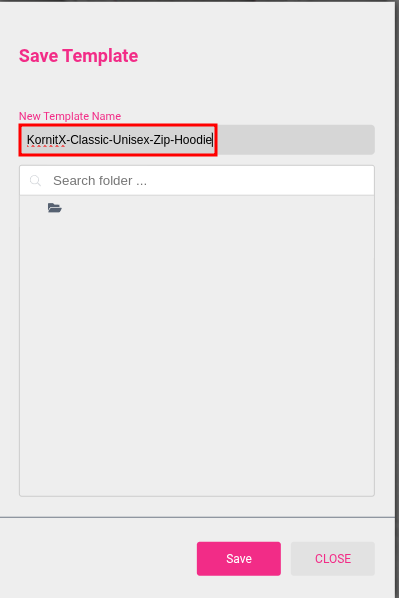
This should open the Printess Editor in a new browser tab. Check if your browser blocked the attempt to open a new tab in case it does not appear. The editor opens a newly created template that is already completly configured for you. To prevent data loss in case of accidental browser tab closing etc, save your template at first under a name that you will remember easily when searching for your specific product.
Now, without closing the current tab, go back to your Printess Account Portal tab where you created the Kornitx product definition. Here in you new product configuration click on Create.
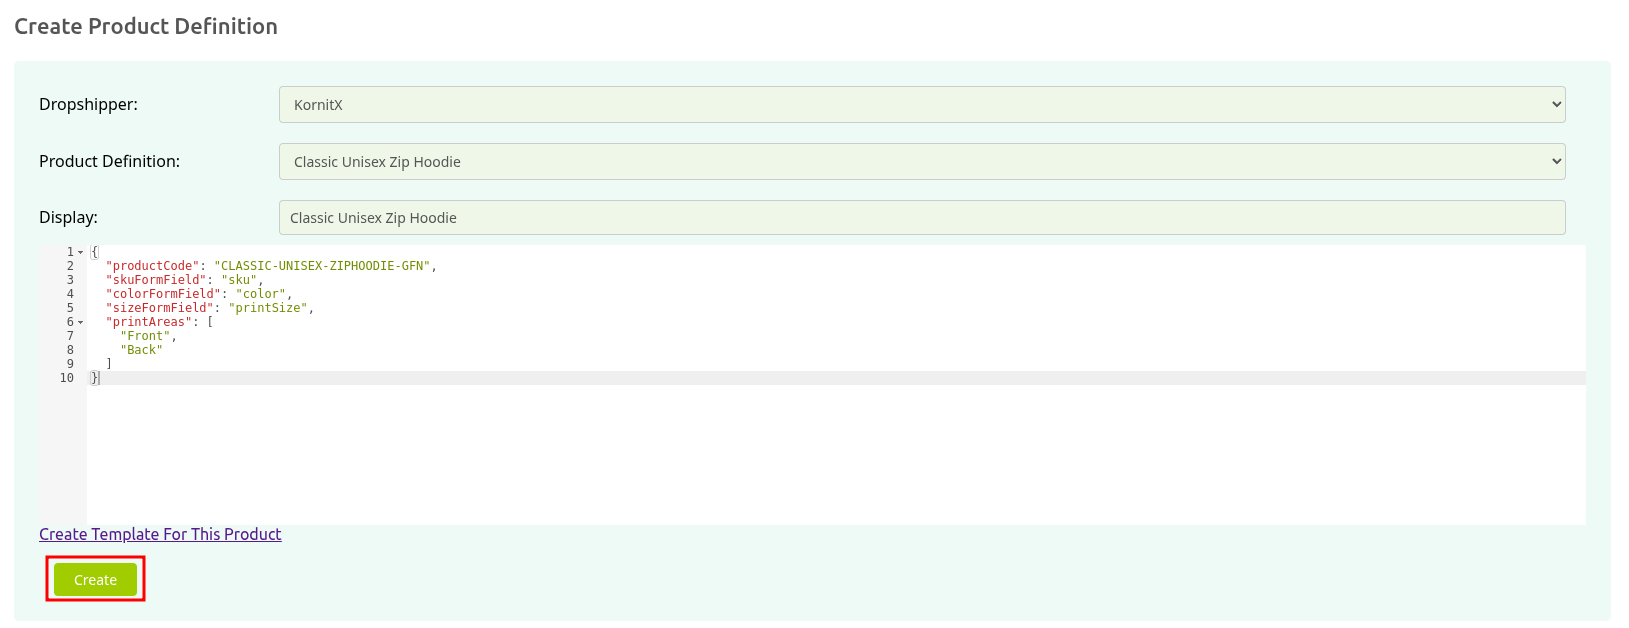
This will create the new product definition. If you forgot to click on Create and just closed the tab, you will have to recreate the product definition. (There is no need to recreate the Printess template as well in this case).
Switch back to the browser tab containing the editor and your newly created template. As you can see, the editor created a template containing 2 print documents (Front and Back) as well as all the required form fields including their configuration:
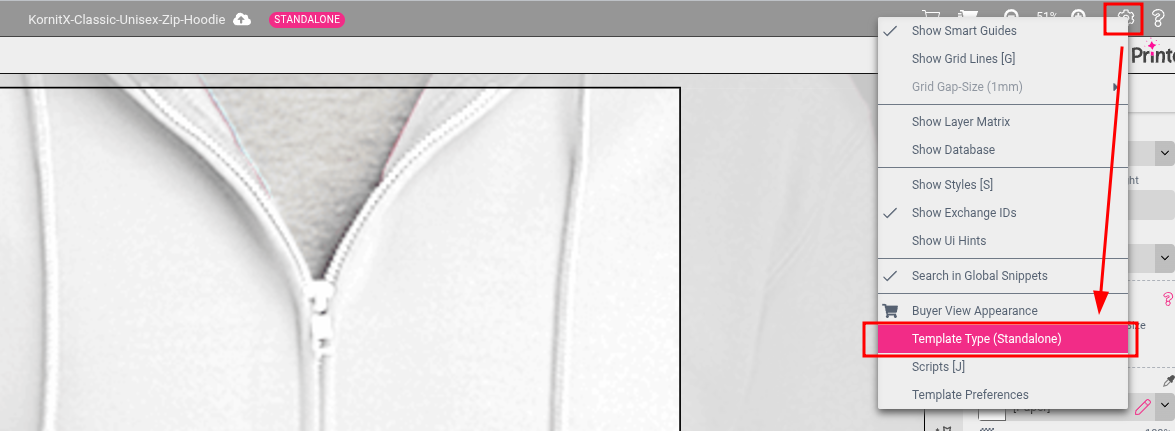
One of the last steps is getting the product to your shop. This is highly dependent on your shop integration and out of scope for this document. Normally this involves providing the Printess template name to your shop product configuration. The second step would be to configure your shop product to use the Printess dropshipping and to use your newly created KornitX Product definition. In case your shop is configured to use Printess dropshipping and to take the dropshipping configuration from the Printess template, you need to configure to use the KornitX product configuration. Open the Template type configuration and configure the dropshipping to your KornitX Dropshipper and the KornitX dropshipping product.
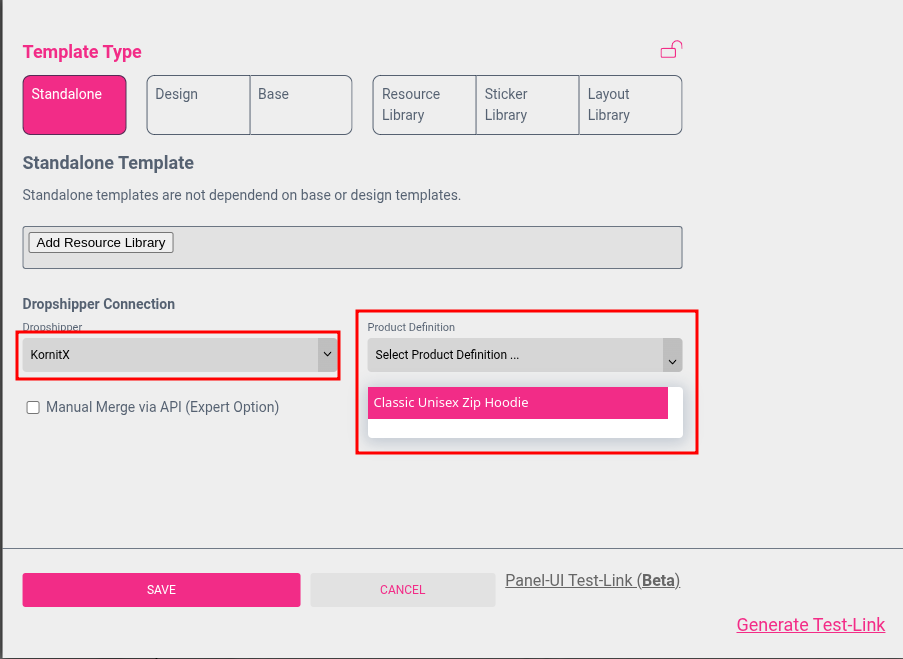
To ensure that the latest changes, including your dropship configuration in the template is available to your shop, publish the template.
