![]()
All text settings are located at the Text feature icon in the top menu bar. If a frame with the Single Line feature is selected the tab shows the settings for Single Line.
To learn about the Buyer Side Settings for Single Line Text click here

This will convert the frame to a Multi Line text frame. Note that Single Line specific properties (MinMax Spacing, MinMax Letter With, Text Case, Max Chars, Text Before, Text After and actual text size) will get lost on conversion.
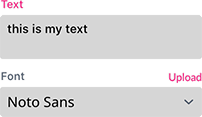
The Text from the text box will be displayed in the frame. The text can also come from a form field and info or the label value. To do this, one needs to enter ${form.formfieldname}. Right clicking on the Text box will allow you to insert all form fields directly from the context menu.
You can also connect one single line or path text frame to another by naming the source frame and addressing it with ${frame.name.text}.
One can also use String operations, conditions or any other JavaScript code in this Embedded Expression e.g. ${(form.myVal == “Test”) ? “this is a test” : “that’s reality”}.
With the Font drop-down you can select any loaded font of the template.

Horizontal Alignment can be set to Left, Center and Right.
Note that either the given font metrics table is used (fitting = font) or the glyphs get measured by the system (fitting = measure).
Top - Either means the fonts ascender touches the top of the frame (fitting = font) or the tallest character touches the top (fitting = measure).
Center Baseline - The baseline of the font gets vertically centered in the box.
Center - Either means that the ascender and descender of the font get vertically centered in the frame (fitting = font) or the highest and lowest point in the text gets centered (fitting = measure).
Bottom - Either means the fonts descender will get positioned on the bottom of the frame (fitting = font) or the lowest point of the text will be positioned on the bottom of the frame (fitting = measure).
Bottom Baseline - The baseline of the font gets positioned on the bottom of the frame.
These powerful alignment settings are best understood through an example. Please see this example doc and play around yourself. (Link: Example Document how to create a complex font)
There are two general fit modes you can switch between with the two icons above:
Measure - The ruler symbol means the fonts ascender, descender values are ignored and the characters of the text are measured for fitting operations.
Font - The ascender, descender and character distance values are used to fit the text into the given frame.
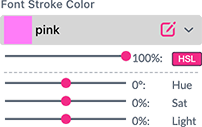
Set the fill color of the text by either selecting a swatch from the drop-down menu or use the Create icon inside the drop-down to create a new color. If one has selected an RGB color the HSL manipulation option will be available as well. Press the HSL button to change the hue, brightness or saturation of the selected color.

As font size is normally determined automatically in Single Line text frames, this option has to be enabled to set the maximum font size for the frame. Note that text can still be made smaller if necessary.
With Font Size Groups multiple single-line text frames can get connected and will then adjust their font size together. This is a useful feature if one would like to not use multi-line text as the amount of lines should be limited but still would like to keep a uniform look of the text lines.

The most easy way to put multiple frames into one font size group is to shift-select all frames and then select a free font size group. Once the frames are in one group Printess will make sure the font size for all frame is derived from the single line text with the smallest font-size.
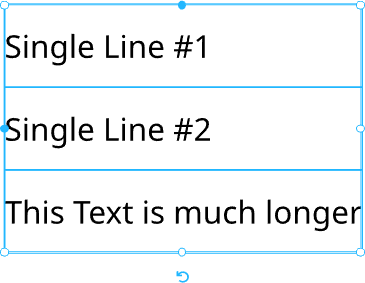
Info: The Font Size option cannot get used together with Font Size Group and will be disabled for frames which are in a Font Size Group.
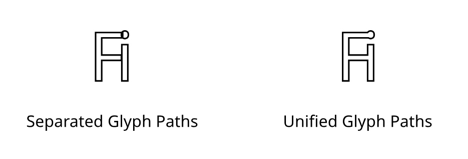
Union Glyph Paths combines overlapping glyphs paths into one. The stroke would then be applied to that outer path ignoring any path segments which overlap each other.
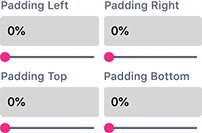
Left, Top, Right, and Bottom Paddings will control the distance of the text to the respective edge of the frame. Paddings effectively reduce the size of the box to fit in for the algorithm set in the alignment section.
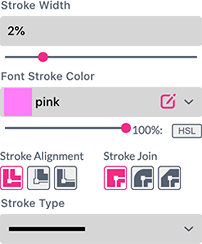
If Stroke Width is set to a value other than 0 the Stroke settings will appear. Font Stroke Color allows controlling just the color of the stroke around the letter. Functionality is the same as in Text Color.
Notice: When using highly distorted fonts or fonts with very high vector count stroke (especially with round join) processing can become pretty slow. Please consider using the Stroke Effect instead, as it works on image level and has superior speed in these situations.
The stroke alignment buttons controls where the stroke should appear:
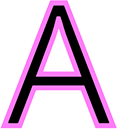

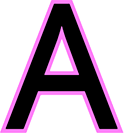

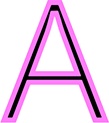

Notice: When using text with stroke in conjunction with Mesh Warp, it is mandatory to add paddings that are bigger than the Stroke Width to make sure the stroke is not cut off.
Stroke Join buttons control how the stroke contour forms at the edges:
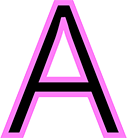

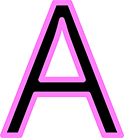

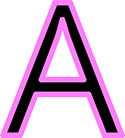

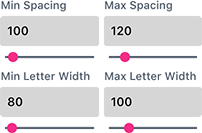
Min/Max Spacing controls the ability of the text to fit the frame better by minimizing or maximizing the character distance (tracking).
Min/Max Letter Width does the same but by stretching or squeezing the letters. If both settings are in use simultaneously, Printess will first apply the letter width and then apply possible spacing ranges.

Text case can automatically uppercase (upper) or lowercase (lower) the user’s input. If it is set to mixed case (mixed) the text will stay unaltered.
Max. Chars will define the character limit for the text (Before & After Texts are not counted).
By default, the Max. Chars limit for Single Line texts is set to 100 characters.

Before and after define a prefix/postfix text which will be added before/after the given text. If the text is empty no prefix or postfix will be added. This is useful if one would like to create a Phone Nr. line on a business card saying “Phone: (XXX) XXX-XXXX”. If no Phone Nr. is given “Phone:” should not appear as well. To achieve this put “Phone:” in the Text Before input box.
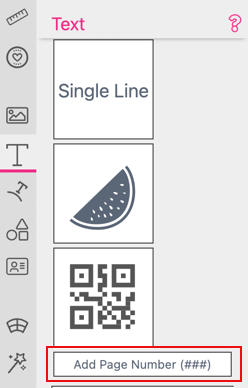
If you click the button “Add Page Number (###)” the system will automatically drop a Single Line Text Frame with the right number of your current page.
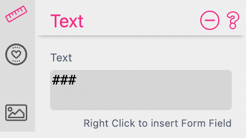
You can also use a regular Single Line Text Frame to type into the form field ### to add a page number to your document page.
But be aware that these page numbers only work for the current and a placed sub document. And only one hierarchy deep.