For different types of frames you can define different Styles with plenty of properties.
Here is the comprehensive cheat sheet of all the stylable properties of frames!
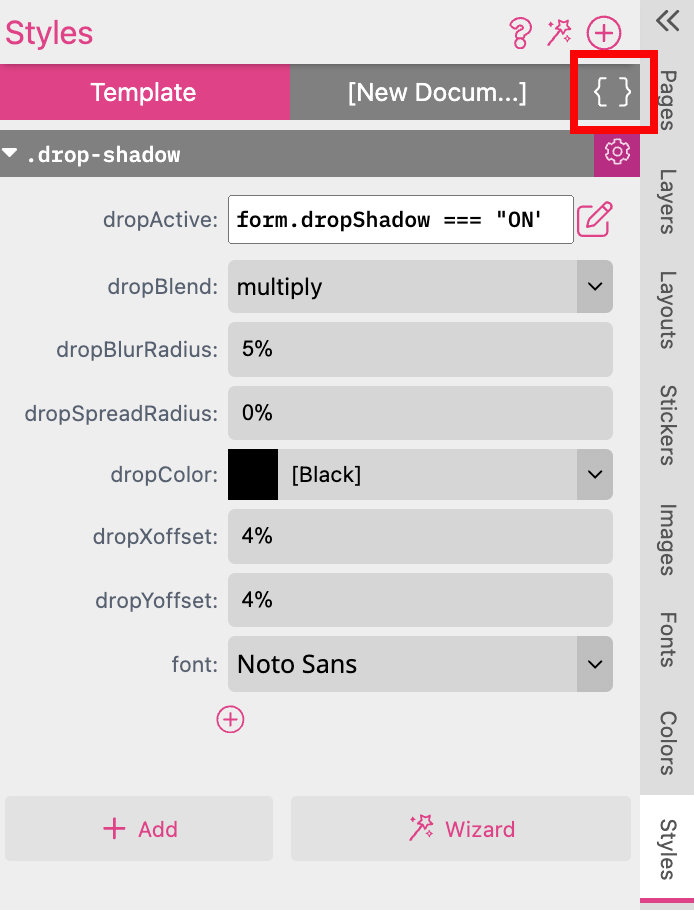
There are two different views available for Styles. By default the Style is shown with the UI at the Styles Tab.
But if you click on the brackets icon  on the right top it will change to the Code Editor View.
The Style Code Editor helps you to edit styles as code with syntax highlighting, auto-completion, and error messages.
While typing, auto-completion will start to automatically display and filter options from items contained inside of your current code.
To select an item from the list simply click on it or move up and down through the list with Cursor Up or Cursor Down and Return for inserting.
If an error is detected, an error message will appear at the bottom of the Editor tab.
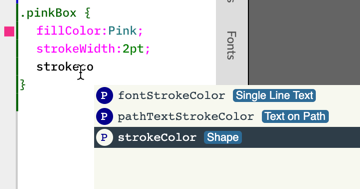
For convenience, any colors used in a Style will create a small color patch to the left of the line where the color is mentioned.
If you are using the Code Editor to define Styles there is a certain CSS-like syntax you have to comply with. A Style is a collection of different properties and has a clear syntax:
.stylename {
  propertyName:value;
  secondProperty:value;
}
Note that a Style always starts with a . directly followed by the name of the Style. Then comes the Style’s properties which are enclosed in two curly brackets {}. The properties are used to control nearly every aspect of a frame or its content (e.g., fillColor, textColor, strokeWidth, etc.).
Each property is set with its respective propertyName followed by a :. Then you input a value, followed by a semicolon ;.
If you click on the icon  on the right top it will change to the UI View again.
Using the  sign on the bottom of a Style adds a new property to the Style.
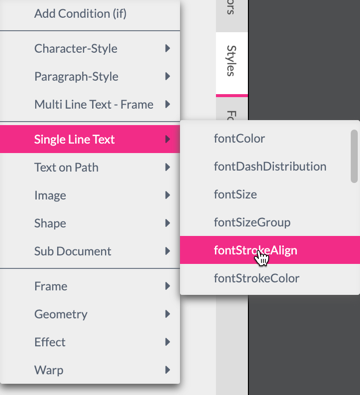
This opens the property selector which allows you to add all available Style properties sorted by frame type. Note that the text properties for a Multi Line text frame are located under Paragraph- and Character-Style.
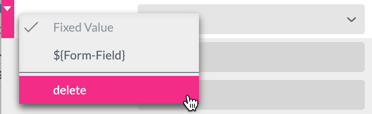
To delete a property in a Style or switch it to be directly controlled by a Form Field, simply select the property and open the drop-down with the triangle to the left:
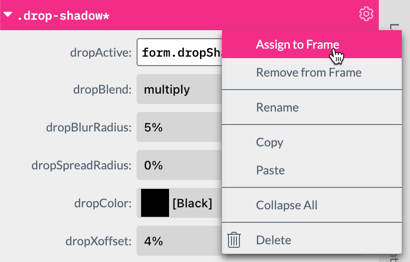
You can assign a Style to a frame directly from the Style tab by selecting the target frame, then clicking the gear icon  and selecting Assign to Frame. You can also remove all Styles assigned to a frame with Remove from Frame. Note that assigning a new Style to a frame will remove any previously assigned Styles.
In rare cases you may wish to assign multiple Styles to a frame. To do this you need to use the Style Selector in the Position  tab to choose and add whatever Styles you want applied to the frame.

x Will remove a selected style.
Tip: Conflicting Styles Behavior
If you select multiple Styles containing the same properties (e.g., color) - the Style which appears last in the Style tab will determine the property independent from the order in which the styles are mentioned in the frame’s Style Selector.
Notice: Document Styles will take precedence over Template Styles.
Styles can be made conditional. Read more about conditional styles here!
If a series of Styles are using the same Form Field to activate it, the Printess Editor automatically recognizes this and displays a little button on the top to set the Form Field value so that the selected conditional Style is active.
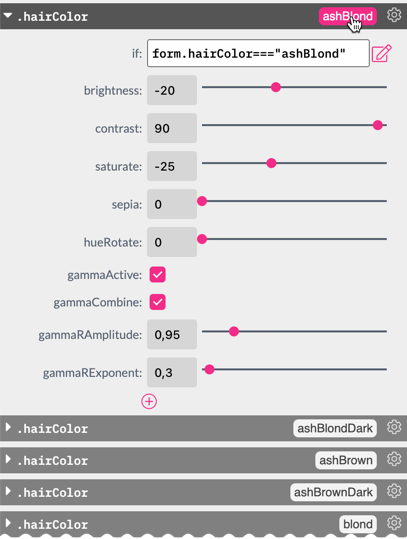
This allows you to work faster as you don’t need to switch between the Form Field and Style tabs all the time while testing and adjusting. Check out our Avatar T-shirt example to see a bunch of conditional Styles in action.
The Condition Editor is a great way to build conditional Styles like shown here in this example. But the Editor itself works the same for Document Conditions.
Read about Document Conditions.
Read about conditional Styles here.
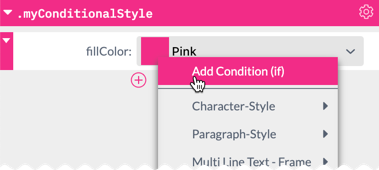
To add a condition to a Style press the icon at the bottom of the style and select Add Condition.
Once added it will have the start editor icon:  beside the condition in a Style.
With the Condition Editor you can easily combine AND and OR conditions for all the tests you do.
An AND condition means two tests must be true to let the whole condition be true.
An OR condition means one of the tests must be true to let the whole condition be true.
Here is an example of a conditional Style which exchanges an image only when the Form Field ‘hairstyle’ is set to ponytail AND the Form Field ‘glasses’ is not set to glasses OR the Form Field ‘haircolor’ is not set to Blonde.
Below is this example condition represented in the Condition Editor:
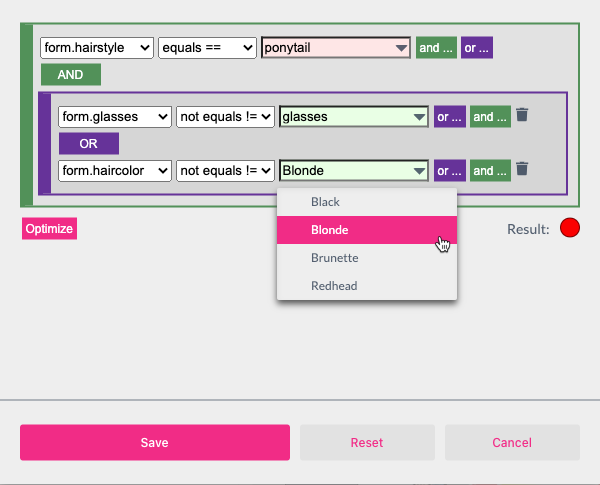
A big plus with the Condition Editor is that all defined values from the used Form Field are directly shown in drop-downs.
This is how the condition looks in the Code Editor:

If the Form Field got the Data Type “string” defined you can use the operators “equals” or “not equals” for your condition.
If the Form Field got the Data Type “number” defined you can use the operators “bigger than” and “less than” in addition.
Learn more about Form Field Data Type
In addition to Form Field values, you can also use the following special values to test for:
doc.name - this contains the name of the currently shown document.
doc.mode - this is ‘display’ when the document is configured or ‘production’ when the document is rendered as an output file.
doc.device - is ‘desktop’ if the current device is any desktop browser (or during production) and ‘mobile’ when a document is configured on a mobile device.