Note: This feature is only included in the Printess Large Plan. But can be booked in addition to a Medium Plan.
This Form Field will show a table editor at the Buyer Side where the Buyer can enter data and add or delete rows.
For each column you can define:
Name - must be a unique name without spaces.
Data type - can be a string, number or boolean (which will show a check box).
A list - of possible values to present in a drop-down to the buyer (except for boolean which will always show a check box).
Width - for the column in pixels (this will be ignored for boolean columns as they only span the width of the check box).
Row - can be set to display multiple input fields in the same row on the Buyer Side.
Hide - allows you to hide rows on the Buyer Side table display. The row details will be visible when selected by a user for editing.
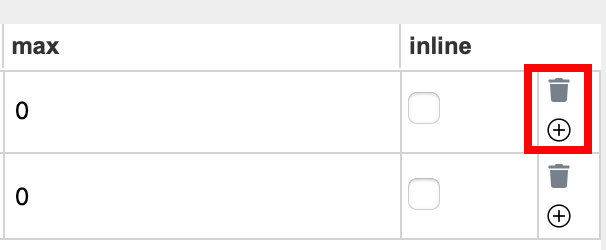
inline - the column will be shown editable at the Buyer Side without the need to select the row. Be careful: If all columns are marked inline, it gets hard for the buyer to select the entire row. Its recommended for a specific column like “price”. Also when you have only 2 columns it can be handy to select all of them, so the user does not need to select the row before editing its values.
type = - if you set the type to “item” the column will be displayed at the Buyer Side but not it’s values.
mandatory - if you set a column to “mandatory” the Buyer needs to define a value for it. Otherwise an error message will be displayed.

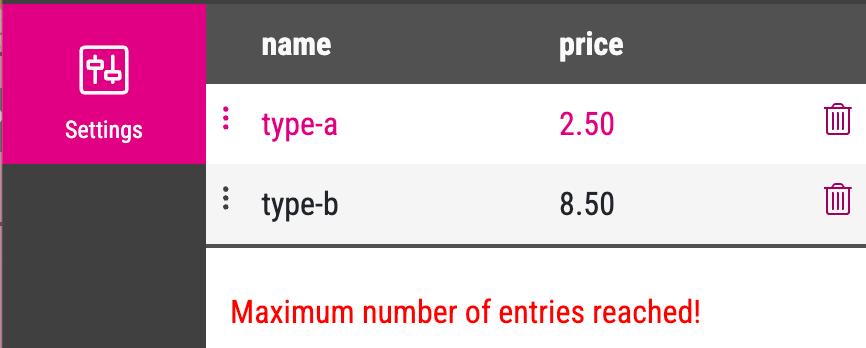
At the Buyer Side an error message will be displayed.
The row column is used to numerically define rows such as type and price as in the example below. This will display both rows as a single row that lists, for example, a pizza and its price. Multiple rows can be assigned in this way.
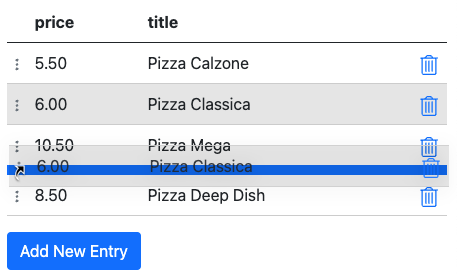
Rows are also sortable on the Buyer Side. Buyers can add, delete, and rearrange their data table entries. Buyers rearrange rows in the Form Field by simply selecting the table header badge or manually drag-dropping the rows to their desired position.
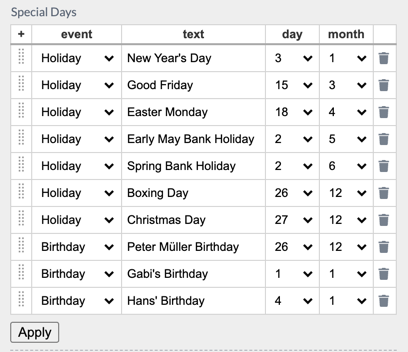
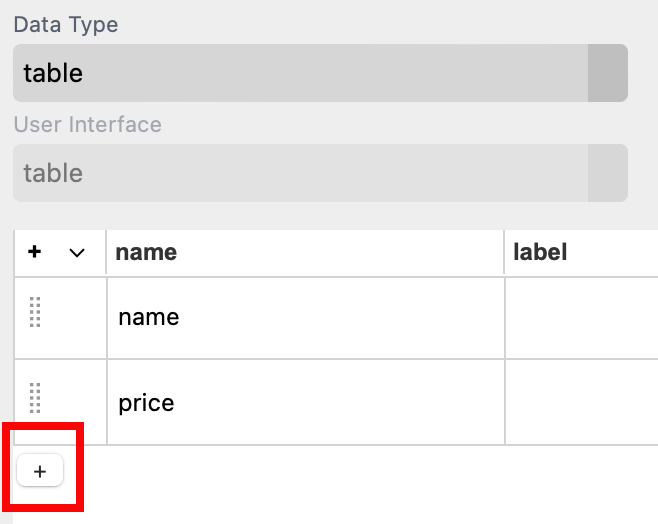
Once the columns of the table are defined you can add default values by closing the properties dialog and pressing the + on the top-left of the table then entering values into the newly created row(s). Once finished entering the default values, press the Apply button below the table.
Watch a video how to use a Table Form Field for variable data print
You can use the Plus Icon on the left to add a row at the end of the table.
Or the Plus Icon on the right of a row to add it a row underneath.
Here you can also remove any row by clicking on the bin.
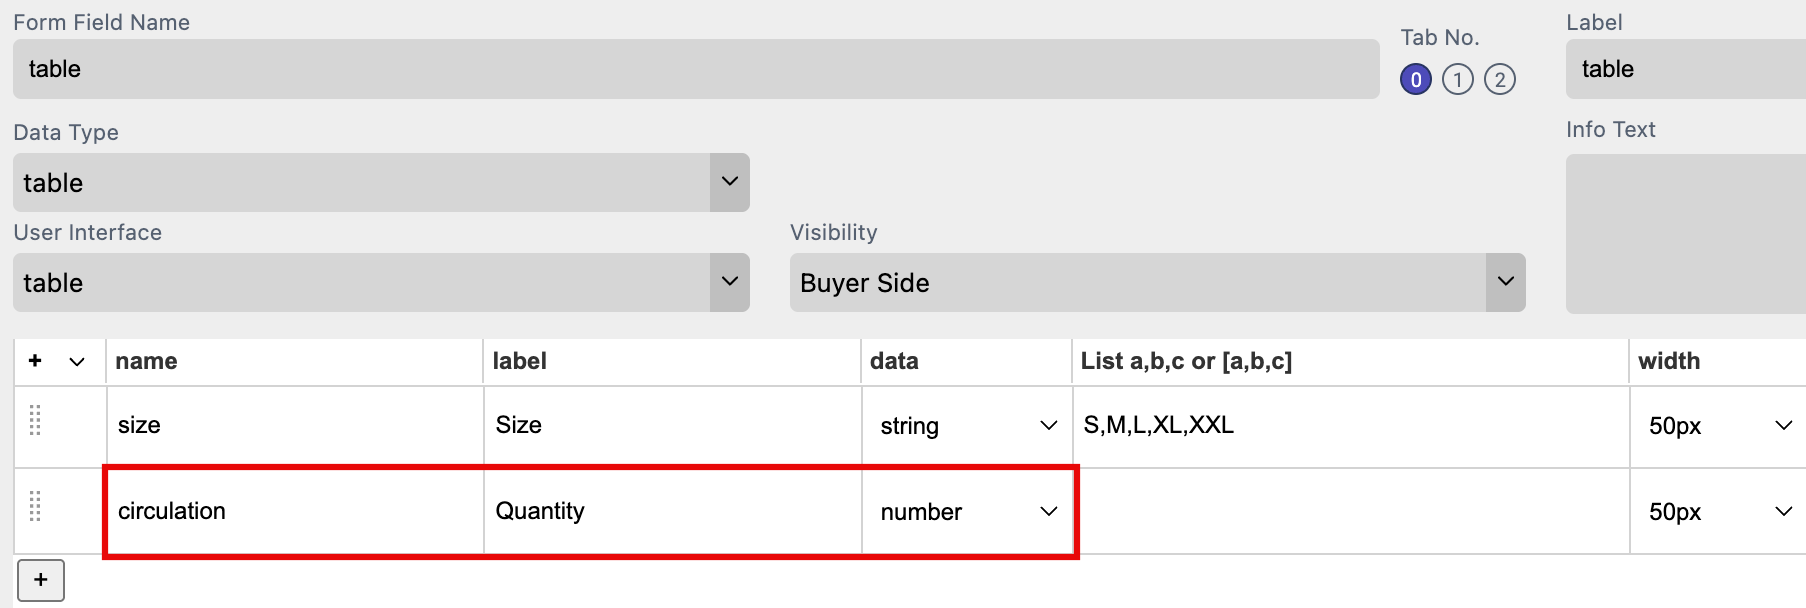
With the column circulation you can enable the Buyer to define a quantity for an product.
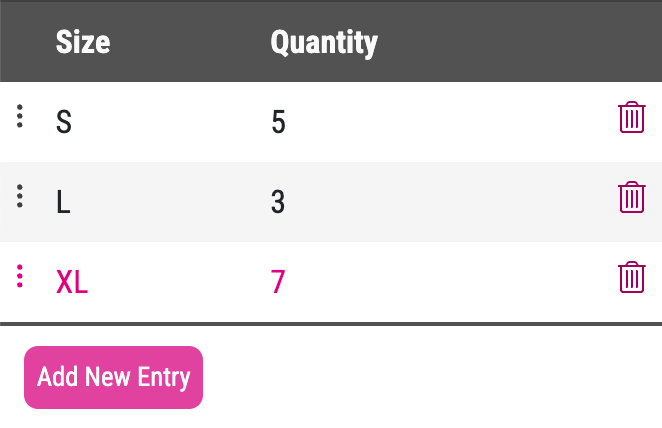
You need to add that column to your Table by adding a row to it. This example is showing a table to select different sizes and quantities to oder T-Shirts.
In addition you have to assign this Table as a database to the Printess Template.
Now the Table reports back the total number of printed records per product as part of API using getPriceRelevantData() or .printedRecordsCount or in price change callback.
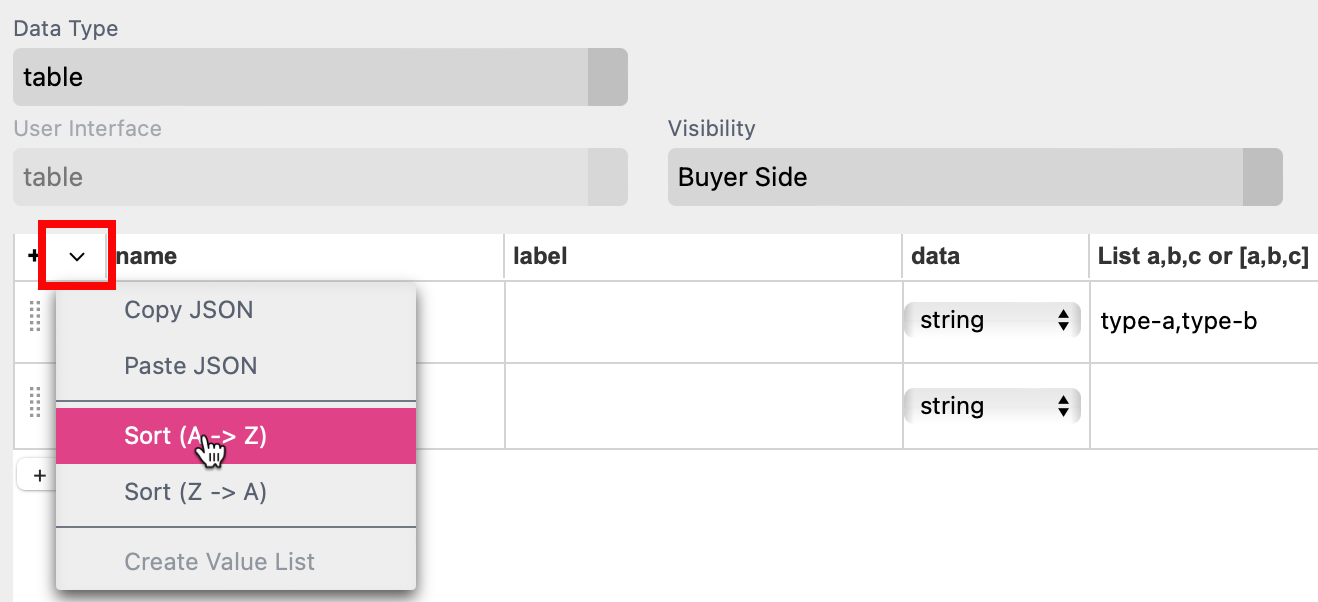
If you click on the small arrow on top of the table a drop down menu will open. Here you can now sort the Table form A-Z or from Z-A.
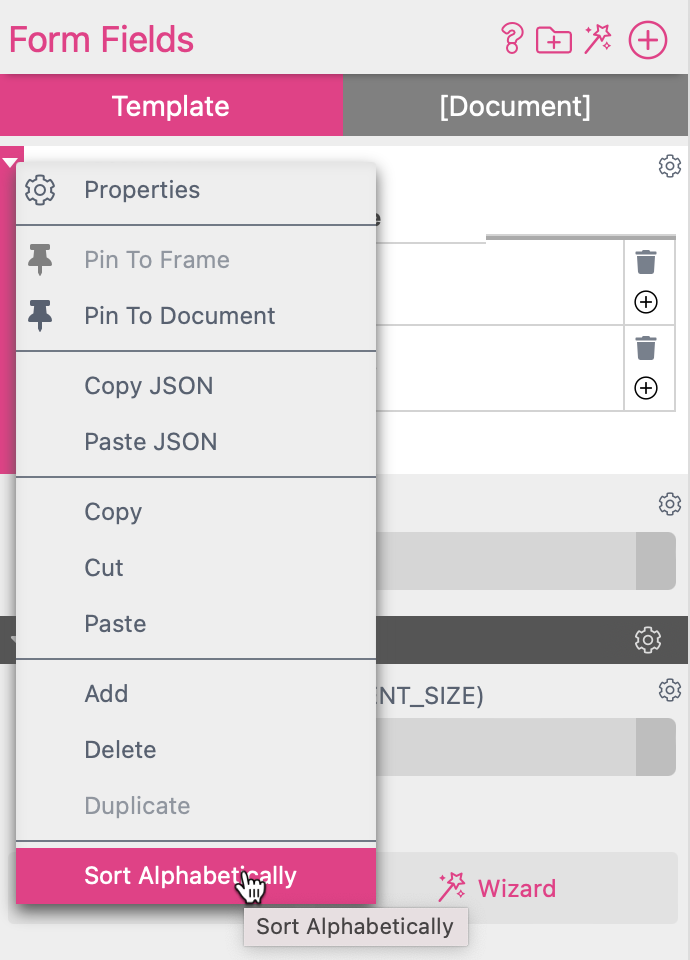
In the Context Menu of the Table you can sort it from A-Z only.
Tip: Please be aware that the copy and paste JSON works slightly different with Select Lists.
Learn about Copy and Paste for Select List here
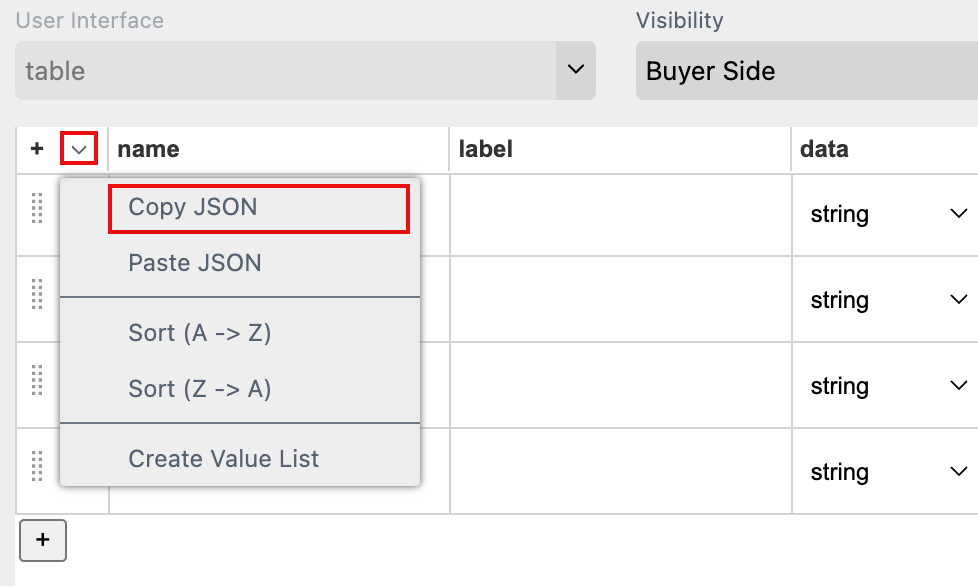
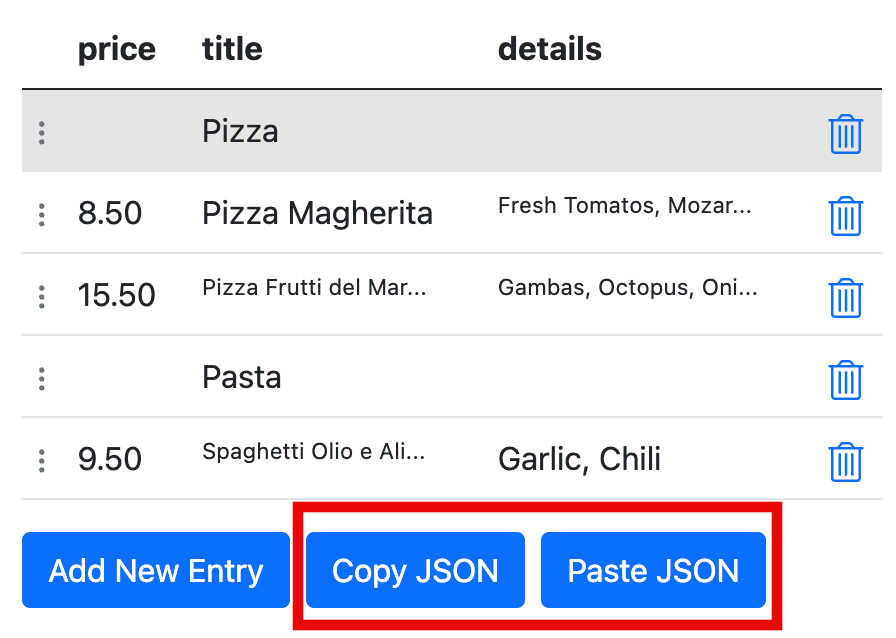
Internally the values of a table are represented as an array of row objects and their named properties. You can also export and import the values in a table as a JSON string via the context menu of the Form Field.
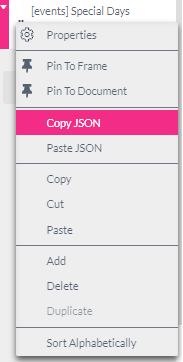
Select Copy JSON and the content of the table will be copied to the clipboard in JSON format. The above table will look like this:
[{"event":"Holiday","text":"New Year's Day","day":3,"month":1},{"event":"Holiday","text":"Good Friday","day":15,"month":3},{"event":"Holiday","text":"Easter Monday","day":18,"month":4},{"event":"Holiday","text":"Early May Bank Holiday","day":2,"month":5},{"event":"Holiday","text":"Spring Bank Holiday","day":2,"month":6},{"event":"Holiday","text":"Boxing Day","day":26,"month":12},{"event":"Holiday","text":"Christmas Day","day":27,"month":12},{"event":"Birthday","text":"Peter Müller Birthday","day":26,"month":12},{"event":"Birthday","text":"Gabi's Birthday","day":1,"month":1},{"event":"Birthday","text":"Hans' Birthday","day":4,"month":1}]
Now the table contents can be edited and (by selecting Paste JSON) copied back into the table. Note that if one adds a property in the table which currently has no column, the table control will not display it until you add the respective column.
If you are using the copy and paste option in the Table Properties Dialog Box you will get a different result. In this case the function refers to the structure of the table - not the content.
In this case the result will be:
[{"values":["name","","string","type-a,type-b","75px","1",false,0,false]},{"values":["price","","string","","50px","1",false,0,false]}]
Tip: You can use the Table Form Field to store structured data for use in the document without showing it to the buyer by switching the visibility to Designer Side.
Please read more about tables and the use of scripting in the scripting section.
Tip: Please be aware that this feature is only available with Database & Tables license.
You can enable the Buyer to copy and paste the content of the Table.
Open the Properties of the Table to activate the option Allow JSON data paste.

You can filter your Table by another Select-List. First set up a Select List with the values of one of the columns of your Table. The values in the Select List are now used to filter down your Table.
You enable the filtering in the Properties of your Table. Click on the small plus icon on the bottom of your Table.
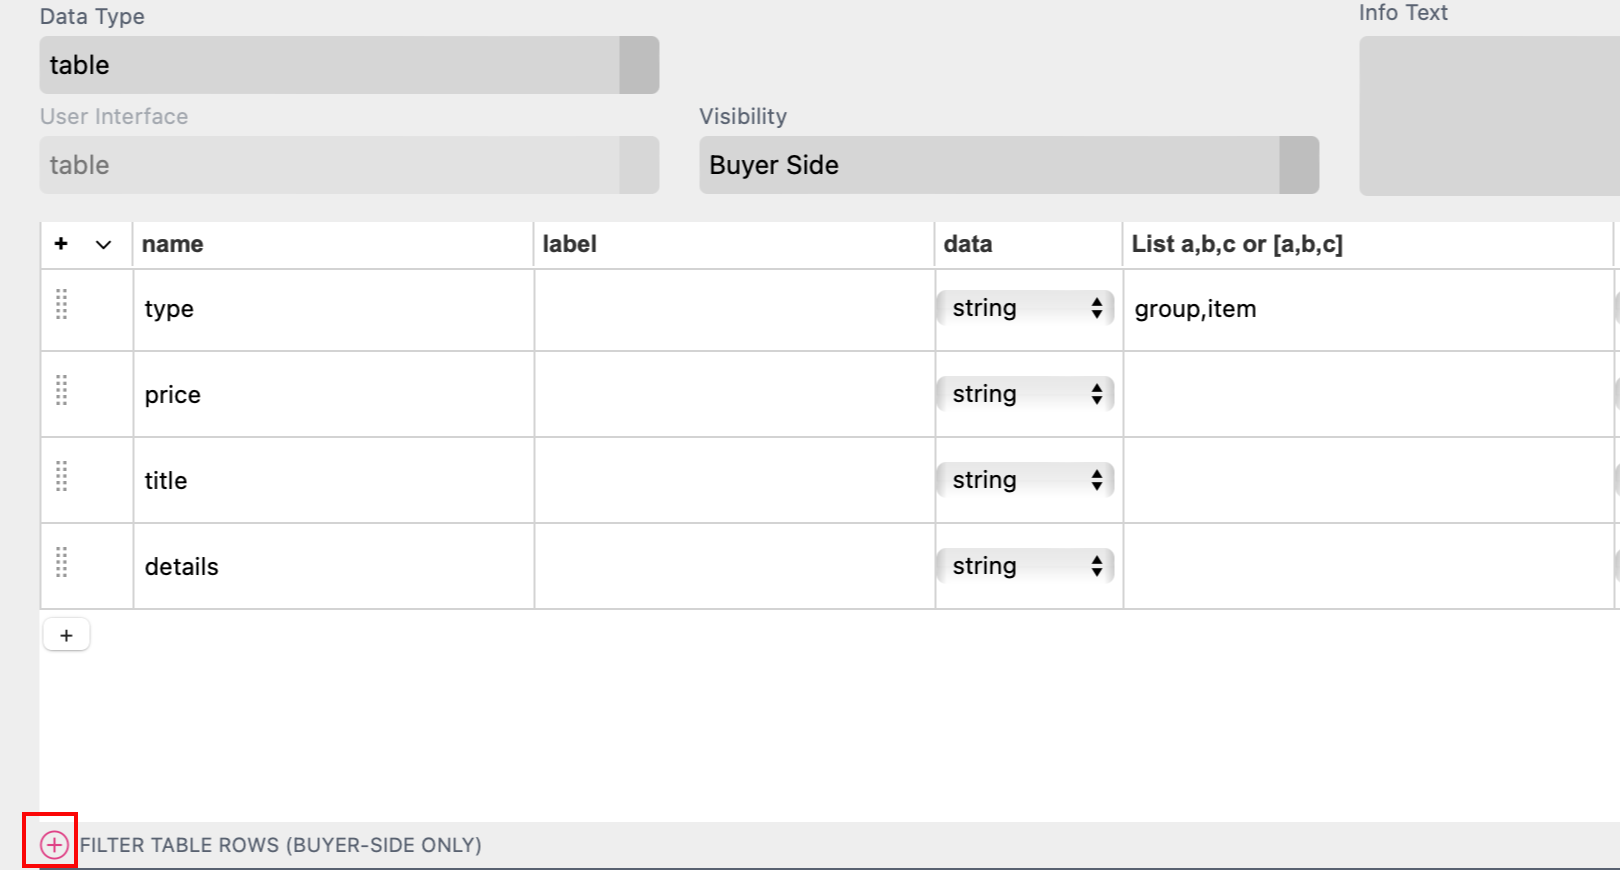
An input line will open where you can choose the Table Column which should be filtered:
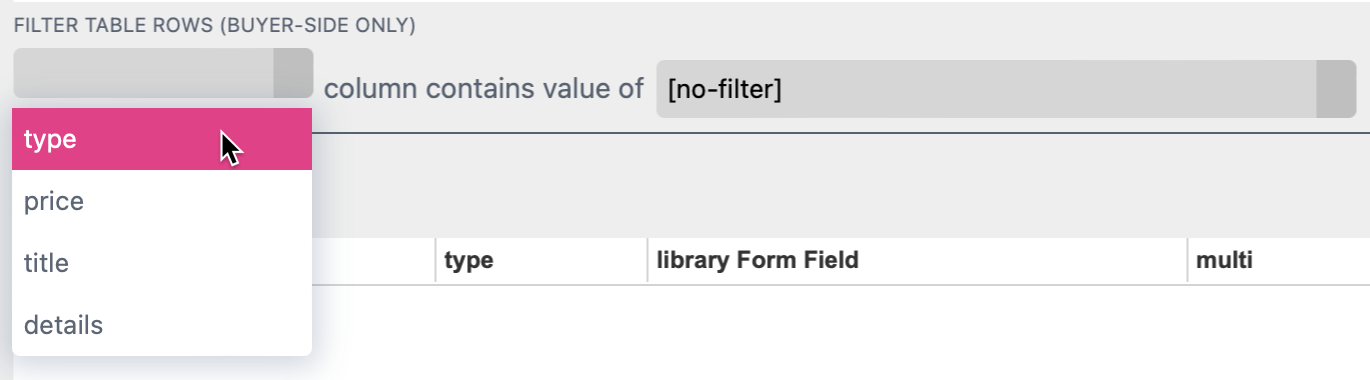
And the Select List you would like to use for filtering.

For the Select List you get shown it Label Choose, its Name option and the Value of the first row item.
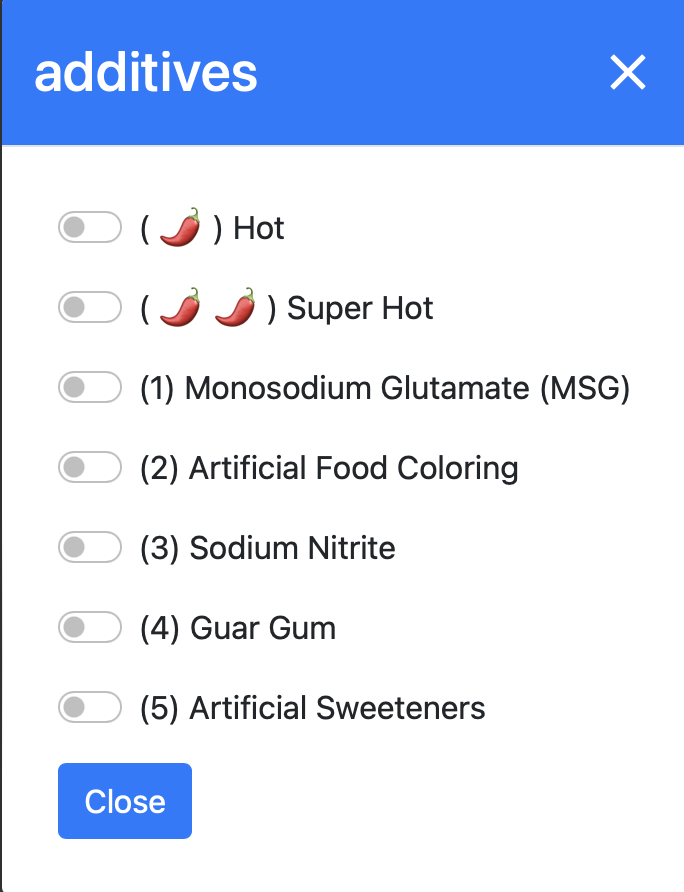
This feature reads data from a corresponding Table Form Field and allows the Buyer to select multiple values from it. Like in our example “Italian Menu” the Buyer can not just add new dishes but in addition also add the additives for each single dish. The List of the additives is a corresponding Table of the List of the dishes.
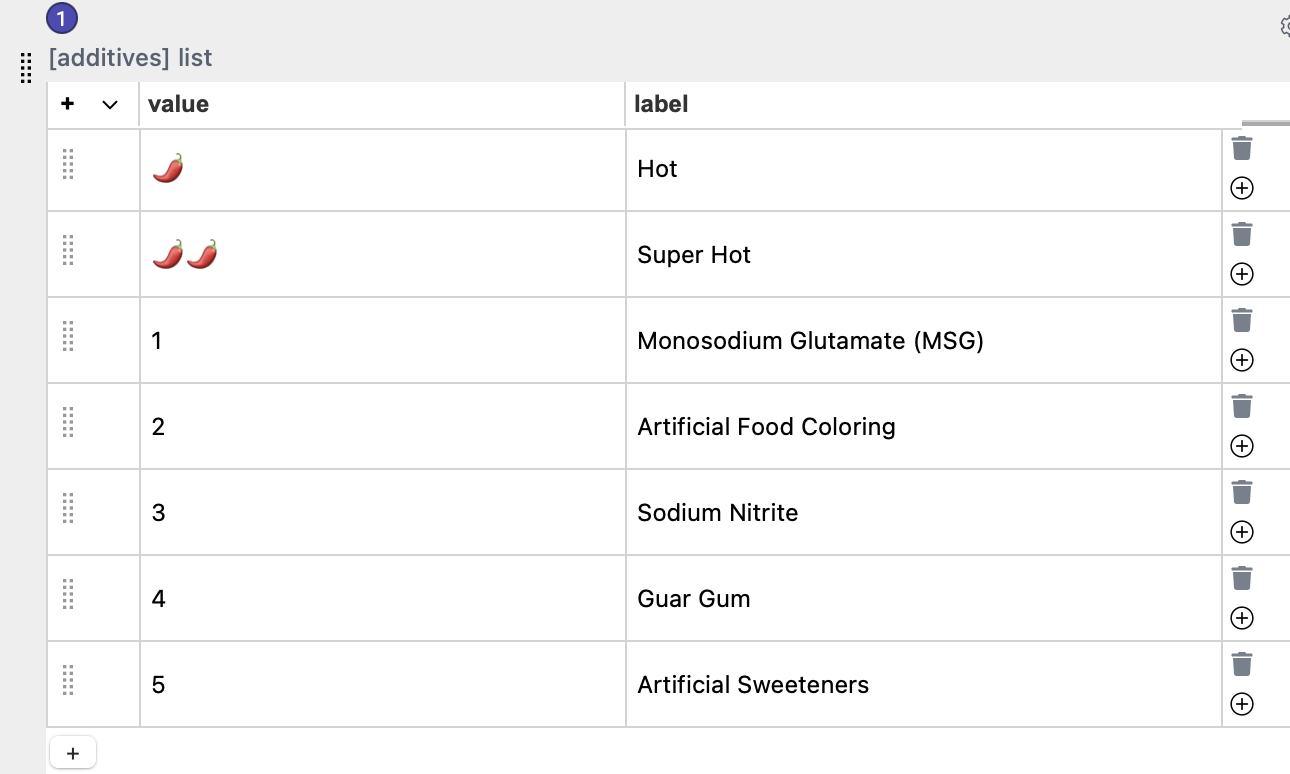
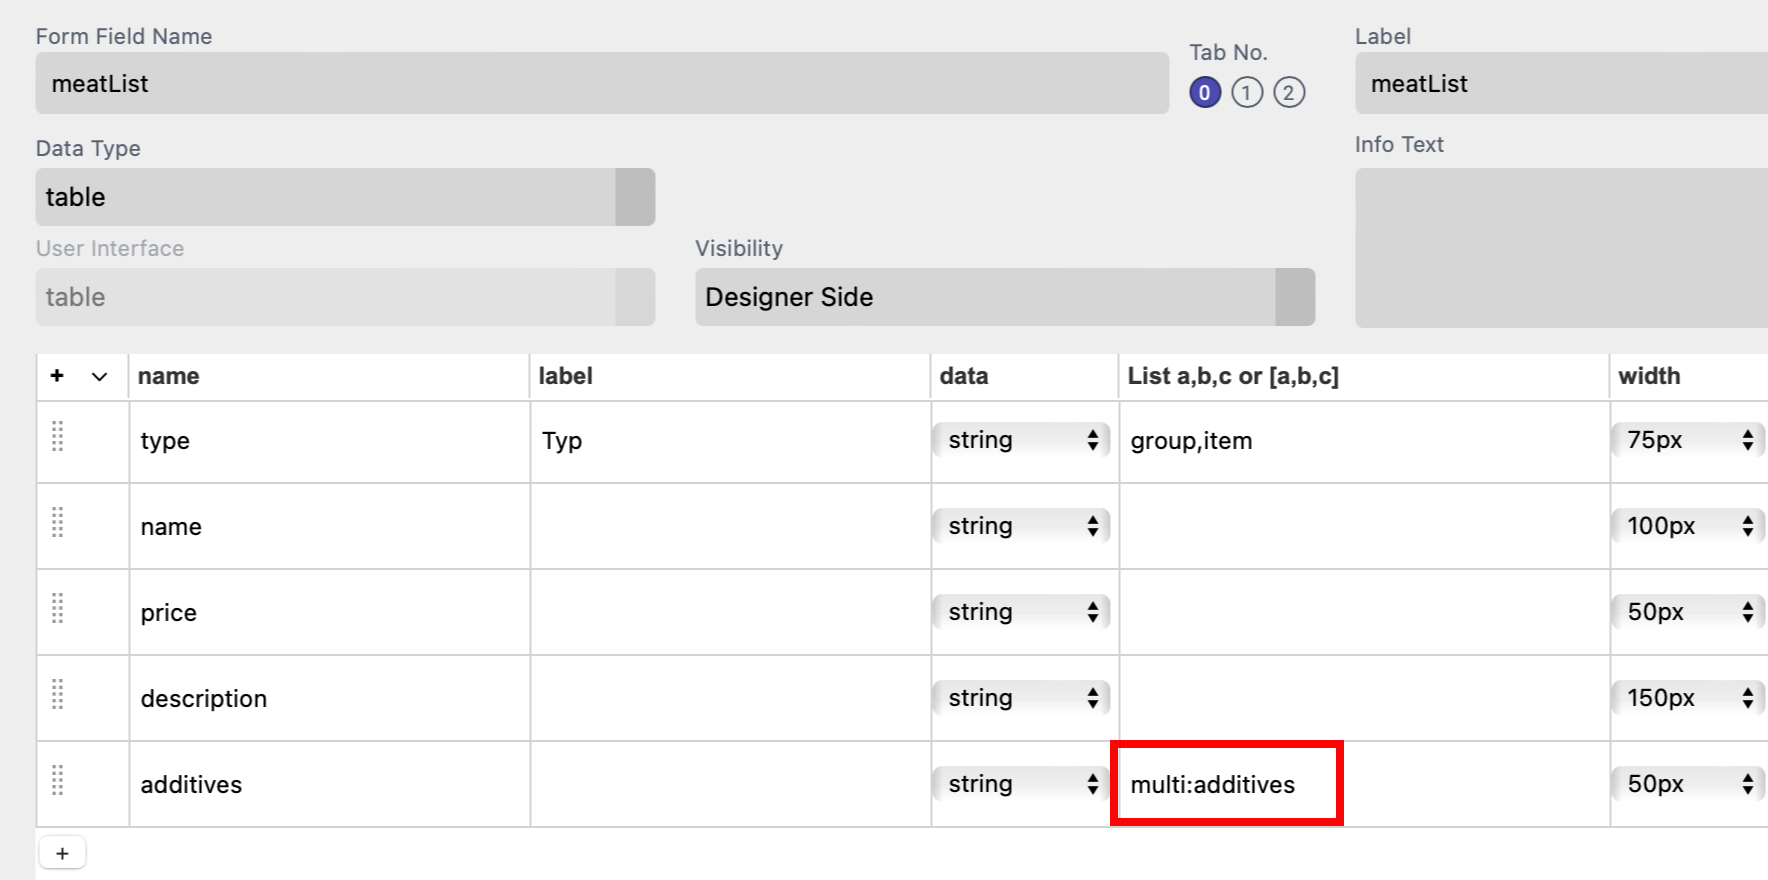
The first Table Column represents the value, the second Table Column contains the label shown to the Buyer. Like shown in the screenshots, value is the number “1,2,3, …” and the additives name is in the second Column of the table.
At the Buyer Side the values of the List could be selected by activating the checkboxes.
The Multi Select Mode can simply be activated by writing “multi:” and the name of another Table Form Field in the list column multi:[table-form-field-name].
The Multi Select Mode is dynamic. The buyer can change the selection but also edit the list of values itself.
Click here to open the example document
Within the Printess Editor you can load data from a Google Sheet (Any csv or Excel can be loaded into a Google Sheet.) This is a live connection through the link of the Google Sheet. So if you are changing the content of your Google Sheet these changes are available in the Editor as soon as you refresh the view there.
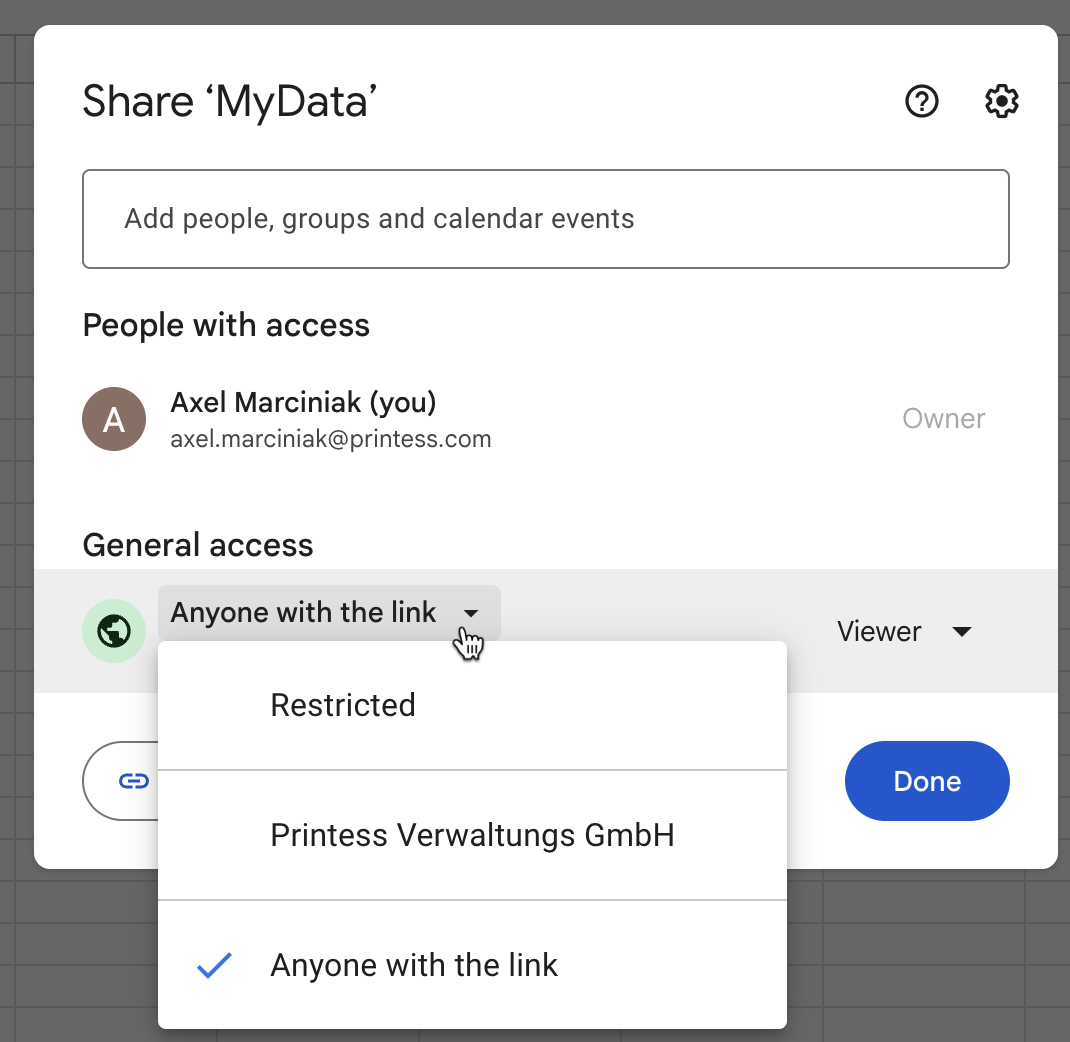
Before you set up such a connection please change the “Share Settings” of your Google Sheet to “Anyone with the link” first.
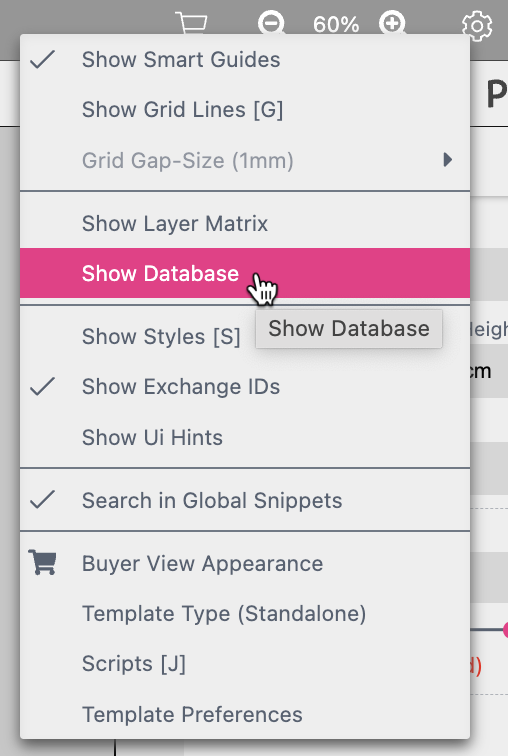
Click on the gear icon on the upper right to select the Option Show Database.
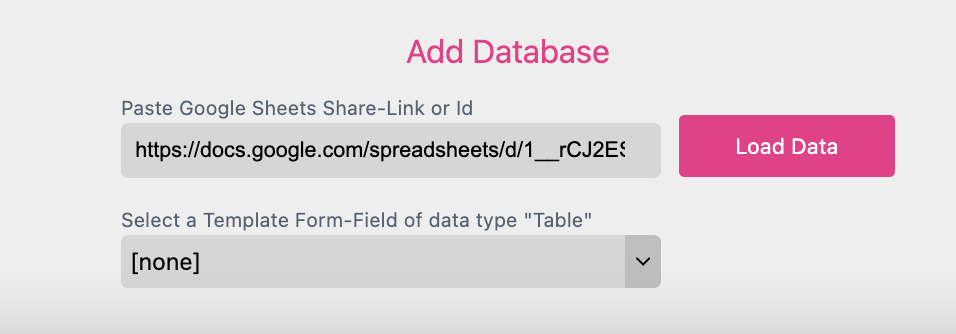
You will now find a dialog on the bottom of the editor. Copy the link of your Google Sheet and paste it in the input field to click on Load Data.
Now the loaded list is shown in the Editor and you can close it (1), refresh it (2) or delete it (3).

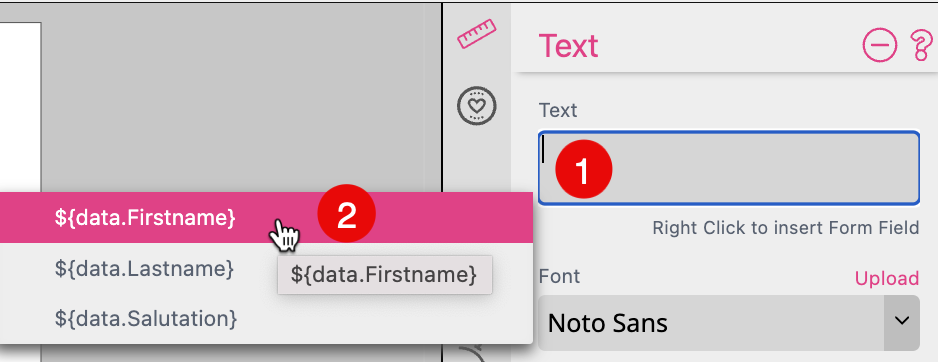
If you now place e.g. a Single Text Frame you can use the loaded data. Go to the Text Input Field of the select frame and remove the default text (1) to do a right mouse click in that field. Then you can choose a column from the list (2) to personalize the frame.
You can now skip through the records to test it.
Such a Google Sheet link could also be used through the API to feed data to the Production File.
You can set up an internal data table which enables the Buyer to add records which could be used e.g. for Birthday Invitations.
Therefore set up a Table first. Click on the plus icon on the upper right of the Form Field Tab of the Resources Panel.

Open the Form Field Properties to:

Click on the gear icon on the upper right to select the Option Show Database.
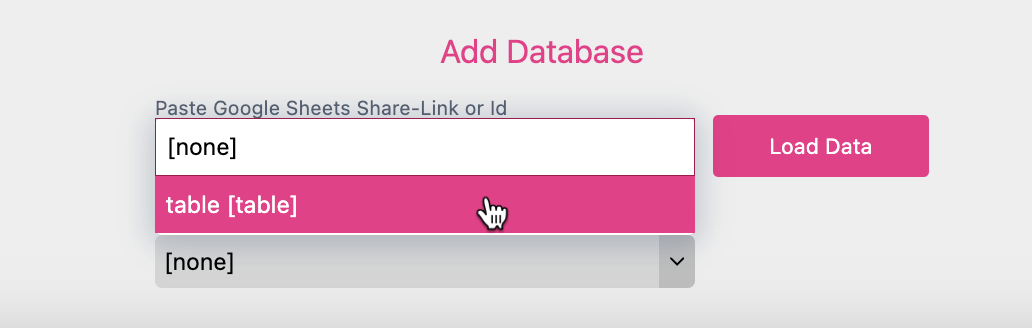
You will now find a dialog on the bottom of the editor where you can choose the Table you would like to use.
If you now place e.g. a Single Text Frame you can use the data from this Table. Go to the Text Input Field of the select frame and remove the default text (1) to do a right mouse click in that field. Then you can choose a column from the list (2) to personalize the frame.
To output the content of a Table Form Filed in a text frame you need to use Multi Line Text Frame.
Technically every Printess Table is a JavaScript Array.

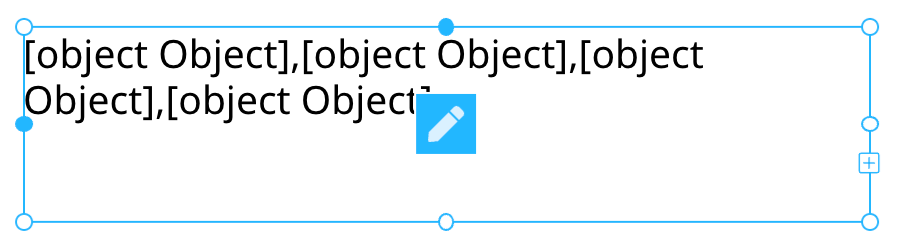
This means you have to use JavaScript when outputting values in a Multi Line Text Frame. Normally you can just use a simple script to assign a Form Field to a Multi Line Text Frame. With “${form.text}” for example you could assign the value of the Form Field “Text” to a Multi Line Text Frame. But this do not work with a Table Form Field because it not just got one value. It is a list of values - a JavaScript Array. So if you would write “${form.table}” into a Multi Line Text Frame you would get the following result:
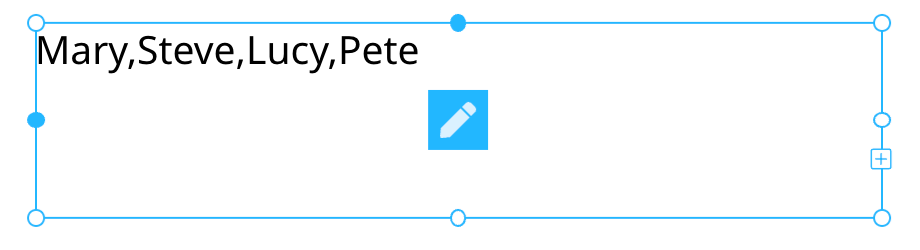
To define which values of the Table you would like to display you have to use the function map() in addition to the Form Field name. And this function needs at least one value. This value has to be defined within the brackets. It needs the name of the row of the Table you would like to display: row => row.name for example. So the simplest working script looks like: ${form.table.map(row => row.name)}. This is a so called Embedded Expression and it will display all values of the name column of the Table - comma separated.
Never use a line break within your Embedded Expression. This will break your script.
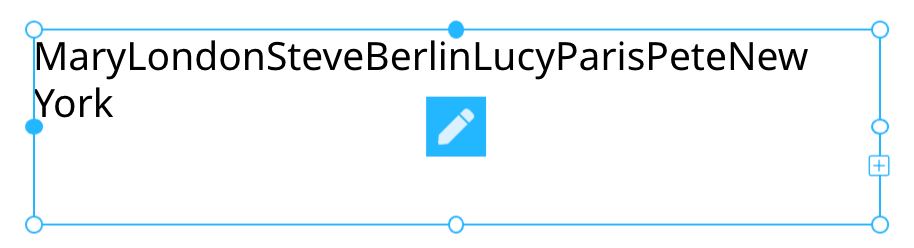
You can now add the city as well with + row.city. To remove the comma separation we will add the function .join("") at the end of the string. The entire script now looks like:
${form.table.map(row => row.name + row.city).join("")}. The result looks like:
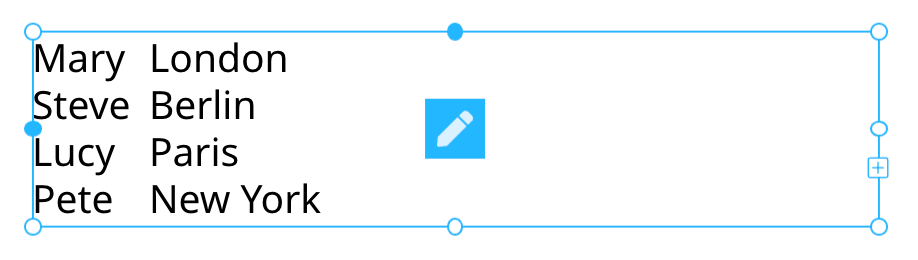
And if we now add a tab "\t "between the two variables and line break “\n” to the join function we will get a table displayed.
${form.table.map(row => row.name + "\t" + row.city).join("\n")}.
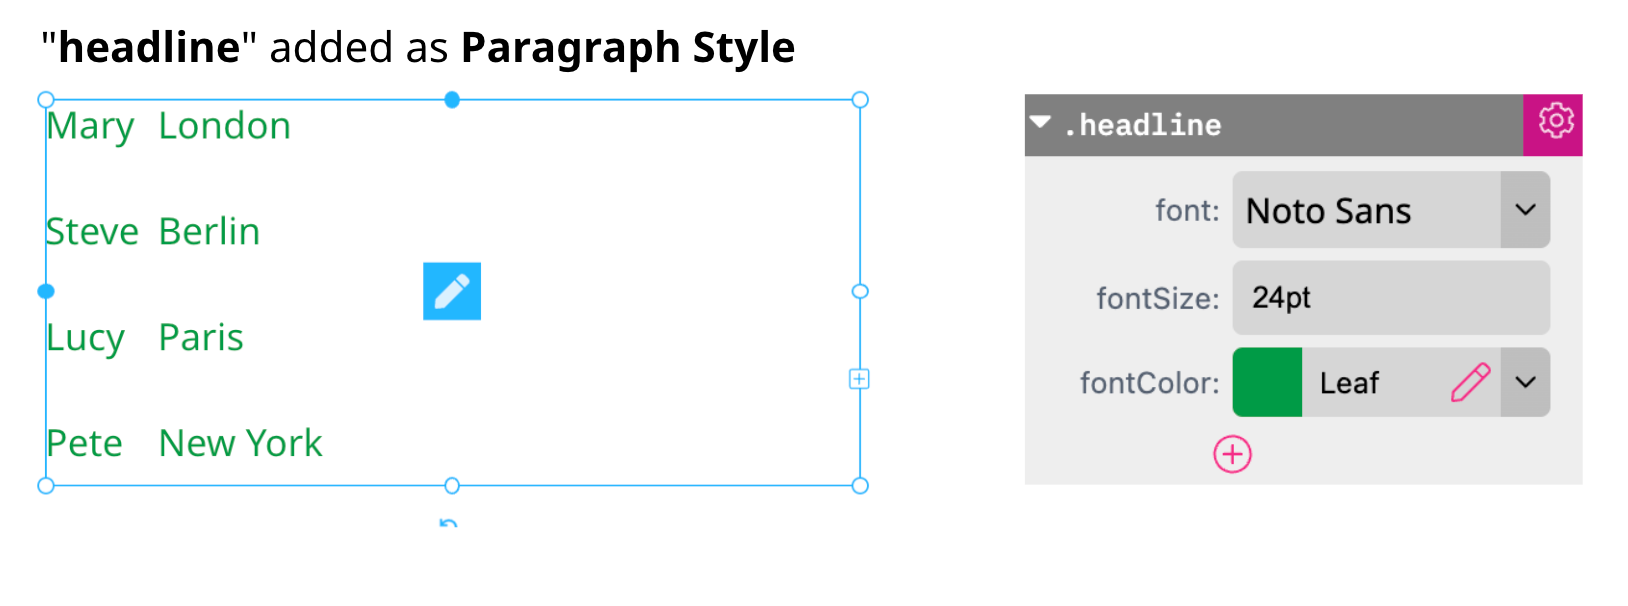
You can add Paragraph Styles and Character Styles to your script. In this example you can add the existing Style headline as a Paragraph Style to the script. Just add “<p:headline>” to the existing script.
${form.table.map(row => "<p:headline>" + row.name + "\t" + row.city).join("\n")}
I changed the font color of that Style to green so that the result looks like:
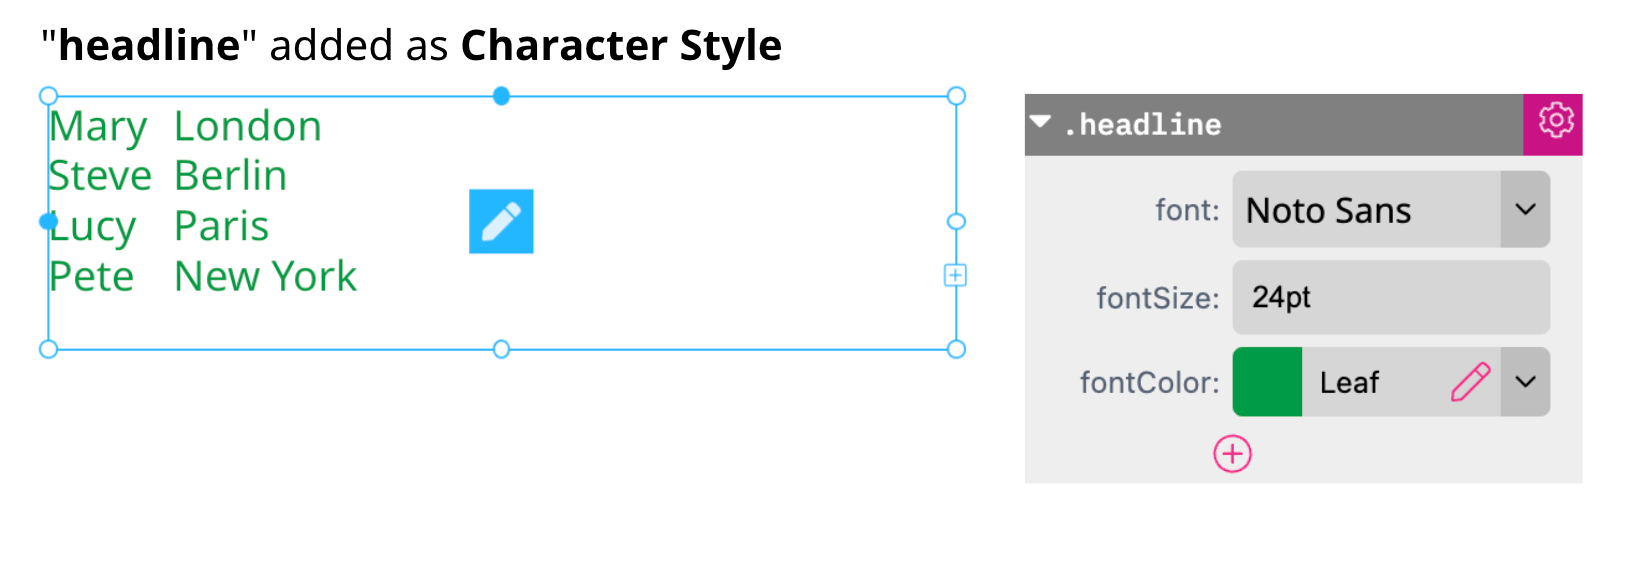
A Paragraph Style always forces a line break so that this script includes two line breaks now. If you don’t need that additional line break you can assign the headline Style as a Character Styles. In this case you have to replace “<p:headline>” by “<w:headline>” to the script.
${form.table.map(row => "<w:headline>" + row.name + "\t" + row.city).join("\n")}
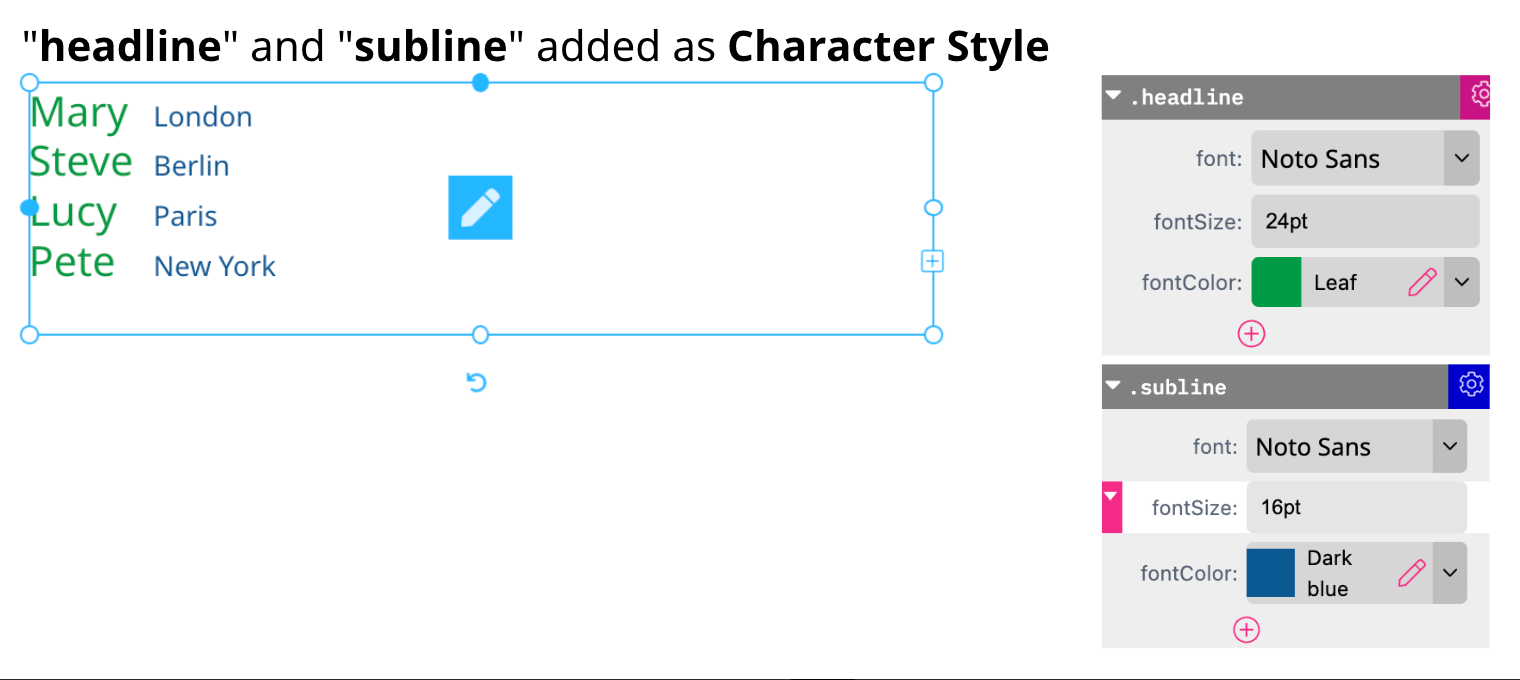
If the City should get a separate Style you can use the existing one subline as an example. In this example the color is changed to dark blue.
${form.table.map(row => "<w:headline>" + row.name + "\t" + "<w:subline>"+ row.city).join("\n")}
But you can also use variables of the Table do create dynamic Styles. Add a color row to the Table for example and define 4 different colors for the four records. Add for Styles to the Printess Template as well to define these four colors.
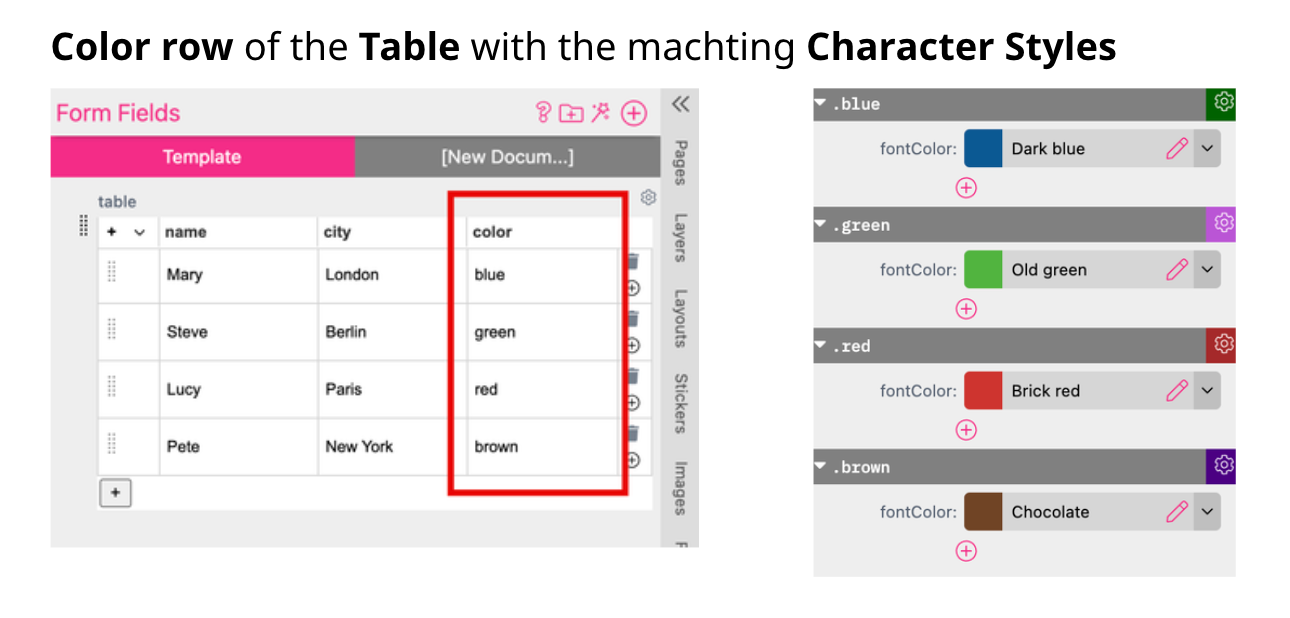
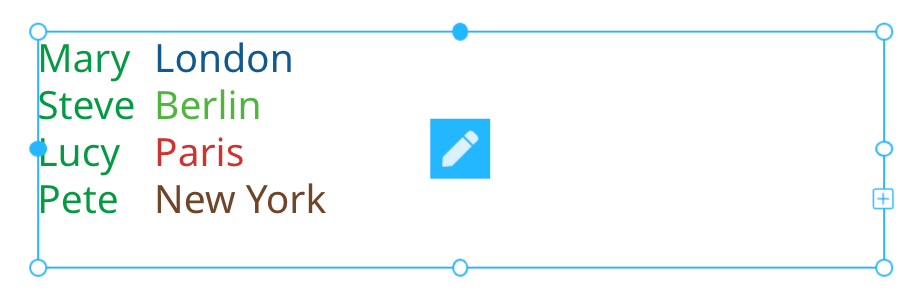
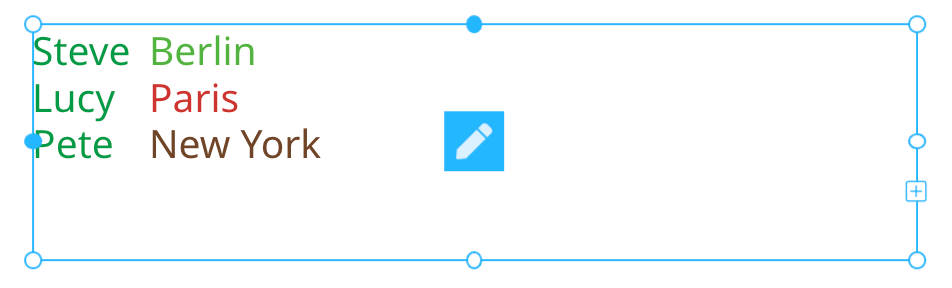
With + "<w:" + row.color + ">" you can assign the values of the color row to the script as a Character Style.
${form.table.map(row => "<w:headline>" + row.name + "\t" + "<w:" + row.color + ">" + row.city).join("\n")}
If you do not want to show the entire Table in the Multi Line Text Frame you can filter it. For example you can filter anyone in the Table besides “Mary”. In this case you would have to add the function filter(row => row.name !== "Mary").
${form.table.filter(row => row.name !== "Mary").map(row => "<w:headline>" + row.name + "\t" + "<w:" + row.color + ">" + row.city).join("\n")}
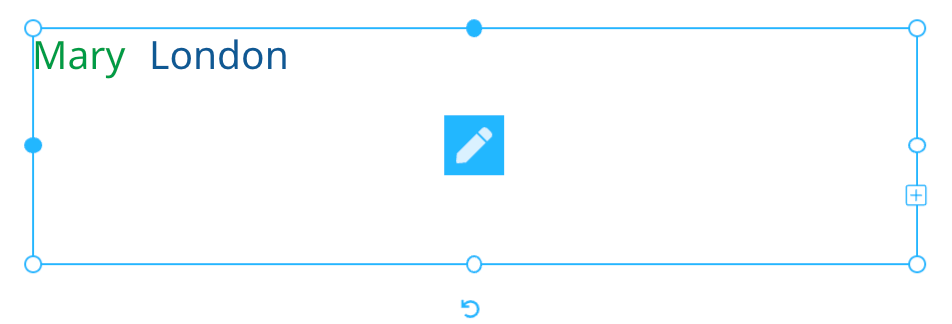
If you would like to filter the Table for “Mary” only you have to remove the exclamation mark from the filter function. filter(row => row.name == "Mary").
${form.table.filter(row => row.name == "Mary").map(row => "<w:headline>" + row.name + "\t" + "<w:" + row.color + ">" + row.city).join("\n")}
With the JavaScript Ternary Operator you can create a if/ else conditions. The easiest Ternary Operator is ${(1 == 1 ? "true" : "false")}.
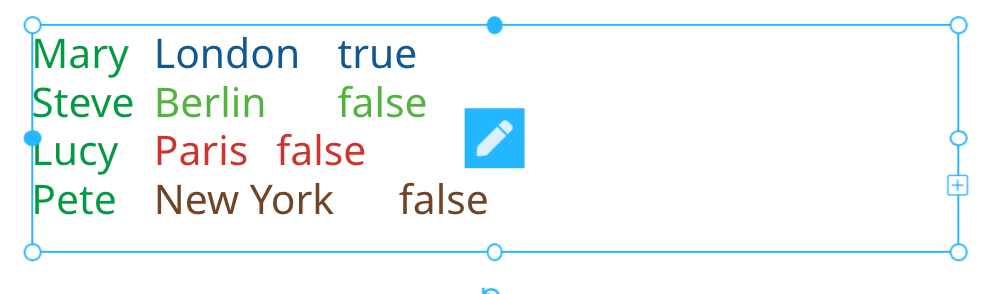
The Multi Line Text Frame will display true in this case. Because “1” equals “1”. If we apply this to our example we could say: if the name is “Mary” its “true” - otherwise it is “False”. To achieve this we need to include the operator (row.name == "Mary" ? "true" : "false") in our script.
${form.table.map(row => "<w:headline>" + row.name + "\t" + "<w:" + row.color + ">" + row.city + "\t" + (row.name == "Mary" ? "true" : "false")).join("\n")}
To improve the look like of that Table output you can add a Paragraph Style to this Multi Line Text Frame to define the Tabs.
